Episode # 5 of our column "how to take better photos with iPhone". Today I will talk to you about food photos, or rather how to take photos of gastronomic content. In particular, in this video you will find some issues addressed such as the importance of natural light, how to check the ombre, the naturalness of the colors and then again the composition, which wallpapers work best with.
And then we'll see again a trick to take perfect photos from above and finally exposure not to miss details: this and much more in the video you see right above! Let's make a brief summary:
Why do you need to have this expertise?
Knowing how to take pictures of food it's not just a game to embellish your wall or your social profiles: in the professional field (such as restaurants, inns, street food and the like) the presentation of a dish is a crucial aspect! As they say, the eye wants its part!
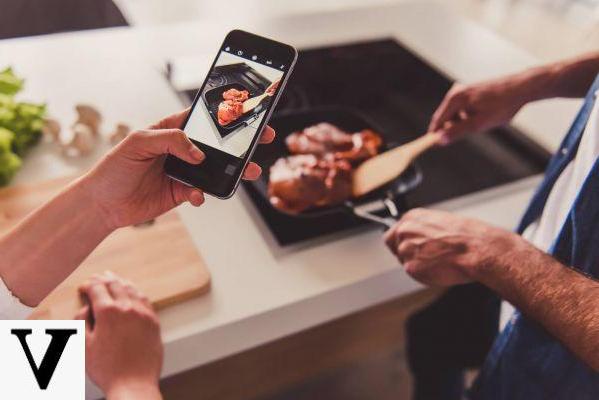
Most businesses nowadays have a social profile, usually on Facebook or Instagram, on which it is possible to attract customers by showing your main dishes: this is where knowing how to photograph a dish becomes important and in this video I will show you how you can do everything yourself (without hiring an expensive photographer) simply with the help of your iPhone or in general with your smartphone. So here are my tips:
Give preference to natural light
The first tip may seem trivial but fundamental: you must always shoot in natural light condition: I almost never recommend taking pictures with a flash or an artificial lamp because these can alter the true colors of the plate or object you are going to photograph. Especially when it comes to food, it is very important that the colors respect reality. So, even in post production, don't edit the photos too much, making everything too surreal or changing the colors of the food too much.
Of course I realize that there are not always excellent conditions for taking pictures of food: if you find yourself in this condition, then you will have to prepare the environment and follow some precautions. For example, if you are in a pizzeria, a pub or a restaurant, and you have both limited space and limited light, you have to make do with playing with the play of light or maybe buy some outdoor spotlights to be able to photograph in low light conditions. However, these spotlights must always be calibrated in the right condition and with the right mix of warm / cold light precisely not to alter too many natural colors.
It's all a shadow play!
Another recommendation is to be careful of ombre! Most of the time the shadows are hidden when there is a lot of natural light, or too much light can even take them out entirely. learn to manage the shadows: there are in fact strong shadows, which can obscure the plate or in any case give problems to photography, and then there are soft shadows, or those shadows that create a sense of depth and that can be easily managed by moving the plate from one angle to another or by approaching a window.
Shadows can sometimes ruin the photo; other times they can make it really incredible: when they are too strong and you don't have the possibility to move with the window, advice is to use a white curtain (a semi-transparent one) in such a way that the sun's rays arrive in a manner softer. Even better if you are outdoors and there is a lot of sun; in this case you can use a "reflector" to bounce the light off the plate: trivially you can use a blank sheet which has the guaranteed effect because it is enough to place the reflector on the side where there are shadows and the sunlight will come from the sheet going to illuminate the slightly dark areas. This is how you are literally checking the shadows!
And the background? Where do we put it?
Even this may seem like a really trivial advice, but the background is a key element: it is able to bring to attention some details and give a setting to the photo: a rustic setting? Elegant? Hot or cold? It is up to you to decide based on what your needs are! Also understand that the background cannot be too much bursting, otherwise the plate is overshadowed: for this reason the best technique is to put the dish is well focused and place the background (which can be a wall for example) as far away as possible so as to create a blur effect that will not "bother" the dish.
So make sure the background is neutral enough for the emphasis to be on your plate. A neutral background does not mean that you do not have to put anything in the composition of the photo, indeed here I want to give you another tip. There are three types of backgrounds which work very well in food photography, and which are: light backgrounds dark backgrounds and especially wood backgrounds, like a cutting board or a nice table. You can also insert a small element in the photograph, sometimes even a tablecloth or a glass can go, so as to give a "human" element that accompanies the dish you are photographing.
Finally, I also recommend that you experience a good one contrast between background and plate (or subject in the foreground): a chromatic contrast between the food and the background itself sometimes makes the photos truly incredible and attract a lot of the user's attention!
The shutter angle: there is a trick!
Not all food photos are the same and not all food should be photographed the same way! We can indeed identify three ways to photograph food: from top to side and diagonally. They are not defined techniques and they are not mandatory to follow because there is no better or worse technique than the other, but there are usually some tips to follow depending on what you are going to photograph. For a dish the advice is to photograph from above and then follow all the advice given above on the background, the light and so on. On your smartphone it is therefore it is essential to activate the grid in the camera: this is because there is a little trick that not everyone knows (especially on the iPhone) where a kind of viewfinder. When this sign turns yellow and matches the white sign, it means you are perfectly perpendicular:
The photos from the top have many advantages: in addition to showing a plate of food, it is possible to include other elements such as cutlery, a hand to give the human element, a fruit and so on. If, on the other hand, the subject is different, for example an ice cream or even better a cake, my advice is to photograph from the side to better appreciate the details such as the layering of the cake or if it is a particular type of pizza or focaccia you could see the inside, the filling. However, I repeat that there is no precise and better technique than the other, however experiment with different angles it is fundamental, and in fact the last angle I want to recommend is the one in diagonal.
Usually when I take pictures of food I love taking pictures in all three angles and then I decide which is the most beautiful or the best depending on the case. Then remember to "fill" the scene without distracting the reader too much from your plate, using for example cutlery, glasses or spices in an ornamental way within your composition: the photograph of our plate will reach a higher level!
Exposure is the key to everything!
The exposure, as mentioned previously in other videos, is trivial the most used technique to quickly change the look of your photograph so that it has more or less contrast and light. Incorrect exposure leads to problems especially in food where you can end up with dark or too white dishes (even worse when the background is white or if there is a lot of light). The advice is to adjust the exposure simply by tapping on a part of the camera with your finger and once the yellow square - on iPhone - you can lower / raise the exposure by swiping your finger on the screen (as I show you in the video) by acting on the exposure value:
By doing so you can avoid problems with underexposure and overexposure obtaining improvements also in contrast and exposure. Then of course, for the best, you can always intervene in post production to go and work on the shadows and other important aspects.
Doubts or problems? We help you
Remember to subscribe to our Youtube channel for videos and other reviews. If you want to stay up to date, subscribe to our Telegram channel and follow us on Instagram. If you want to receive support for any questions or problems, join our Facebook community or contact us on Instagram. Don't forget that we have also created a search engine full of exclusive coupons and the best promotions from the web!