


Taking pictures inside the house and, more generally, inside a closed environment may not be easy at all: the lighting conditions are not always optimal and, if you do not have the necessary experience (as well as the right equipment) , getting good shots may be particularly difficult.
By following the right precautions, however, it becomes absolutely feasible even for those who, a bit like you, consider themselves a “budding” photographer. What precautions do I refer to? Continue reading this guide on how to take pictures at home and you will find out soon. This is nothing complicated, however, rest assured.
What do you say then? Are you ready to get started? Yup? Very well! Concentrate, then, on reading the next lines, take note of the advice I am about to give you and put them into practice when you go to take photos indoors. You will see that, as time goes by, as you practice, you will get better and better. At this point, I just have to leave you to the tutorial and wish you good reading!
How to take beautiful home photos
So let's get to the heart of the topic and discover some tips on how to take beautiful home photos. I will show you how to proceed both in case you want to use a DSLR and the camera of your smartphone (in this case, however, to get good results you will need to use a smartphone with a good camera).
Choose the type of photo to be made
Before even putting your hand to your camera or smartphone, you have to choose the type of photo to be made: it is on the basis of this, in fact, that certain technical and practical decisions must be made.
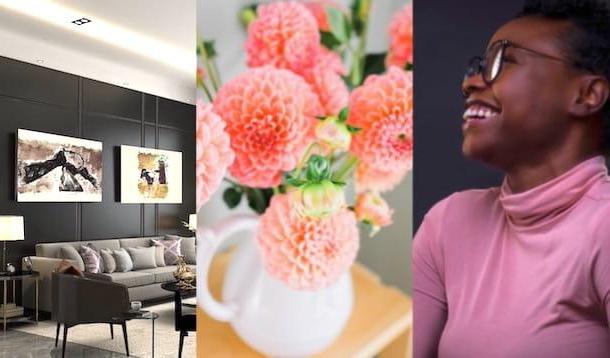
What types of photos can be taken indoors and, more generally, in a closed environment? Well, there are several: portraits, where the protagonist is a person (or even more than one); still lifes, where the subjects are inanimate objects e interior photos, where the protagonist is the house itself (or part of it).
Choosing the right light

Once you have defined the genre you want to try your hand at, the first thing you need to do is choose the right light. Why is doing this important? Because basically light is the "raw material" of photography: without it, photography would not exist.
How can you choose the right light? It depends on the type of photography you intend to make (which you must have already decided at this point) and on the lighting available in the house. In principle, it is always advisable to make the most of the natural light, that is, that coming from the sun's rays. Doing this shouldn't be a problem for portraits and still lifes, as you can move the subject close to a light source, such as a window, skylight, etc.
The situation changes considerably for interior photos: in this case, it is likely that the windows (unless they are large enough) alone will not be able to transmit all the light necessary to bring out a sufficiently bright photo.
Regardless of the type of photo you want to make, therefore, it may be advisable to help yourself with one artificial light: it could be the chandeliers and to the Applique present at home or, if you want even more professional results, of spotlights to buy for the purpose.
The spotlights in question have the advantage of being able to be positioned where you prefer and, in many cases, of offering the adjustment of the temperature and intensity of the light generated, which can be useful regardless of the photographic genre chosen.
Manually adjust the shooting parameters
To take well-made photos, I think it is essential manually adjust shooting parameters. In this way, you will have the possibility to act on every single parameter and adjust it according to the available brightness condition and, above all, according to the result you want to obtain. What are the main parameters on which to act? I'll list them below.
- Shutter time (also called exposition time o shutter speed) - this parameter refers to the time the shutter remains open and allows light to reach the image sensor. If the shutter speed is high (eg. 1/40, 1/10, 1 ", 2 ", etc.), the amount of light reaching the sensor will be large, which will make the photo brighter. By setting a shorter shutter speed (eg. 1/320, 1/800, 1/2000, etc.), however, the shutter will remain open for a shorter time and, therefore, the sensor will be reached by less light, with the result that the photo will be less bright. In acting on this parameter, therefore, be careful not to overexpose and not to underexpose the photo. Also, keep in mind that by setting a longer shutter speed, part of the movement of the subject will be captured, as well as part of the movement of the photographer (if a tripod or other support is not used); by setting a shorter shutter speed, the subject will be immortalized more quickly and the presence of blur or micro-blur will be avoided.
- Opening the diaphragm - by diaphragm we mean a system of blades positioned in an inverse fan pattern which, according to the choice made by the photographer, open and close (on smartphones, in reality, a software solution is used that somehow emulates the presence of a physical diaphragm which, for obvious reasons, cannot be introduced into the lenses of the latter). The aperture is measured in f / stop, has an influence on the depth of field, therefore on the range of distances from the camera within which the subjects portrayed will be more or less sharp. If you set a large enough aperture (eg. f / 1.8, f / 2.4, etc.), you will decrease the depth of field and, for this reason, the foreground subject will be completely in focus, while the background will be blurred (which could be useful for portraits and still life compositions). By setting a smaller aperture (eg. f / 8, f / 16, etc.), you can increase the depth of field, thus obtaining shots that have everything in focus (this can be useful for indoor photos).
- ISO - it is a value that indicates the sensitivity of the sensor to light. If this value is high, the “effort” that the sensor will have to make to capture the light will be greater, making the shot brighter. This, however, will make the photo more "noisy": this means that it will have an ugly glossy effect that could be difficult to correct even in post-production (if it is particularly pronounced). If you illuminate the subject and the environment correctly, perhaps with the use of spotlights and artificial lights, you will be able to set a low ISO value and get a higher quality (and at the same time bright) photo.
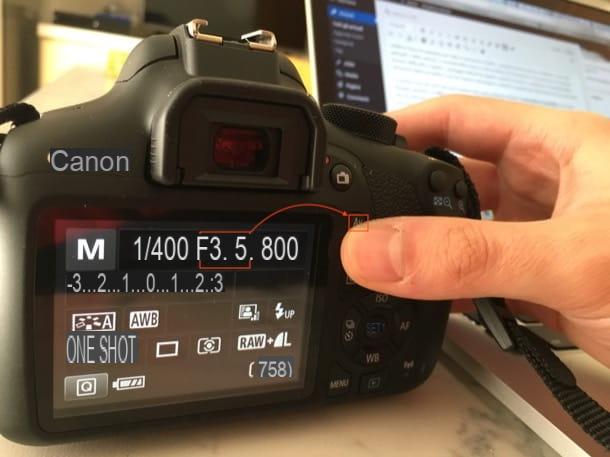
How do you change the shooting parameters? If you have a reflex, you have to set the manual mode (which is usually possible to do through a special one selection dial, moving it to the letter M), you have to press on button which allows you to navigate the menu displayed on the screen to select one of the available parameters and, therefore, you have to modify them (which is usually possible by moving the toothed wheel placed on the machine body).
Unfortunately I cannot be too specific in my indications, as the procedure can vary from one camera to another, but in essence it is the one I have just described to you. More info here.
If you want to manually adjust the camera shooting parameters of the smartphone, instead, know that you will almost certainly have to resort to third-party apps, such as Camera FV-5 Lite per Android (free) or ** Halide for iPhone (9,99 euros). The app Camera pre-installed on Android and iOS / iPadOS, in fact, it does not allow manual modification of the aforementioned shooting parameters.
Compose the photo
At this point, after having adequately illuminated the home environment and having set the shooting parameters in the best possible way, you just have to compose the photo and shoot. In doing this I advise you to follow the rule of thirds which, as simple as it is, offers the possibility of pulling out interesting and never banal shots.
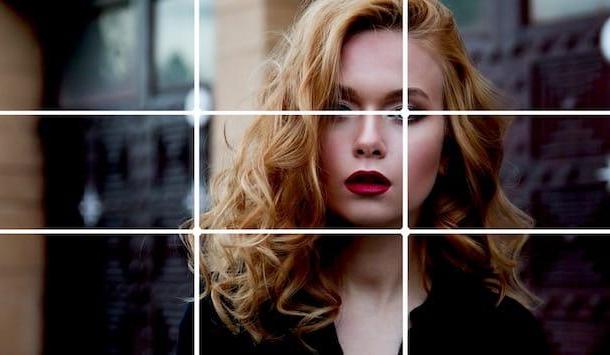
What is it about? Basically this rule suggests to the photographer to divide the image into one imaginary grid formed by 9 rectangles: the subject, instead of being positioned in the rectangle in the center, should be placed in the menu one of the four intersection points formed by the grid.
To go into more detail, if you are making a portrait, it would be good that at least one of the subject's eyes is positioned in one of the intersection points formed by the grid. If you are creating a composition, on the other hand, make sure that the main elements of the composition appear on the points of intersection (where possible): for example a glass, a chalice, a fruit, a flower, and so on.
And what about interior photos? In this case, you could take advantage of the rule of thirds by making sure that walls, supporting columns, furniture and other relevant elements are placed at one of the intersection points of the grid, which will give more momentum to the photo and to the environment itself.
How to take artistic photos at home
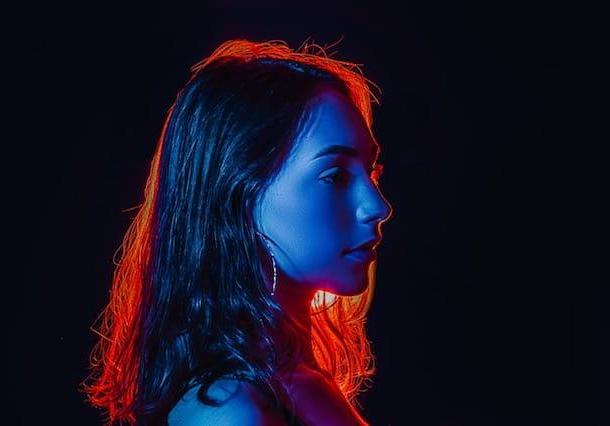
Would you like to know how to take creative photos at home? Well, try to look around, to identify interesting corners of the house and, above all, try to experiment as much as possible, letting your imagination and creativity run wild.
And if you want some practical ideas about it, take a cue from this other guide that I dedicated entirely to the subject. I really hope it can provide you with the right inspiration!
How to take passport photos at home
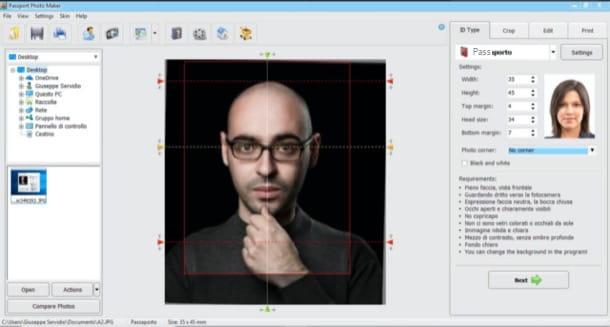
Sei turned his questa guida with l'obiettivo di scoprire how to take passport photos at home? Well, to do this, first of all try to follow the basic rules for taking a good photo inside the house, which I have amply illustrated in the previous lines.
Then take a look at this other article, where I have proceeded to show you in detail how to make passport photos. I really hope that this guide will also be of help to you.
How to take pictures at home


