


You spent the whole weekend taking pictures with your new Canon camera. You would really like to transfer them to your PC, so you can view the shots and see if they need some tweaking here and there. Unfortunately, however, you still don't understand how to transfer photos from Canon to PC and you fear that you will not be able to complete your "business" today.
Come on, don't be so pessimistic! After all, it's not that complicated to transfer photos taken with a camera to your computer. You just have to know how to connect your camera to your computer and then select the shots you want to import to your PC. And if the camera model in your possession allows it, you can transfer the photos even with Wi-Fi, without having to physically connect the camera to the computer via USB and without having to extract the SD card and insert it into the appropriate PC reader. So, are you ready to get started? Yup? Very good! Then make yourself comfortable and implement the "tips" that I will give you.
Just a small clarification before starting: to make this guide, I used the Canon EOS 1300D. The indications and wordings to which I will refer in the next lines, therefore, may differ slightly if you have a different camera model. That said, now we can get started in earnest!
Transfer photos from Canon to PC
Let's start this tutorial on how to transfer photos from Canon to PC taking into consideration some “classic” solutions, those that consist in physically connecting the camera to the computer. If you do not know it, to do this just use the USB cable supplied with the Canon camera or, more simply, you can extract the SD card from the latter and insert it into the appropriate card reader on your computer (or in a special adapter, if the PC does not have a card reader).
USB
If you want to transfer photos from your Canon camera to PC by establishing a connection USB between the two devices, the first thing you need to do is download an appropriate software from the Canon website. Please do not connect the camera to the computer before performing this operation, otherwise you risk compromising the installation procedure of the program in question.
Connected, therefore, to this page of the Canon site, select the item cityno from the menu Select Language, expand the menu Europe, Middle East and Africa and then click on the link British. In the text field Enter your product name in the box below, type the name of the camera in your possession (ex. EOS 1300D) and click on the suggestion that is proposed to you. At this point, the version of the operating system in use on your PC should be detected (eg. 10 64-bit Windows, macOS 10.14 Mojave, etc.) and you will be told if the drivers are compatible. If not, follow the instructions you see on the screen to download the drivers needed to connect the camera to your PC.
Once this is done, press the tab Software at the top left, select the version of the operating system in use on your computer from the appropriate drop-down menu (if necessary), presses the button Download and by clicking on the button click to Accept and Download. Then enter the serial number of the product in your possession in the appropriate text field (in my case it is on the plate located at the base of the camera) and presses the button Send to start the software download.
Now, wait for the download of the installation file to finish and then open it and follow the wizard to complete the setup. On Windows, then open the archive .zip you have obtained and move the content to any folder. Then start the executable ksdwxx.xa-installer.exe.
Su Macinstead, open the file ksdmxx.x-installer.dmg, right click on theinstaller contained inside and presses on apri twice in a row, so as to "bypass" Apple's restrictions on software from non-certified developers.
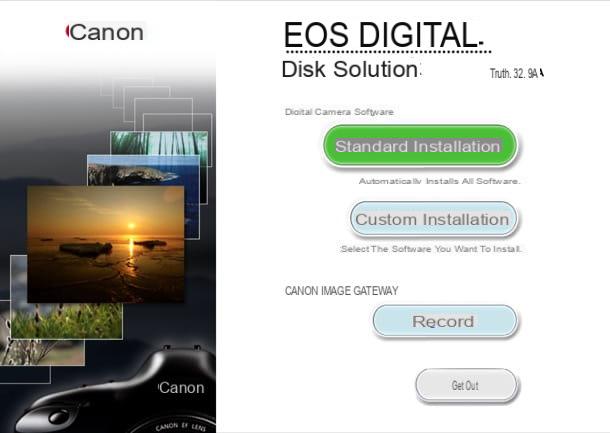
Now in the main application window Universal Installer, select your country (ex. city), presses the button NEXT e poi pigia sul pulsating Standard installation if you want to install all the software available for your camera (which I recommend you do) or Custom installation to choose the applications you want to use.
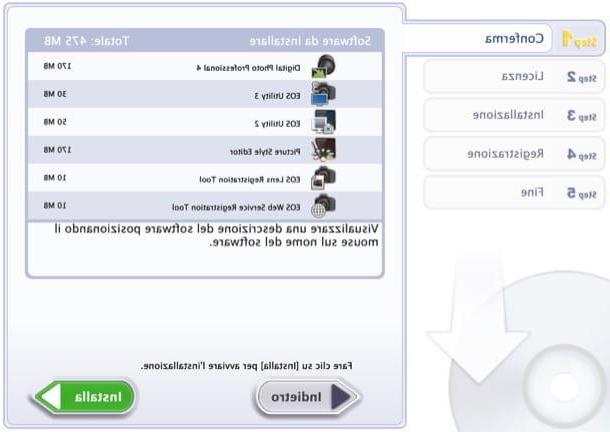
Whether you have chosen the first or the second option, know that you will simply have to follow the wizard by pressing on the buttons NEXT, Install, Yes and then press on again Yes (if you use Windows) or put the Password administrator (on Mac), wait for the setup to be completed, press the button again NEXT, put the check mark on the item No, I will register later, press on once again NEXT and then on the buttons OK e end.
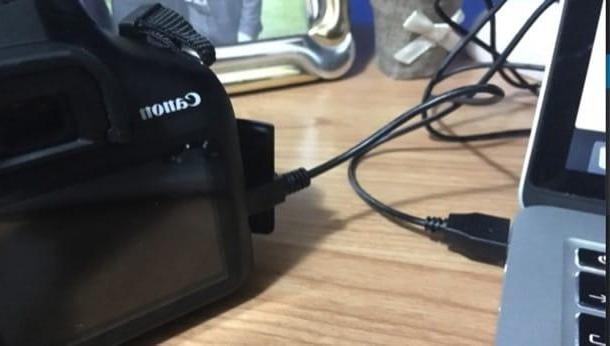
Now you have to turn on the camera moving up ON the switch located on the machine body, locate the terminal cover (the rubber flap which, in the model in my possession, is placed on the left side of the camera body) and open it from the appropriate slot. After that you have to connect the camera to the computer via the USB cable that was given to you.
At this point, the program EOS Utility should start automatically (if not, make sure the Wi-Fi mode on your camera is disabled): on its main screen, press the button Download the images to your computer and then click on the entry Select and download. Then select the images you want to save the club and press the button Download to transfer them to your PC.
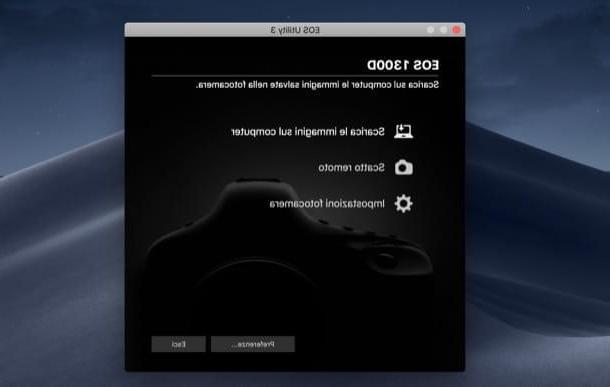
Pressing on the button Settings, you can customize some download settings and choose, for example, to automatically download the photos not yet downloaded by clicking on the item Start automatic download. Easier than that ?!
SD card
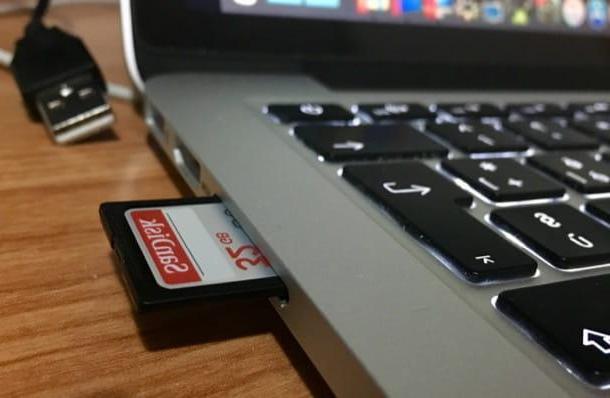
One of the easiest ways to transfer photos from a Canon camera to your PC is to extract the SD card from the slot on the camera and insert it into the card reader integrated into the computer (or into an external card reader, to be connected via USB, if your computer does not have one).
If your computer doesn't have a built-in card reader, buy one at an electronics store or online store, such as Amazon.
See offer on Amazon See offer on Amazon See offer on AmazonThe first thing you need to do to do this is take out the SD card from the camera. Therefore, identify the slot in which it is inserted: in my case it is located on the base of the camera, in the compartment where the battery is also inserted. Once you have extracted the SD card from the camera, insert it in the appropriate slot of the SD reader built into your computer or external media and then do the following.
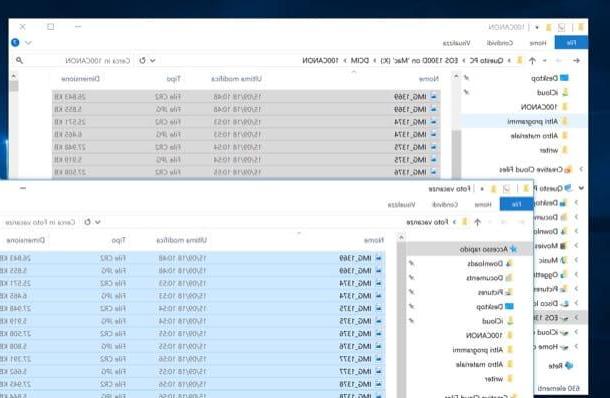
Su Windows, apr l 'File Explorer (the yellow folder icon on the taskbar), expand the menu What PC, computer o Computer resources (depending on the version of the operating system in use) and select the drive relating to the SD card just inserted into the reader (eg. USB drive (F :)).
Now you just have to open the folder containing the photos you want to view / import to your PC, select those of your interest, right-click on the selection made, press on the item Send to and choose the destination folder to transfer them to. Alternatively, you can right-click on the previously selected photos, select the item Copy from the context menu and then paste the images in the desired location.
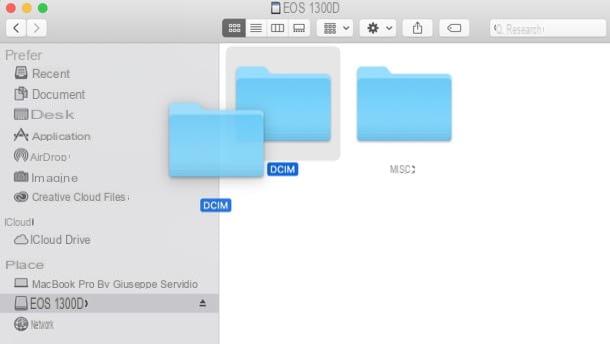
It was used MacOSInstead, open the Finder, presses on SD card name located on the left sidebar and open the folder containing the photos you want to view / import on your Mac.
Then select the images you want to transfer, right click on the selection made, select the item Copy [N] items from the menu that opens and then paste the photos into a folder on the Mac. Alternatively, you can simply drag the folder containing the images in question and wait for the entire content in it to be transferred to the Mac.
Then remember to "unmount" the SD drive inserted in the computer by removing it safely, otherwise you risk damaging it and compromising the files saved inside it (to do this, just right-click on the drive icon you inserted in the computer and select the voice Eject / Eject "[unit name]" from the menu that opens).
If you want more information on how to read an SD card on a PC, all you have to do is read the in-depth study I have dedicated to the topic.
Transfer photos from Canon to PC with Wi-Fi
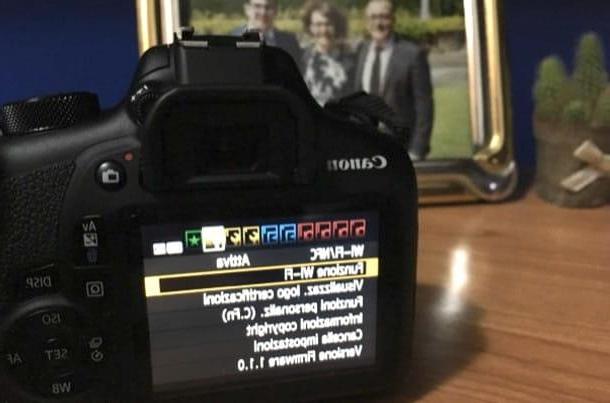
Your camera supports the transferring images with your computer via Wi-Fi? To use it, after turning on your camera, you have to press the button Menu placed on the body of the machine, move with the directional indicators towards the appropriate icon of the Wi-Fi function (one of yellow wrenches), open the menu Wi-Fi / NFC and select the option Attiva.
After that, you need to open the menu Wi-Fi function and select the option by which to connect the camera to the computer by pressing the icon of laptop. Then a local network will be created to which you can connect from your computer and download the images via Wi-Fi, following the wizard that appears on the screen.
In case of problems or doubts, you can get detailed information on how to proceed by downloading the user manual of your camera from the Canon website. To do this, connected to the manufacturer's website, presses the card corresponding to the family of cameras to which the one in your possession belongs (eg. EOS, Reflex 35mm, EOS M o EOS R) and then click on the link corresponding to the machine model whose user manual you want to download (eg. EOS 70D). To start its download, then, presses on the link Manualsclick on your bottone Download e poi pigia sul pulsating click to Accept and Download. Easy, right?
How to transfer photos from Canon to PC


