


If you have one iPhone or iPad, you will surely know that Apple offers two systems for storing photos online: one is called Photo stream, it is completely free, it does not erode the storage space on iCloud Drive, but it has several limitations. In fact, it does not allow you to archive Live Photos, does not save videos and only keeps the contents for a period of 30 days. The second service, much more complete, is called instead ICloud Photo Library, erodes the storage space of iCloud Drive (which for the free version of the service is only 5GB, so it requires the subscription of a paid plan) but does not place time or type limits on the stored contents: this means that it saves photos, Live Photo and video without ever making them "expire". I also told you about it in my tutorial on how to store photos on iCloud, if you remember correctly.
Well, if you are here today it is because you use one of these services and you want to know how to transfer photos from iCloud to PC, did I guess? Well then know that you have come to just the right place at the right time! With today's tutorial, in fact, I will show you how you can take advantage of all the tools made available to us by Apple to download photos, Live Photos and videos from your iCloud account to your computer, be it a PC equipped with Windows or a Mac. in addition, some "shortcuts" and some alternative services that allow you to download photos from iCloud without installing programs on your computer and without using special software.
So, are you ready to get started? If your answer is yes, don't wait any longer: take five minutes of free time, carefully read the instructions below and try to put them into practice. I assure you that downloading photos from iCloud will prove to be a much simpler operation than you imagine. All that remains for me is to wish you a good read and, above all, a good download!
Transfer photos from iCloud to Windows PC
The simplest method for transfer photos from iCloud to PC is to use the official iCloud client for Windows, which, as easily understood, allows you to synchronize the data of the Apple-branded cloud storage service with your computer. Among the data in question, there are, of course, also the photos hosted by the iCloud Photo Library and the photo stream.
A PC equipped with Windows 10, you can download the iCloud client from the Microsoft Store. Alternatively, you can download the classic installation package by connecting to the Apple website and clicking on the link On Windows 7 and Windows 8, you can download iCloud for Windows from Apple's website.
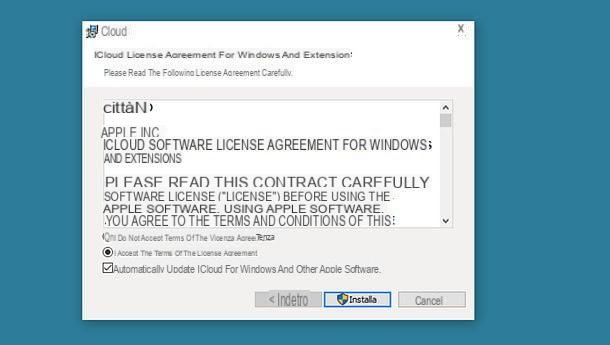
In the latter case, when the download is complete, start the executable iCloudSetup.exe and, in the window that opens, put the check mark next to the item I accept the terms of the license agreement and click in sequence on the buttons Install, Yes for two consecutive times e Close to conclude the setup.
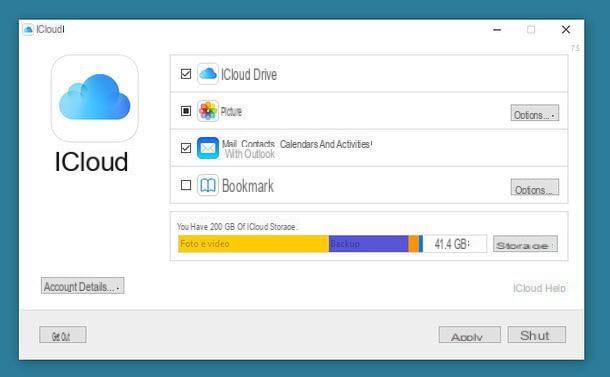
If you are asked to restart your PC, accept. When you log in to Windows again, the iCloud client should automatically start and ask you to log in. Then log in with your Apple ID data (by typing them in the fields Apple ID e Password) and enable photo synchronization on your computer: to do this, check the box Gallery.
Photos (and movies) synchronized with iCloud Photo Library and / or Apple Photo Stream will be downloaded in an optimized version in the iCloud folder, in the path Images.
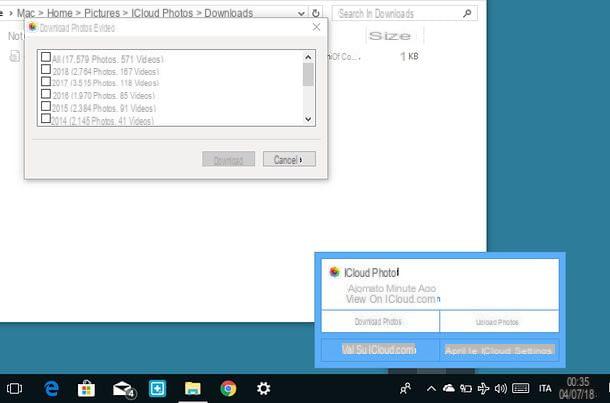
To follow the progress of preparing the photo download, you can click on the icon iCloud (the blue cloud on a white background) present in the notification area, next to the Windows clock. When the download is ready to start, click on the button Download photos present in the box that appears at the bottom right of the desktop.
Then put the check mark next to the years related to the content you want to download to your computer (or next to the option All, if you want to download the contents of all years) and click on the button Download to start the download.
To quickly access the folder with the photos downloaded from iCloud, open theFile Explorer (the yellow folder icon located at the bottom left of the Windows taskbar), select the item ICloud Photo from the left sidebar and double-click the icon Download.
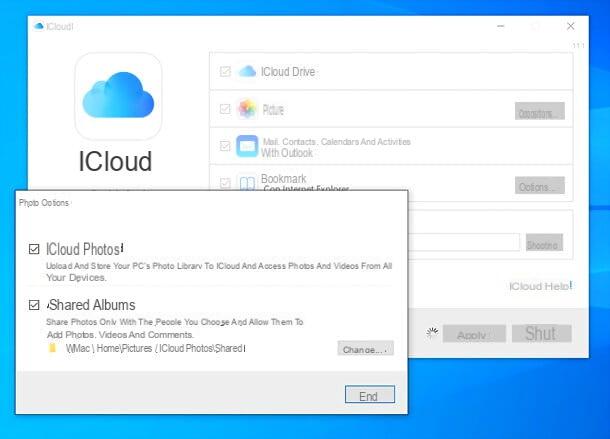
This is for photos downloaded from iCloud Photo Library. To access the shared photos, if you have activated the download function for them as well, access the folder [tuo nome]PicturesiCloud PhotosShared (or to the folder you have chosen, by pressing the appropriate button in the iCloud management panel).
Transfer photos from iCloud to Mac

If you use a Mac, you can transfer photos from iCloud to your computer using the tools included "standard" in macOS: I am referring in particular to the function of downloading photos (and videos) from iCloud included in Gallery, Apple's default application for managing your photo and video library.
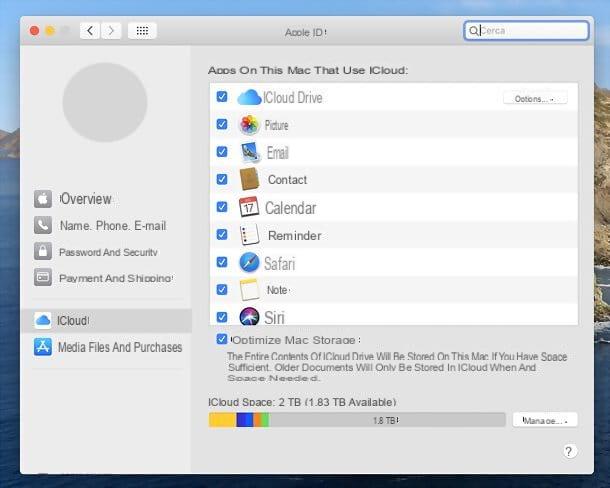
To take advantage of the function in question, you must first check that the Mac is paired with the same iCloud account used on the iPhone and / or iPad from which the photos you want to download to your computer come from. Then open System preference, by clicking ongear icon located on the Dock bar, and select the item related to iCloud from the window that opens.
At this point, check that in the left sidebar there are the data of your iCloud account, otherwise log in by clicking on the appropriate button. Then proceed to go to Apple ID / iCloud and, if necessary, to activate the photo synchronization function from iCloud: to do this, put the check mark next to the item Gallery.
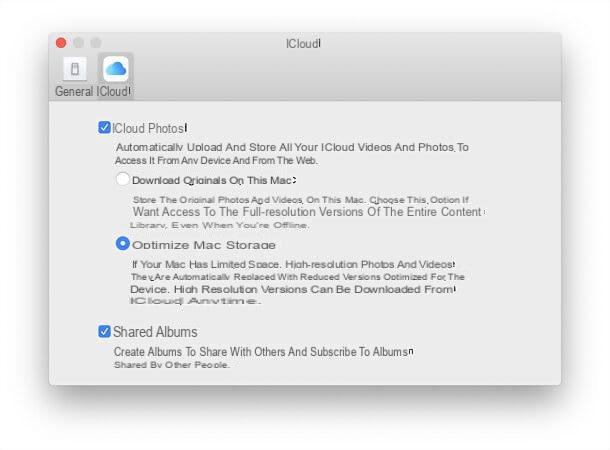
Now, open the application Gallery of macOS, which is represented by a colored flower icon and should be in the Dock bar. Once the program has started, go to the menu Photos> Preferences located at the top left, select the tab iCloud from the window that opened and put the check mark next to the items you prefer among ICloud Photos, My Photo Stream e ICloud Photo Sharing, depending on the services you use and want to sync with your Mac.
If you use iCloud Photo Library, you can choose whether download the originals to the Mac or optimize storage on Mac ticking one of the two available options: in the first case, photos and videos will be downloaded at the highest quality on the computer; in the second, a low-quality version will be kept on the Mac and, when necessary (ie when you go to open the content by double-clicking), the highest quality version will be downloaded from the Internet. As you can easily understand, to keep the contents in high quality on the Mac, it is necessary to have a lot of space available on the disk.
Mission accomplished! Close the Photos application preferences window and, as if by magic, its library should begin to populate with all the photos and videos you have on your iCloud account. Obviously, if your library is very large, it will take some time for the synchronization to complete.
To export a photo or video outside the Photos library (which is treated as a single file, the position of which can be changed by going to the menu Photos> Preferences> General), you have to select its thumbnail within the application and drag it to the desktop or to a folder of your choice.
Other solutions to transfer photos from iCloud to PC
If you need to download photos from iCloud using a computer that is not yours and / or you cannot install programs such as the official iCloud client for Windows, you can use some online solutions that do not require the use of any software, other than the browser you usually use to browse the Internet. The solutions in question are the iCloud web panel, which allows you to access the iCloud Photo Library (therefore not the Photo Stream or shared photos, only the iCloud Photo Library) and to download photos and videos by selecting them "manually", and the Apple's site, through which it is possible to create an archive with all the photos hosted on iCloud and then download it to the computer (the wait, however, in this case can also last several days). Here is in detail how to proceed on both services.
ICloud web panel
If you only need to download some photos from iCloud and not the entire library, you can take advantage of the web panel of the famous Apple service. To begin with, then connect to iCloud.com and log in using your Apple ID data.
When the operation is completed, click on the icon Gallery and, if this is your first time accessing the service, wait a few minutes for your photo library to be prepared (it may take several minutes).
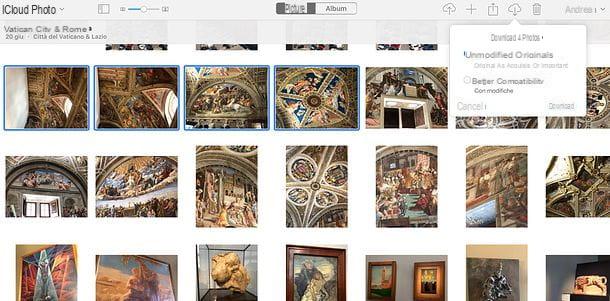
Once you have access to the photos saved on iCloud, to download them to your PC, all you have to do is select them, using the combination Ctrl + click (your Windows) or cmd + click (on Mac) on their thumbnails (or Ctrl+A/cmd+a to select all) and click on the icon cloud with down arrow which is located at the top right.
If you want, by clicking on v located next to the cloud icon for downloading photos, you can choose whether to download the images in original unmodified or in an optimized format that ensures, however, a better compatibility with other devices. You have to put the check mark next to the option you prefer the most and click on the item Download to proceed to download the selected photos.
Apple site
If you want to download the entire photo library you have on iCloud, you can use this page of the Apple website, through which you can request an archive with all your data in the possession of the Cupertino giant. To request the archive with the photos you have on iCloud, log in with your Apple ID, click on the button Continue and select the item Start present nella sezione Get a copy of the data.
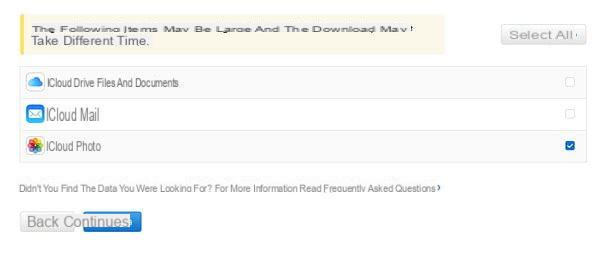
At this point, metti il segno di spunta accanto alla voce ICloud Photo (and next to the items relating to the other data you want to download from iCloud, knowing however that the more data you choose to download, the longer it will take to prepare the archive) and click on the button Continue.
In conclusion, choose how to divide the archive to download by setting a maximum weight for each "piece" of the latter (you can choose between 1, 2, 5, 10 o 25 GB) and click on your button Complete the request. At this point you just have to wait for the Apple email with the link to download the archive: the wait, as mentioned, could last for several days.
To get an estimate of when the archive could be ready, go back to the home page of the Apple site dedicated to privacy and click on the link See the details present in the right sidebar, under the heading Data request in progress.
How to transfer photos from iCloud to PC


