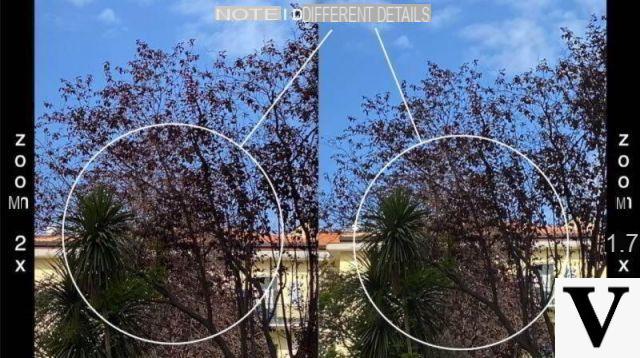
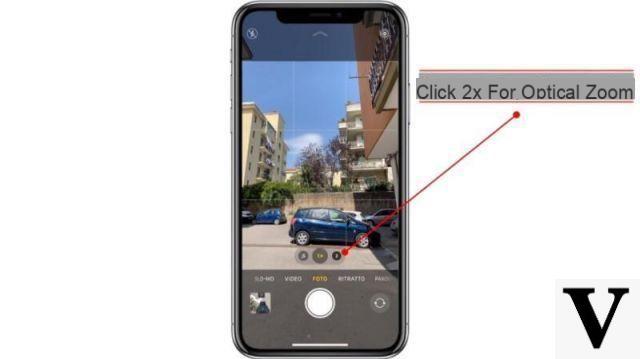
Episode 13 of the section "HOW TO TAKE BETTER PHOTOS WITH IPHONE" where I tell you about tricks and tips on photography with the iPhone. In today's episode we talk about zoom: optical, digital, the differences, how and when to use it!
In this article we want to summarize some key points of this shooting mode that you must always keep in mind to improve your shots. Let's start:
Can you use the ZOOM?
It seems like a provocation, the ZOOM on smartphones has practically always existed, even if the digital zoom must be distinguished from the optical one. But obviously with these little "video lessons" my intent is just to show you the basics and guide you to their correct use.
Believe it or not, in fact, the zoom actually has its own modus operandi, and there are situations in which it is better to use it instead of the main camera. We are obviously talking about the latest generation iPhones, with at least two rear sensors, where the first is the main one and the secondary is Optical ZOOM.
Optical ZOOM and Digital ZOOM
Digital zoom is what you all know and that we all have on our smartphone, even on the cheapest smartphone there is. This type of zoom is done via software (digitally in fact) and simply consists in enlarging the image you are seeing to have an effect of approaching distant subjects.

This type of zoom, however, is practically performed with a cut of the image (so called CROP) that irreparably ruins the photo, its quality, with an effect that - among other things - is not at all pleasant. In short, the less you use the digital zoom, the better. I advise you never to use it if you have an optical zoom available.
Optical zoom, on the other hand, is done by placing a zoom lens in front of the sensor. In fact, some smartphones have multiple sensors on the back and often one of these is called TELE LENS, that is a sensor on which a telephoto lens is installed that allows the optical zoom (because it is a real optical) of the image. In this case image quality is not affected, and the result is very beautiful in particular cases.

What if I don't have a zoom sensor?
As mentioned a little while ago, to have a zoom sensor it is sufficient to place a particular lens in front of this sensor that allows the image to be enlarged. If your smartphone does not have a TELE LENS sensor, just buy one Kit di Lenti ZOOM MOMENT or other online kits to be affixed to the sensor of your smartphone. For example my iPhone 11 Pro Max has three sensors and one of these is the telephoto lens, otherwise you can buy a kit like these:
Other useful tricks
Once you have mastered this mode, you can also add a few more tricks that we have seen in the other episodes. For example, you can use the Burst mode, that is, hold down the shutter button to take many more photos and then choose the best one.
Another trick is to change the exposure: once you have focused on a point of the photo, with your finger swipe on the screen in order to increase / decrease the brightness level of the photo, so as to enhance lights or shadows. Finally, don't forget to always carry a comfortable bag with you tripod like these:
Doubts or problems? We help you
Remember to subscribe to our Youtube channel for videos and other reviews. If you want to stay up to date, subscribe to our Telegram channel and follow us on Instagram. If you want to receive support for any questions or problems, join our Facebook community or contact us on Instagram. Don't forget that we have also created a search engine full of exclusive coupons and the best promotions from the web!


