


Although we have already talked about it on other occasions, it is always interesting to remember that in macOS not everything we use is in sight.
Surely you used the Compress Files option that appears in the Finder context menu… or not.
Don't you know what I'm talking about? Let's start from the beginning.
How to compress files on macOS
The Mac operating system includes the option to compress files (in.zip) from the Finder itself, without the need to use other applications.
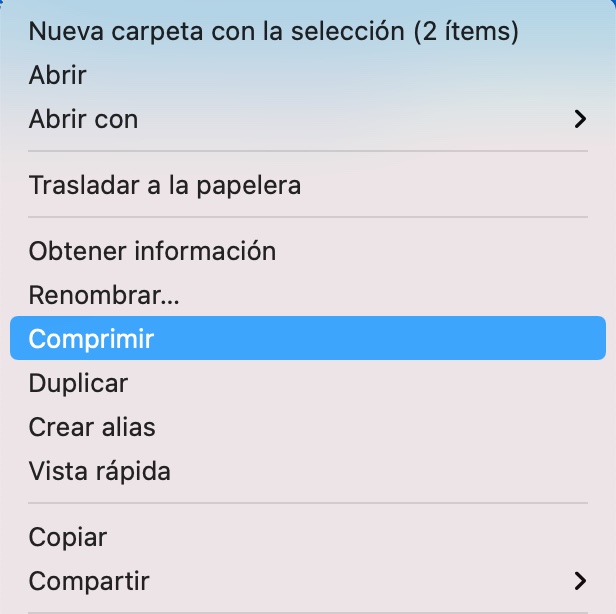 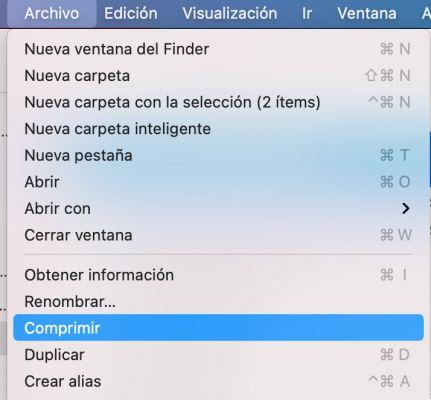 |
To compress files or folders, select them and right-click. You can also find the same option if you visit the File menu in the menu bar and select the Compress option.
If you select two or more files / folders, a new one called Compressed File.zip will be produced. By clicking on the name you can rename it to something more familiar that tells you what it contains. If you select only one file or folder, the resulting compressed file will have the same name as the file or folder you selected.
Once the desired files are compressed, the originals can be deleted, as they are already contained within the compressed file.
Double-clicking on the compressed file will unzip it and recover the original files. Once unzipped, you can delete the .zip file.
If they ever send you or download compressed in.rar files, I recommend that you download the free UnRAR app from the App Store.
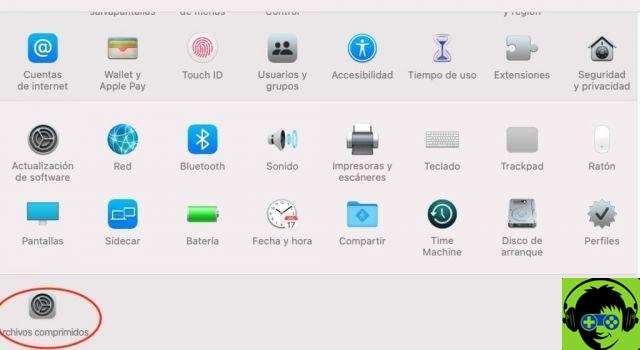
How to add the compression utility to the System Preferences panel.
That simple action you just did from the Finder's context menu, what it does is run an invisible program, called the Compression Utility.
It turns out that Utility is hidden in
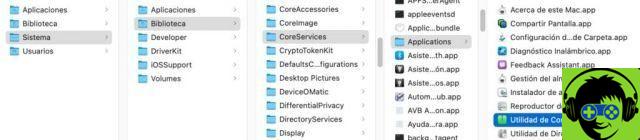
/ System / Library / CoreServices / Applications / Archive Utility.app
/ System / Library / CoreServices / Applications / Compression Utilities.app
If you double-click on it, a dialog box will appear asking you for permission to embed it in System Preferences.
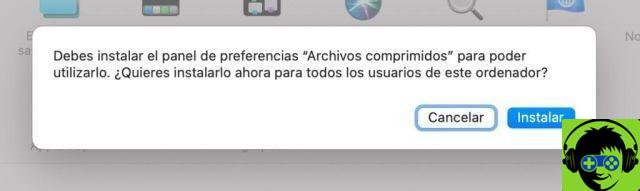
By doing so it will appear on its own line in the preferences, the one for "other things".
Although some of its functions are inoperative, as it has never been fully developed, you can enjoy playing around with the settings and seeing the results.
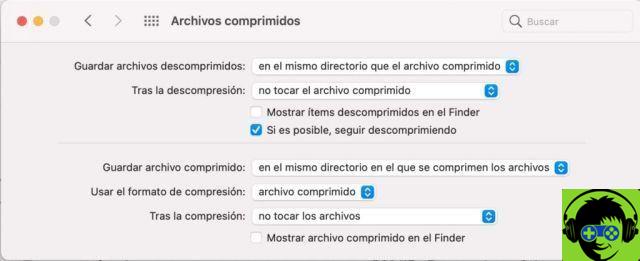
As you can see, you can enable it to automatically delete the compressed file when unzipping, etc.
Have a good time!


