Our old man now Samsung Galaxy S9 ha exceeded 2 years of life from the day of its official marketing.
With the passage of time we have seen the evolution not only of the Samsung smartphone line-up, until it reaches the S20 family, but also of the software installed by the Korean company on board its devices: we are talking about the One UI arrived at version 2.1, interface capable of offering a lot in terms of feasible customizations but that it has almost never been particularly attentive to energy consumption and user experience in terms of fluidity and efficiency, features especially accentuated for those phones with hardware that is not at the top or of a certain age and our S9 falls among them.
That's why we decided to bring you this guide, where we illustrate you how to install an alternative custom ROM to Samsung's One UI, always based on Android 10 but able to bring much more fluidity and speed, net of a much lower number of features available, with a no-frills, essential and minimal interface: let's talk about the famous LineageOS 17.1!
The procedure illustrated in this article is inspired by the official installation notes for Samsung Galaxy S9 drawn up directly by the LineageOS development team and coincides per i device Galaxy S9, S9 Plus e Note 9, while for other smartphones the procedure may vary and in that case we advise you to trust the official installation guides.
Our test on the Galaxy S9
WARNING!
Unlocking the bootloader (required) results in the loss of all data, the invalidation of the warranty and the inability to use payment apps, streaming and banking services!
If you want to keep a copy of the most important data such as videos and photos, we recommend that you make a dedicated backup by following our guide.
The procedure illustrated is only valid for Galaxy S9, S9 Plus and Note 9 and may differ for other devices. Refer to the official installation guide available for each supported device.
We strongly recommend that you read the entire guide before attempting to install LineageOS!
In any case, the author and the editors of TuttoAndroid.net assume no responsibility for any problems / difficulties / malfunctions of the terminal following the implementation of this guide.
1. Pre-installation requirements + important configurations
- Before proceeding with any operation or procedure we recommend that you install the latest software update available for Android 10.
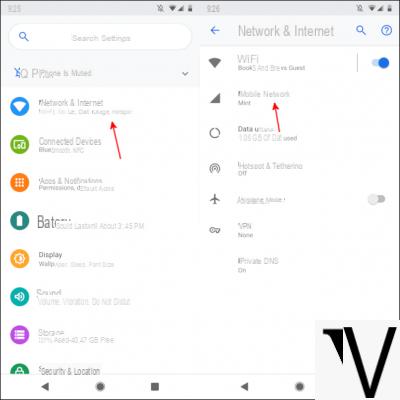
To download any updates via OTA, simply go to the phone settings in the “Software updates” -> “Download and install” section and check for any available downloads; - Enable USB Debugging - from the phone settings go to the section "About the phone" -> "Software information" -> repeatedly press on "Build version". Now, still within the settings app, navigate to the end of the menu list under "Developer options", here abilitate the toggle "OEM release"; this will result in the loss of all data inside the phone and you will be prompted to perform a factory reset immediately.
Once the operation is complete, perform a quick configuration of the Samsung and activate the developer options again, but this time going to enable the "USB Debugging" toggle.
Make sure that the appropriate message requesting permissions for the computer appears on the smartphone: activate the option "Always allow from this computer" and then click on "OK".
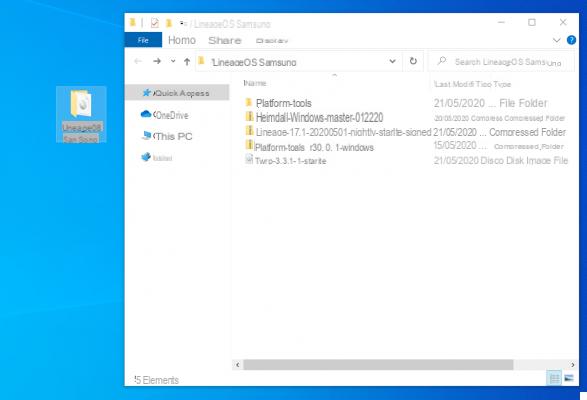
- Download the following files, are required to install the custom recovery and flash the LineageOS ROM.
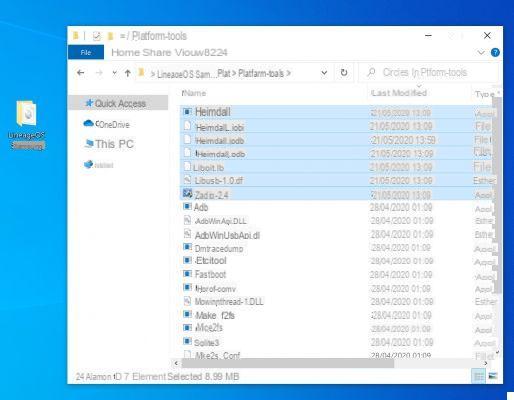
We strongly recommend that you copy all the files listed below into a dedicated folder, for example by naming it "LineageOS Samsung", to avoid confusion:- SDK Platform-Tools (ADB) – download the SDK version corresponding to the PC operating system with which you intend to install LineageOS. Extract the .zip file, you will end up with one folder resulting from the name "platform-tools". Copy it inside the dedicated “LineageOS Samsung” folder created previously;
- Heimdall suite - Heimdall is a cross-platform open-source tool useful for interfacing with the “Download mode” of Samsung smartphones, on the same wave line as Odin.
We specify that Heimdall is available for Windows / macOS / Linux and its "installation" differs depending on the operating system with which you want to flash the custom ROM.
Below we outline the steps required for each platform:- Windows
Extract the .zip file downloaded, copy all files present in the extracted folder and paste them inside the "platform-tools" folder extracted in the previous point. - MacOS
Fate double click on the .dmg file downloaded and copy the "heimdall" file into the "platform-tools" folder extracted earlier. - Linux
Extract the .zip file downloaded and copy the heimdall file into the "platform-tools" folder extracted earlier.
- Windows
- TeamWin Recovery - select the exact device e download the recovery .zip file;
- LineageOS ROM - select the exact device e download the .zip file of the ROM. It is not necessary to download the associated recovery as well since you will install the TWRP.
2. Installare la custom recovery TWRP
Since the bootloader has now been unlocked we just have to continue by installing the TeamWin Recovery.
WARNING!
Installing a custom recovery involves the breakage of the KNOX safety system, which means that it will no longer be possible for you in any way, not even returning to the original ROM, to use Samsung Pay and Samsung Health.
- First of all, remove any PIN or password to unlock the smartphone;
- Simply turn off the device;
- Now press the buttons simultaneously power on + volume down + Bixby and release them when the relevant screen appears download mode. When the new screen appears, press the volume up button to confirm;
- Now you can connect the phone to the computer;
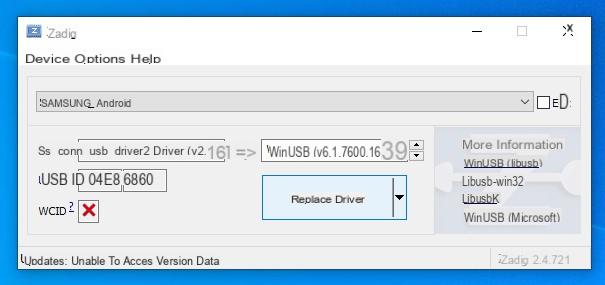
- For Windows users only- It may be necessary to install any missing drivers. To solve the problem independently you can refer to the ZAdig guide, alternatively follow the steps that we list:
- Run the “zadig-2.4” executable - it is an .exe file included in the heimdall .zip file that you downloaded and extracted earlier and then copied to the “platform-tools” folder;
- From the menu item "Options" select "List All Devices";
- Select the item corresponding to the connected smartphone;
- Select from the available drivers immediately to the right of the green arrow "WinUSB" (which will be followed by a specific version number);
- Click on the “Replace driver” button below.
Now always on the computer open the terminal and type:
cd
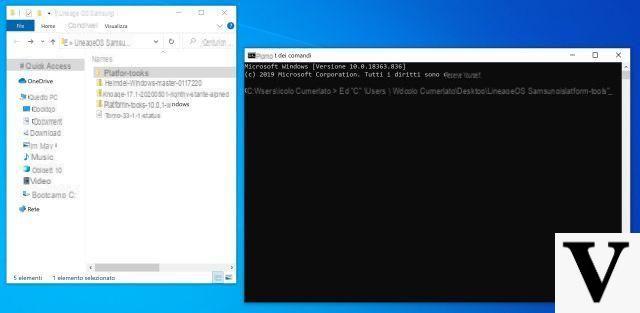
Obviously the characters "<>" must be omitted and in all cases the wording must be replaced with the absolute path of the "platform-tools" folder extracted previously and in which you had also copied heimdall.
Then type:
heimdall print-pit

(macOS users: add ./ at the beginning of each command)
If the phone reboots it will mean that there is communication between Heimdall and the Samsung.
Wait for the terminal to restart, then turn it off again and return to Download mode always via buttons power on + volume down + Bixby.
Go back to the terminal from pc and type:
heimdall flash --RECOVERY --no-reboot

3. Flash the LineageOS ROM
- When the phone has finished installing the recovery press simultaneously the keys power on + volume down e release them when the screen goes black;
- Right after doing this now hold down the keys power on + volume up + Bixby until the Samsung reboots into TWRP recovery;
- In case you are asked topassword entry to decrypt the Data partition click on "Cancel";
- In case you are asked "Keep System Read Only?" swipe to enable changes;
- From recovery go now to “Wipe” -> “Format Data” -> type “yes” and confirm;
- Then go back and go up “Wipe” -> “Advanced wipe” -> select the partitions “Dalvik / ART Cache”, “Cache”, “System” -> swipe to confirm.
At this point go back to the main screen and always from recovery selected “Advanced” -> “ADB Sideload” -> swipe to confirm. Immediately after, from the terminal on your computer, type:
adb sideload

And the Google Apps? They are not there originally
That's right! Google services are absent by default (consequently the Play Store is too) from the operating system and it will therefore be necessary to install them separately. In fact, although LineageOS prefers to leave ample room for maneuver regarding optimizations and customizations to be implemented, it must be said that developers are not allowed the native integration of LineageOS with Google Play Services due to the policy rules established by the Californian company. .
Therefore, the sideload of the recovery operating system is finished what we advise you to do is to flash the Google Apps. Be careful to have selected the ARM64 version and Android 10.0, while as a package variant we recommend the "Pico" as it appears to be the most compatible with Lineage 17.1 on our Galaxy S9. For example, trying to flash the “Stock” and “Nano” variants we ran into constant crashes of the system launcher rather than having difficulty granting all the necessary permissions to the Google Services app or being unable to use the default keyboard.
Once downloaded the corresponding .zip file, type from terminal:
adb sideload

(Optional) No GPay and Netflix? Thanks SafetyNet.
Unfortunately, installing LineageOS involves altering the verification results produced by SafetyNet, an API developed by Google to allow apps to understand whether the system on which they are run has been artifact or not.
Due to internal rules established by the LineageOS team it was decided not to circumvent the "problem", this involves theinability to make contactless payments with Samsung Pay or Google Pay, take advantage of Netflix or Amazon Prime Video as well as most banking apps or streaming services in high definition.
A valid solution is called (va) Magisk, a tool capable of provide root permissions and at the same time to hide its existence from apps that want to perform authenticity tests with SafetyNet. However, in the last period Google is making its security systems more sophisticated and attentive, which is why at the moment it does not seem possible to completely conceal software counterfeiting from applications (which in fact was necessary to install LineageOS).
In all cases, the absence of Netflix on the Play Store can be circumvented by downloading the related APK from the APKPure store, while if you want to use Amazon Prime Video you will need to install Magisk on your phone, under penalty of being unable to see any content.
Proceed therefore, since we are in recovery, with the download of Magisk on the computer and with the execution of an additional ADB sideload command, first activating the relative recovery option and then typing the command from the pc:
adb sideload

Once this is done you can finally reboot the system. Go to “Reboot” -> “System”.
If you were to ask for confirmation, accept and continue without fear.
After running the setup the first thing we recommend you do before proceeding with the customization is to configure Magisk for our purpose.
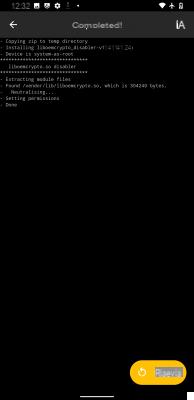
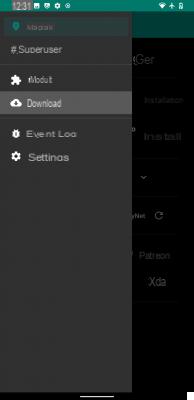
- Start Magisk (it will already be installed on your phone);
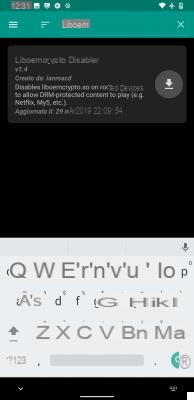
- From the side menu select the item "Download";
- In the search bar at the top digital "liboem" and select the result "liboemcrypto disabler";
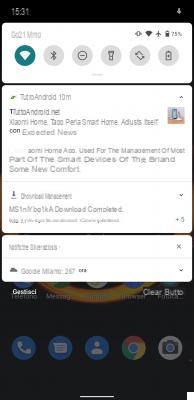
- Download and install it, then press the orange "Restart" button;
- Wait for the smartphone to restart e you can enjoy streaming services in SD quality.


Previous
Next
Fullscreen


4. Our customization
Immediately after we concluded the initial setup of the Lineage OS 17.1 we found ourselves in front of a lean operating system, extremely responsive and snappy and really difficult to get stuck.
The default apps
The UI definitely needs a reorganization of system default apps (practically all AOSP obviously) since the solutions contained in the ROM did not convince us that much in terms of graphic presentation and limitations in use.
So we went on the Play Store to install the following proposals (and we advise you to do the same):
- Phone <- default AOSP version
- Messages <- default AOSP version
- Contacts <- default AOSP version
- Calendar <- AOSP version di default
- Gmail <- versione AOSP (Email) di default
- Google Photo <- versione AOSP (Galleria) di default
- Google Chrome <- versione LineageOS browser di default
- Google Camera <- versione AOSP di default
More obviously, other Google applications (and not) not pre-installed with the GApps package; we did not miss for example Telegram, YouTube, Google Keep, Maps, Spotify, Instagram, ...
Small paragraph we dedicate it right to popular Google Camera photography app: we struggled a lot trying to find a version that is as compatible as possible with our Galaxy S9 (we still haven't succeeded). For him we advise you to install this old version, 5.1. Unfortunately, the more recent ones are much more problematic but consider that this GCam also has limitations as videos lack automatic exposure and have extremely awkward focus; then the"Portrait" effect does not work with selfie sensor but luckily you can get around this problem by using the "Lens Blur" mode.
Alternatively you can rely on the AOSP variant, that is the original camera app pre-installed with LineageOS, which however it is unable to shoot in HDR (or rather… it makes them, but they are completely unusable due to artifacts). So… why not use both of them in pairs?
The graphic changes
The interface, despite the excellent cleaning, certainly needs a more accurate graphic restyling.
First we removed the widgets present by default on the home screen and we added the Google search bar at the top, the Google summary immediately below and nothing else.
We have also replaced the wallpaper with a background obtained from the Crisper app, which we had already talked about in this article.
The functional changes
You also miss the tab Google Discover? To us particularly and, although originally the swipe to the right does not lead anywhere, there is a very simple way to activate it: download the Google app and that's it.
The same applies to the tasto Bixby which with One UI on board was able to recall the voice assistant of the same name, but which now seems to not work.
In reality, from the settings you can choose the action to be performed when pressed (simple or prolonged) and, by installing the Google Assistant, you will be offered the possibility of calling up Google Assistant as an alternative.


Previous
Next
Fullscreen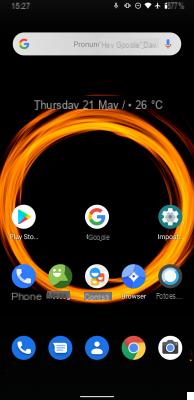


How does LineageOS behave?
Well, very well to be honest. Has helped to make our Samsung Galaxy S9 significantly more responsive and responsive presenting a clean and minimal interface and well-reproduced and always fluid animations.
The battery also benefited, managing to gain 30 minutes or at most 1 additional hour of active display from the previous 4 standard hours with average use.
Sure you lose a lot of the features present on One UI but those who opt for a similar solution certainly do not do it with the intention of having the same amount (or more) of features available, but are looking for a much lighter and more performing system, without unnecessarily weighing down the smartphone that otherwise he would find himself having to manage a particularly onerous workload.