


True, you are not a professional in the sector but photos are still a great passion of yours. Nonetheless, it surprises me a lot that you have not yet found one or more software useful for viewing, editing and correcting your digital shots.
Either way, it's never too late to fix it. If you allow me a few minutes of your precious time I can in fact show you all the ones I believe to be the best photo programs currently present on the square. No, don't worry, I'm not going to recommend complicated resources for the experts of the sector but tools that are easily accessible by anyone, even a child! You will find them all indicated (and explained) below.
There are both free and paid programs, for both Windows and Mac (as well as Linux). So identify the ones that you think might do the most for you and download them to your computer. In the end, you will see, you will be able to tell yourself very happy and satisfied with what you have learned. Are you ready? Yes? Great! Then ban the chatter and proceed.
XnView MP (Windows / Mac / Linux)
The first of the photo programs I want to tell you about is XnView MP. It is a great free software for Windows and Mac for managing, viewing and converting digital images that includes support for over 400 different file formats.
It also includes advanced functions to organize and rename photos in bulk and, like other similar solutions, has multiple tools to edit / correct digital shots in various ways: resizing, color correction, brightness / contrast adjustment, etc.
To download the program on your computer, connect to the relevant download page and press the button Zip Win 32bit (it stands on Windows 32 bit), su Zip Win 64bit (if you are using 64-bit Windows) or on OSX DMG 64bit (if you are using a Mac).
When the download is complete, if you are using Windows, extract the ZIP archive obtained in any location, open the file xnviewmp.exe present inside and click on Run. If you see an error message, right click on the program icon and choose the option Run as administrator from the context menu, in order to start the software with administrative privileges.
If you are using a Mac, open the resulting .dmg file and drag the program icon to the folder Applications through the window that appeared on the screen. Then go to the folder Applications macOS, right-click on the XnView MP icon and select apri per due turn consecutive.
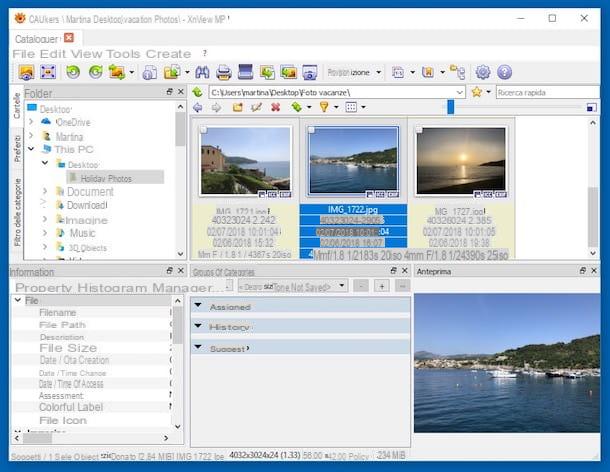
Then click on the button OK and you will finally find yourself in front of the main XnView MP screen. On the left there is the section through which you can select the folders with the images, while on the right you will find the viewer with the thumbnails of the selected files.
At the bottom left there are all the info relating to the selected image (properties, EXIF data, etc.), in the center the categories, while on the right there is a preview of the highlighted photo.
If, on the other hand, you want to make simple changes to your photos or you want to organize them as you think is most appropriate, select them and then use the appropriate tools that you find on the toolbar at the top as well as the items attached to the menu bar. Then, if you want to view a given photo in a larger way, just double-click on it.
PhotoScape X (Windows/Mac)
Another one of the photo programs that I strongly suggest you consider is PhotoScape X. It is a real photo editor for Windows 10 and macOS, free (but possibly available in a Pro variant, for a fee, with extra functions) and very easy to use.
It allows you to edit digital images by applying automatic corrections, effects of various kinds, to crop them, rotate them and much more. It also acts as a "simple" photo viewer. In short, try it now and you will see that you will not regret it!
To use it, first connect to the program's website and click on the button Download with the logo of the operating system you are using next to it. In the case of Windows, the screen will then open Microsoft Store and you will be able to download the program from there, while in the case of the Mac it will open the Mac App Store and the application download will be carried out by the latter.
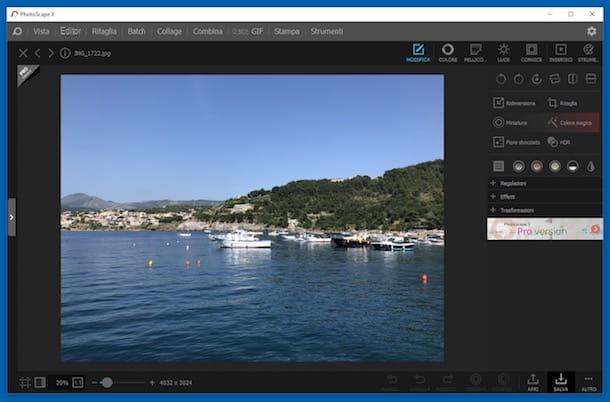
Once the download is complete, start the program by clicking on its icon located in the Start menu (in the case of Windows) and in the Launchpad (in the case of the Mac). Once the software window appears on the desktop, choose the type of change you want to make to your photo by selecting the appropriate item from the menu bar: Vista, Editor, Cut out, Batch, Collage e Combines. Then drag, in the central part of the program window, the reference image.
Therefore, use the tools that you see appear in the upper part of the window and on the right to intervene on the chosen image as you think is most appropriate. For example, if you have previously clicked on the item Editor you can use the tools on the right to apply effects, adjust color, light and so on.
In the lower part of the screen you will find the commands to increase or decrease the zoom to cancel or re-apply the changes, to view the original photo, to compare the changes made with the source file, to save the edited image, etc.
FastStone Image Viewer (Windows)
FastStone Image Viewer is undoubtedly one of the best free photo programs available for the Windows side. Easily view, edit and correct digital photos in all major file formats: BMP, JPEG, JPEG 2000, GIF, PNG, PCX, PSD, EPS, TIFF, WMF, ICO, TGA and many camera RAW formats digital.
It is completely in British and has a customizable user interface thanks to interchangeable skins. Among its main features it is worth mentioning the full-screen viewing of photos and the possibility of retouching images by cutting them, resizing them, correcting their colors / brightness / contrast and much more. Also note that it provides quick access to the EXIF information stored by cameras and mobile phones in photos.
To download it to your PC, visit the program's website, click on the button download for free that you find at the software name and then on the one under the heading portable, on the page that opens.
When the download is complete, extract the ZIP archive obtained in any Windows location, start the file FSViewer.exe present inside and press on Run.
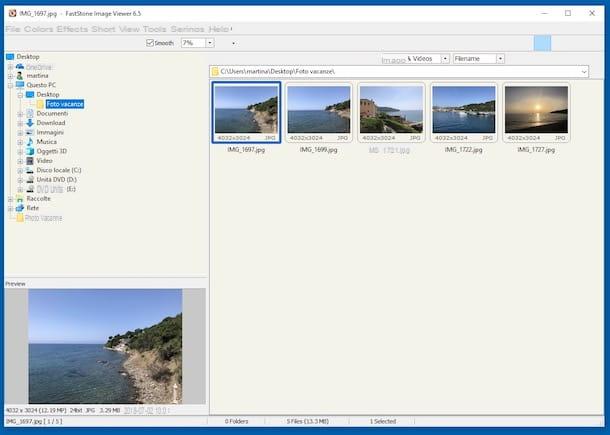
Once this is done, you will find yourself in front of the main window of the program. On the left there is the computer structure with all the various folders that you can open to view the images, on the right there are the thumbnails of the images (which you can view in an enlarged way by double clicking on them), while in the lower left there is preview available.
In the upper part of the window there is instead the menu bar through which you can apply filters to images, perform basic editing operations, add tags to photos, etc., simply by selecting the appropriate items. Further changes to the images can then be made by right clicking on the relevant thumbnail and selecting the desired option from the context menu that opens.
IrfanView (Windows)
IrfanView is a seemingly essential photo viewer but full of advanced features that allows you to view, edit and convert all major graphic file formats together.
It also allows you to save and convert images in batch mode, add text to photos, apply special effects (pixelated effect, contrast increase, etc.) and correct bad shots.
To download, connected to the program's website, click on the button Download which is on the left, corresponding to the correct version of Windows you are using, and presses the button Download Now nella nuova page visualizzata.
When the download is complete, open the .exe file obtained, press on Si and NEXT four times in a row then click on Done but I will complete the setup.
Now, go back to the IrfanView website, select the item Languages at the top and click on the link Installer, in correspondence with the wording city. Then open the downloaded file, click on install and OK.
In the IrfanView window that had opened on the screen, presses on the item Options placed at the top, select Change Language…, click your ITALIAN.DLL from the box on the right and click on OK, in order to translate the IrfanView interface into British.
Now you can finally start using the program. He therefore clicks on the icon depicting the gialla poster at the top left to open the image of your interest and then use the items attached to the menu bar to make any editing operations to the photos.
Using the buttons you find on the toolbar at the top of the program window you can increase or decrease the zoom, view all the various info relating to the photo, print it, export the image in another format, create presentations etc.
NexusImage (Windows)

NexusImage is the ideal photo program for those who want simplicity above all else. It has an interface remotely reminiscent of the macOS Preview application and works without the need for installations.
Despite its essentiality, it includes advanced features such as adding comments to images and viewing EXIF data. It is completely free and is specific for Windows operating systems.
To use it, first connect to the NexusImage website and click on the button Download that you find under the name of the software, in order to download the program on your computer.
At the end of the download, extract the ZIP archive just obtained in any Windows location and start the .exe file inside it. Then click on Run and you will find yourself in front of the main window of the program.
Pigia then on circlet located in the upper left part of the program screen in the center of the desktop, choose the item Open from the menu that opens and select the image you want to view. By doing so, the other images in the same position will also be shown automatically.
In the center of the screen you will therefore find the photo selected previously in an enlarged way, while on the right the thumbnails of the other images. You can quickly switch between photos by using the directional arrows on your keyboard or by clicking on them. You can also use the search field at the top right to search for images by their name.
If you want to view the properties of the photo displayed, make simple editing operations, increase or decrease the zoom level, etc., click again on the circlet which is in the upper left part of the program window and choose the correct option from the menu that appears. You can also bring up the same menu by right clicking directly on the photo.
Photo (Mac)
Are you using a Mac and the photo programs compatible with the “bitten apple” operating system I have already told you about haven't convinced you in a particular way? So, if I were you I would not underestimate the potential of Gallery, the application already included in macOS used, in fact, to view, manage and edit images.
It was developed directly by Apple, is completely free, has a very pleasant user interface and is really very simple to use. It can also be used with the Photo library di iCloud, in order to have all your shots synchronized between the various devices connected to the same Apple ID.
To use it, open the application by clicking on its icon (the one with the multicolor flower on white background) present sulla Dock bar. Once the app's main window is displayed, you can start working on your photos. You can find them all in the center, in miniature. Based on your needs, you can choose to view them by import order, by moments, in collections or by years, just click on the appropriate tabs pertaining at the top.
In the left part of the window there is the library (and related sections), albums and projects, while in the menu bar you will find all the commands and functions to import images and export them, to share them, to play a presentation etc.
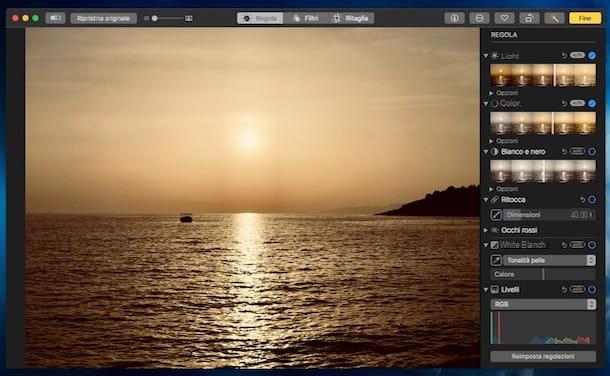
If you then want to view a given image in a larger way, simply double-click on it. By doing so, you can also make changes to your photo by pressing the button Modification at the top right and then using the adjustment bars and tools on the right, after selecting the tabs Rule, filters e Cut out that are high up.
If you want to make general improvements to the image, click on the button with the Magic wand, while to rotate the photo presses the button with the rectangle and the arrow.
Photo programs


