


Have you recently become passionate about the world of photography and are you looking for some software that can be useful to improve your shots? Well, know that you are spoiled for choice! In fact, there are plenty of tools of this type. If this interests you, I can advise you which are, in my humble opinion, the most interesting ones available on the square.
Do you want? Yup? Great! So I suggest you do not delay any longer and immediately get to the heart of this tutorial. Take a few free minutes all for yourself and immediately start concentrating on reading this tutorial of mine, which is dedicated specifically to programs to enhance photos. I already anticipate that there are both for Windows and for macOS and Linux, both free and paid.
How do you say? Would you like to know if there is also some solution to use in the mobile environment? But of course yes, God forbid. In the final part of this guide, in fact, I will show you a whole series of very useful apps that you can use to make your photographs more beautiful and captivating directly from your smartphone and / or tablet. Happy?
Programs to enhance photos
Are you looking for a software that allows you to embellish your PC shots? Then test i programs to enhance photos that you find reported below: I sincerely hope they are able to satisfy you.
Photo (Windows)
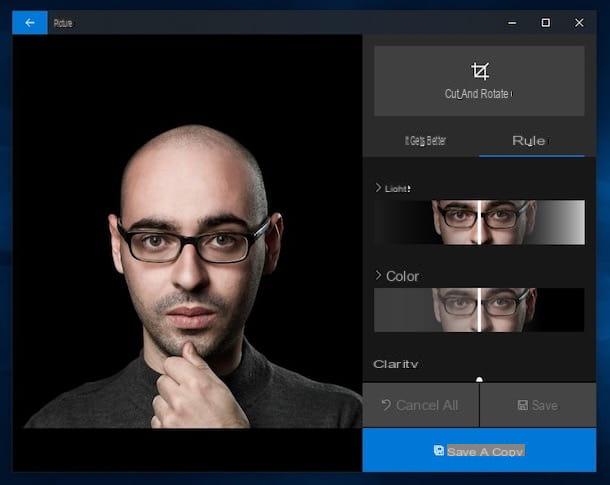
The first among the programs to enhance photos what I want to suggest is Gallery di Windows 10, the application installed "as standard" on the latest version of the operating system from Microsoft, thanks to which you can not only manage and organize your collection of images, but also make basic changes and improvements to the photos.
To use it, call up the Photos application using the Start menu and open the image in relation to which you are interested in going to act, through the section Collection or that one Album (after selecting the relevant photo album). If you don't see any photos, it's because you haven't imported them into the program yet. To do this, press the button Import located at the top right.
Alternatively, you can open your photos by taking them from a specific folder, by clicking on the item Folders at the top and selecting the reference path. Also, if Photos is set as the default program for opening images (for more details on this, read my post on how to change the default program), you can also open your photos by simply double-clicking them.
Once the photo to be edited is displayed, press the button with the brush and pencil located on the toolbar at the top of the window, select the item Modification from the menu that opens and use the tools and options on the right to improve it: you can apply filters, crop and rotate the image, adjust light, color, clarity, etc.
When the changes are complete, click the button Save (to overwrite the changes on the current image) or press the button Save a copy (to save an edited copy, in fact).
Photo (macOS)
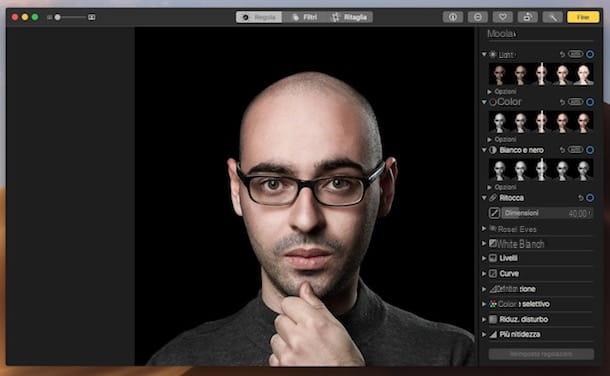
Possiedi a Mac? In this case, similar to what we saw for Windows 10 in the previous step, you can first improve your photos by turning to the application already integrated in MacOS for managing, organizing and editing images: Gallery.
To use it, start the application in question by clicking on its icon (Quella with il multicolored flower) placed on the Dock bar. At this point, if the photo you want to improve is not already in the program library, import it by selecting the item first Fillet in the menu bar and then that Import (or drag it directly with the mouse in the Photo window). If the photo is on your iPhone or iPad, however, you can follow the instructions on what to do that I gave you in my guide on how to transfer photos from iPhone to Mac.
At this point, select the photos you want to enhance from the section Gallery of the app (located in the sidebar on the left) and presses the button Modification located at the top right. Then use the functions and options on the right to change the light, color, red eyes, sharpness, etc. If you want, you can also improve the photo automatically, by pressing the button with the Magic wand present at the top right.
If, on the other hand, you want to apply filters to the photo, select the tab filters placed at the top. To crop the image you just need to go to the tab Cut out (always at the top), while to rotate the image you can press the button with the rectangle and the arrow located on the toolbar.
Keep in mind that all changes will be made directly on the original image: to confirm, click on the button end (top right). If you change your mind, however, you can easily undo your changes by clicking on the button Reset adjustments located at the bottom right.
Focus Magic (Windows / macOS)

Focus magic is a software for Windows and a plugin (for Windows and macOS) with a more than eloquent name. It allows, in fact, to improve photos in digital format (supports all major graphic file formats) by increasing their sharpness.
It is, therefore, intended for all those who have slightly blurred photos and want to cope with it by applying different filters that can be adjusted for intensity and properties. It is paid (it costs 65 $), but it is available in a free trial version that allows you to test all its functions on up to 10 photos.
To use it, visit the Focus Magic website and click on the button Downloada (Win), if you are using Windows, or on that Download (Mac), if you are using macOS.
When the download is complete, if you are using Windows, april il .exe file ottenuto e, nella finestra che compare sul desktop, clicca sul pulsador Yes. In Seguito, select the voice I accept the agreementclick on your button Next (three times in a row), on that install and, finally, presses on the buttons OK e Finish, but will conclude the setup.
At this point, start Focus Magic using the shortcut that was added to the desktop, select the photo on your computer you want to improve, click on the drop-down menu Filter located on the left and select the option Focus (if you want to fix a blurry photo) or that Fix Motion Blur (if you want to correct a blurred photo). Afterward, click anywhere on the image to preview the changes (visible at the top left).
I would also like to point out the possibility of using the menus Blur Width e Amount at the top of the window to adjust the percentage of blur to be corrected and the intensity of the correction to be applied to the photo.
Once you have the desired final result, click on the button with the green light located at the top right, in order to start the actual optimization procedure. Later, you can save the edited photo by clicking on the menu Fillet and selecting the voice Save as.
Se, invece, stai using MacOS, extract theZIP archive obtained and moves the plugin contained within it to the path indicated on this Web page, depending on the version of Photoshop used. Later, you can start using Focus Magic from Photoshop by calling up its menu filters.
Adobe Photoshop (Windows / macOS)
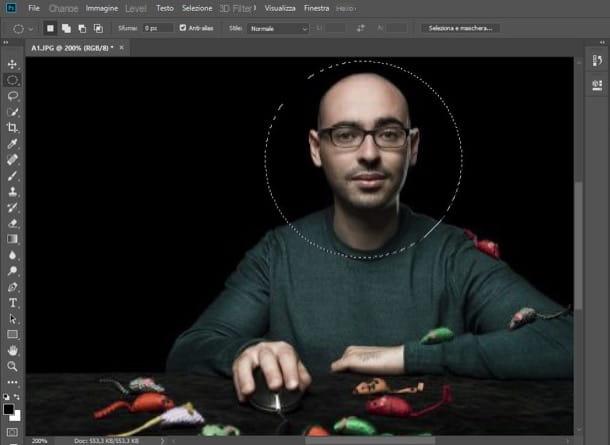
Photoshop is a name that has now become synonymous with photo editing all over the world: it is, in fact, the most advanced solution for editing, retouching and correcting photos in digital format available for Windows e MacOS. It combines unsurpassed capabilities and functions with an easy-to-understand user interface that allows everyone, even novice users, to edit their photos to improve or transform them in various ways.
It allows you to adjust the contrast, brightness and colors of your photos, increase the sharpness, eliminate red eyes, camouflage skin defects and much more. It is paid (it is available as a subscription version at the basic price of 12,90 euros / month), but it is available in a free trial version that allows you to test all its functions for a period of 7 days.
To download it to your computer, connect to the program's website and follow the instructions I gave you in my tutorials on how to download Photoshop and how to buy Photoshop. To use it to improve your photos, however, considering the versatility of the program and the many functions offered, I refer you to reading my detailed guide on how to use Photoshop.
GIMP (Windows / macOS / Linux)
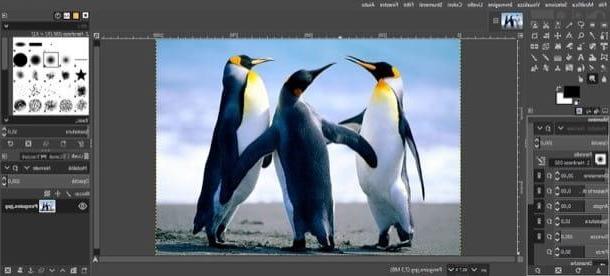
GIMP is defined by many as the best free alternative to Photoshop. In fact it is a free and open source photo editing program available for Windows, MacOS e Linux which offers the user many of the tools made available by the award-winning solution from Adobe.
Thanks to its numerous built-in filters, it allows you to enhance your photos and modify them in any way. It is completely in British and has a user interface divided into panels, which manages to put the user at ease after very few uses.
To download it to your computer, connect to the program's website and follow the instructions in my guide on how to download GIMP. As for the use, since this is also a software full of useful functions to improve images, I invite you to refer to my guide dedicated specifically to how to use GIMP.
Programs to enhance photos online
“Traditional” software aside, did you know that gods also exist programs to enhance photos online? No? Well, now you know. You can use them directly from your browser window, without having to download absolutely anything to your computer. If this interests you, go ahead and read. You will find reported what I believe to be the best solutions in the category below.
Photopea
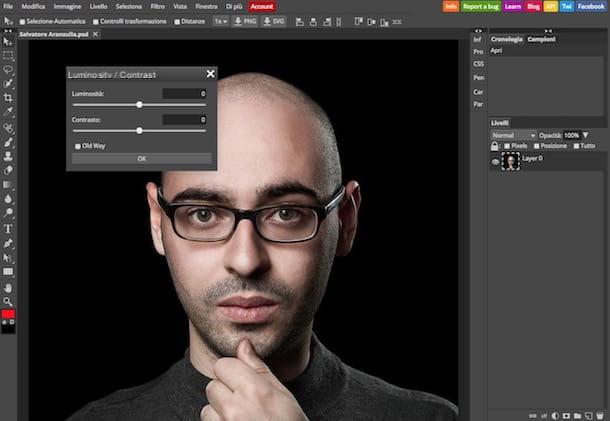
Photopea is an advanced editor for editing and enhancing photos that integrates functions quite similar to Photoshop. It therefore lends itself to use both by newbies in terms of photo editing and by more experienced users. It does not require registration to work and can be used without having to install any plugins on the PC. It's free, but it's available in a paid version (with a base price of $ 9 / month) that allows you to remove ads.
To use it, connect to the service's website and click on (X) located at the top right to remove the welcome message that appears on the screen. Next, translate the site interface into British by selecting the item cityno from the menu More > Language placed at the top. At this point, select the item apri from the menu Fillet (top left) and import the photo on which you intend to intervene.
Now, choose one of the tools placed on the toolbar located on the left and intervene, through the latter, on the photo displayed in the center of the work area. Further commands and functions can then be found in the top menu. In this regard, to modify parameters such as contrast, brightness, etc. of the shot, I would like to point out that you may find the tools in the menu useful Image placed at the top.
When you are done making changes, click on the menu Fillet (top left), select the item Export as, indicate the output format you prefer among those in the list, adjust (if you want) width, height and quality and click on the button Save. Done!
BeFunky
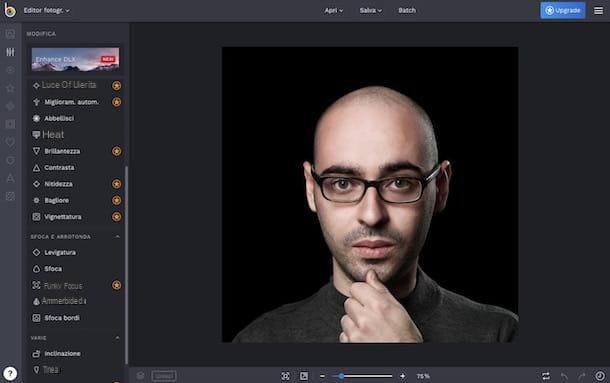
As an alternative to the online service above, I recommend that you consider using BeFunky: it is a renowned online solution that integrates useful tools not only for retouching photos, but also for creating collages and doing small graphic works. It is free, but eventually it is available in a paid version (with prices starting at $ 6,99 / month) that allows you to access an ad-free workspace, have dedicated support available and much more.
To use it, connected to its main page, click on the button Photo Editor located at the top, expand the menu apri always located at the top, on the next screen, and select the source from which you want to take the photo to improve.
Once upload is complete, use the buttons on the left side of the BeFunky screen to choose the tools and effects to use to improve your photo: the button Modification it allows you to intervene on the color, on the blur etc .; that Effects to add artistic effects to the image and so on.
Once you have the desired final result, save the edited photo by clicking the button Save placed at the top. From the menu that opens, choose the saving option you prefer, select the output format that best suits you and click on the button Save To finalize the procedure.
App to enhance photos
As I told you at the beginning of the article, it is possible to make various kinds of improvements to the photos even on the move, using some applications for smartphones and tablets. If this interests you, below you will find the ones that, in my opinion, are the most useful app to enhance photos to Android e iOS. Try them now!
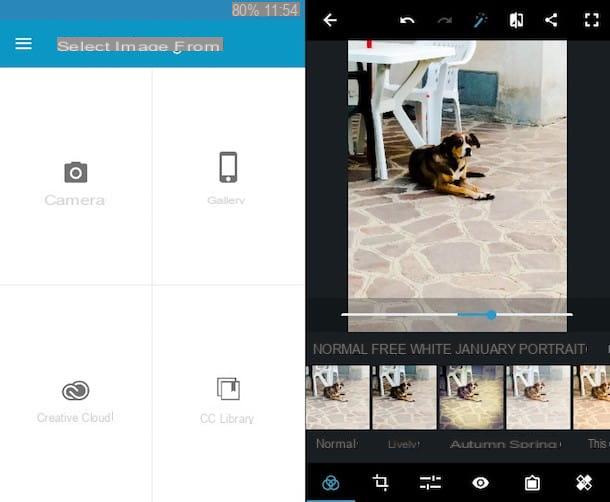
- Snapseed (Android / iOS) - free app made by Google that includes various tools and functions thanks to which it is possible to hide the defects in the photos, calibrate the images by adjusting the exposure, color, contrast, brightness etc. It also integrates many beautiful filters. What more could you want?
- Adobe Photoshop Express (Android / iOS) - zero-cost application made available by Adobe that allows you to intervene on images by changing contrast, exposure, balance, sharpness, temperature, brightness and many other parameters. It also includes a variety of beautiful effects and pretty cool frames.
- Photo editor (Android) - free app for Android devices only that offers the possibility to access a fairly complete photo editor through which to intervene on the shots and optimize them.
For more details and insights about the apps I have just reported to you and to find out more, I invite you to refer to my guide specifically dedicated to applications to improve photos.
Programs to enhance photos


