


A friend asked you to pass him the photos taken on your mobile at that event you attended together, and he gave you his USB key to make the transfer. At this point, however, you asked yourself how to download photos from mobile to stick, since your smartphone does not allow direct insertion of "classic" USB storage devices, and you fear that this is too advanced for your computer skills.
I am very happy to tell you that this is not the case, on the contrary: using a computer or some "special" adapter, you can perform this operation quickly but, above all, extremely simple! There are actually several methods for making the transfer, and I will explain them all to you in the following lines. So, whether you have a computer or not, and whether your smartphone is equipped with Android o iOS, you will find an applicable solution in this guide.
That said, it's time to get to work: sit comfortably, take a few minutes of your free time and learn with me how to move images from the memory of your mobile to the USB stick. I guarantee that at the end of this reading you will be able to decide for yourself the method that best suits your needs and to apply it with ease. At this point, all I have to do is wish you good reading and good work!
Download photos from Android
You have an Android smartphone supplied and you have a firm intention download photos from mobile to USB stick? I tell you right away that it is a rather simple operation and that you can carry it out in two different ways: in the first method that I am about to suggest, you have to equip yourself with a small adapter, in jargon called USB OTG, which allows you to operate directly from your phone without using a computer. If you are not equipped with it, you can buy it for a few euros directly from Amazon or other stores, paying attention to the model that best suits your smartphone: some smartphones are equipped with a connector USB type B, others of connector USB 3.1. You can distinguish them because the latter, in particular, can be inserted in both verses.
See offer on Amazon See offer on Amazon
As for the second method, however, you need to use a PC and have a USB cable to connect the mobile phone and, subsequently, perform a simple cut and paste operation: below I will clearly explain how to operate in both ways.
Tramite USB OTG
Before proceeding, if you don't already have it, I suggest you install the File Manager + app: it is one of the most comfortable file managers for Android that, in a few taps and with disarming simplicity, allows you to move photos from one position to another.
After downloading and installing File Manager + from the Play Store, connect theUSB OTG adattatore to your mobile phone and insert the USB pendrive where you intend to download your photographs. Wait for a notification about the insertion of a new USB device to appear on your phone, put the check mark in the box Always use this USB device that appears on the screen and selects the button Cancel.
At this point, start File Manager + by touching the icon you find in the list of apps installed on your device, tap the button Allow to grant access to the phone memory, press the icon Main Storage, located in the folder that contains the photos you want to move (for example, the folder that contains the photos taken by the phone's camera is DCIM> Camera), do a prolonged tap on the photo you want to move to access the selection mode (from now on, you can also tap on other photos to select more than one) and press the button Move (to move) or Copy (to copy) located at the bottom.
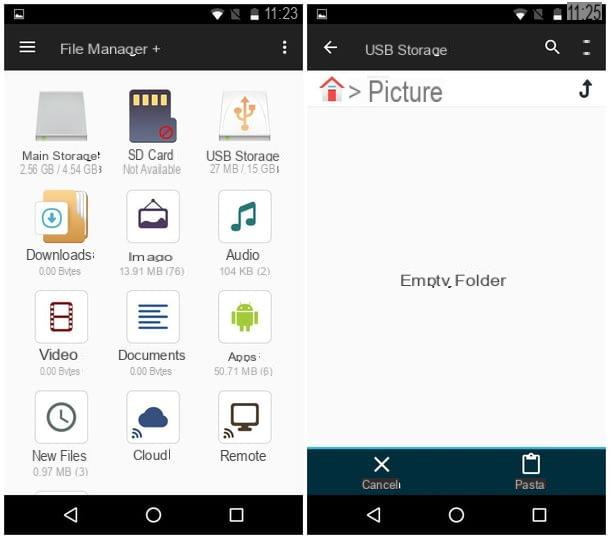
Once this operation is complete, press the icon in the shape of casa located at the top left and still on the icon USB Storage: if it is the first time you access your USB stick, press on OK to allow access to the app, then go to the folder of the key where you intend to download the photos and tap the button paste placed at the bottom. If you want, you can create a new folder dedicated to your photos on the USB device: tap on the icon ⋮ located at the top right, select the items New e Folder, type in the name for the new folder and touch the button OK. You can repeat this operation as many times as you want!
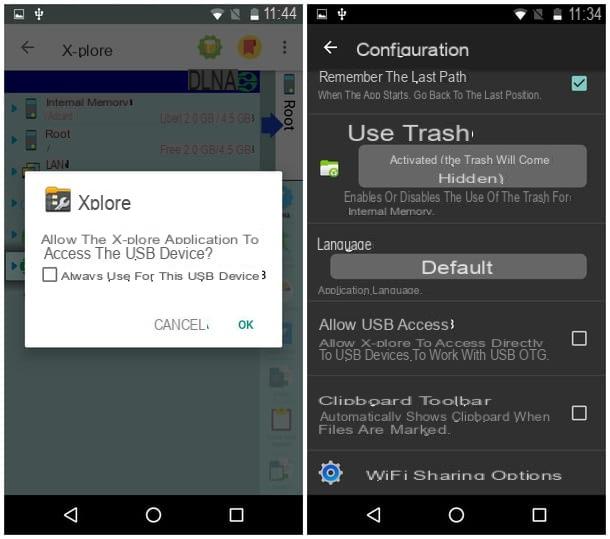
If File Manager + didn't convince you very much, you can refer to the app X-plore File Manager, available for free on the Google Play Store. Thanks to its simple interface and without too many details, you can download your personal images in just a few taps!
Once you have downloaded and installed the app from Google Play, start it from the main screen of your device, tap the button Allow to grant access to the internal memory of your smartphone, then press the button ⋮ at the top right, select the item Configuration from the menu that opens, scroll down until you find the item Allow USB access, check the relevant box, come back back e pulsing sul pulsating OK in the panel that appears on the screen.
Granted the permissions and returned to the main screen of the app, presses on the item Internal Memory, move to the folder containing your photos, set the check mark on the boxes next to the photos (or photo folders) you want to move, then tap the button Copy negli appunti that you find in the right bar and, if you want to move the photos (and not just copy them), put the check mark in the box Move mode (delete source files).
Once you have selected the photos you want to download, scroll down and tap the icon USB, choose the folder in which to download your images (if necessary, you can create new ones by pressing the button Create Folder present in the sidebar) and tap the button Paste. It wasn't difficult at all, was it?
By computer

How do you say? Do you find the transfer with the OTG cable too complex and would you prefer to act in the classic way, using the computer? Don't worry, it's much simpler than it sounds: it all comes down to a simple copy-paste operation, or the use of some tools built into the operating system.
To be clear, if you have a PC Windows, connect your mobile phone to your computer via the USB cable and repeat the same operation with your key. Take the Android smartphone, open thenotify area by swiping from the top to the bottom of the screen, tap the notification for USB options and set the check mark on the folder File transfers. Finally check that the entry Debug USB (present in Settings> Developer options) is not selected and, if it is, remove the check mark from the box. If you don't see this menu, it probably hasn't been activated, so you don't have to worry. If you do not find the “Developer options” item in the Android menu, it means that you have not activated this option on your smartphone and therefore USB debugging cannot be enabled.
At this point, move to the computer, open File Explorer (the folder-shaped icon in the bottom bar), select the icon PC / Computer question from the left sidebar of the window that opened and double-click the icon for your smartphone. Again with a double click, select the icon Internal Memory (o SD, if the photos are saved on the microSD) and then the folder DCIM: copy (or cut) all the photos you are interested in downloading, click on the icon related to the USB key located on the left, go to the folder where you want to move the images (or create a new one) and paste them as usual. If you're having trouble connecting your smartphone to your computer, check out my tutorial on how to connect Android to your PC.
If you have one Mac and not a Windows PC, the simplest way to download photos from your phone to the stick is to use the tool Image capture, already present in the operating system. So connect it smartphone al Mac using the USB cable, access the Android notification area, press the banner USB options and set the check mark on the box Photo Transfer (PTP).

At this point, move to the Mac, plug in the USB stick, open LaunchPad (by clicking on the rocket icon located on the Dock), select the folder Other and click the icon Image capture. Wait a few seconds, select your smartphone from the bar on the left (eg. MotoG3), then click on photo you are interested in (you can use multiple selection by holding down the key cmd while clicking on the photos), expand the drop-down menu Import Into located at the bottom and choose the USB pendrive on which to download the images, then click on Import to acquire the selected images or on Import everything to capture all the photos on your device.
Alternatively, you can open a Finder, select the USB key from the sidebar and drag photos directly on it. Once the copy is complete, if you want, you can delete the photos from your smartphone with the method you think is most suitable.
Download photos from iPhone

Have a iPhone and you don't have a clue how to download photos to your computer? Don't worry, this is a very simple operation and that you can complete even if you are not particularly experienced. In reality you have at least two ways to proceed: the first involves the presence of a computer and the tools integrated into Windows and / or MacOS, the second, on the other hand, makes use of special ones adapters for the expansion of the iPhone's memory. Below I am going to explain both ways to proceed.
By computer
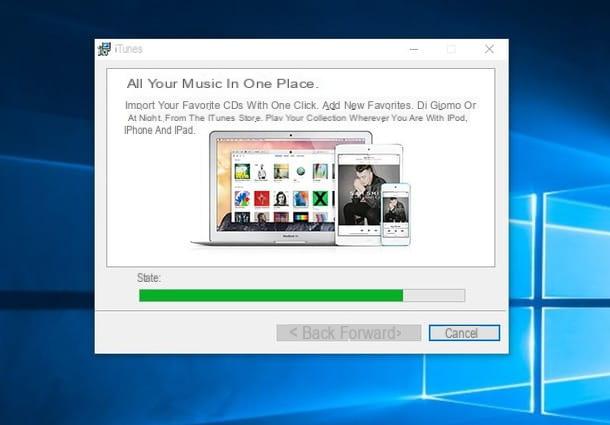
If you have the operating system Windows, the first thing you need to do is install iTunes (if you haven't already) so that the computer can correctly recognize the iPhone. To proceed connected to the iTunes website, click on the button Download and, once the operation is complete, start the package you just downloaded (eg. iTunes64setup.exe). Click on the button NEXT, remove the check mark from the box Use iTunes as the default player for audio files (you can leave it if you want to use this program for opening audio files instead), then click on the buttons Install, Yes twice and end. Finally click on the button Accept to share your library data with Apple, or on No thanks otherwise. If you need more information on this installation procedure, I urge you to consult my guide on how to install iTunes.
Once this is done, connect the iPhone to the computer using the cable USB / Lightning and unlock the screen, tap the button Authorize, enter the security code of your iPhone and wait a few seconds for the mobile phone to be recognized. At this point, you can close iTunes (or follow the on-screen instructions to perform the first sync).
Now, the way to proceed is very similar to what we saw earlier with Android: open a window of File Explorer (the yellow folder icon on the system tray), click on the icon PC / Computer question that appears in the left bar, double-click the icon of yours iPhone and repeat the operation with the folders Internal Storage, DCIM e 100Apple, finally Size (or copy, if you don't want to delete them from your phone) the photos you intend to download.
Still from the sidebar of File Explorer, click on the icon that denotes your USB key, go to the folder where you want to download the photos (or create a new one) and glue them using the Windows context menu or key combination CTRL + V.
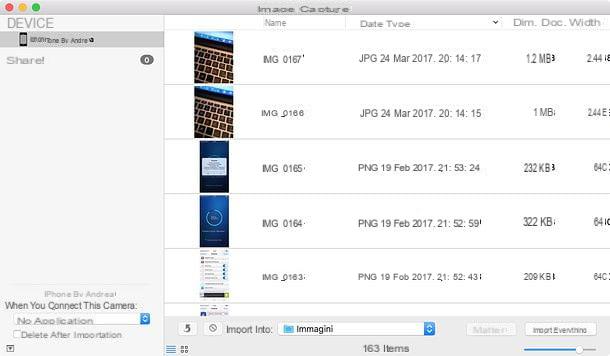
If you have a Mac, the simplest way to proceed is by using the built-in tool Image capture: to proceed, connect the iPhone to the computer, then click on the icon LaunchPad, on the folder Other and finally on Image capture.
Once the program has started, select the name of your iPhone by sidebar, select the photos to download with the mouse (using the cmd to make a multiple selection), click on the drop-down menu Import Into and select the item related to your USB stick. Finally, click on Import to download the selected photos or on Import Everything to download the entire iPhone gallery.
Alternatively, you can download as many photos as you want selecting them with the mouse and dragging them on the USB key: double-click the key icon that appears on the Desktop, create (if you need it) a folder in which to host the photos and, finally, directly drag the photos from Image capture at the window of Finder.
Via Lightning storage devices or portable hubs
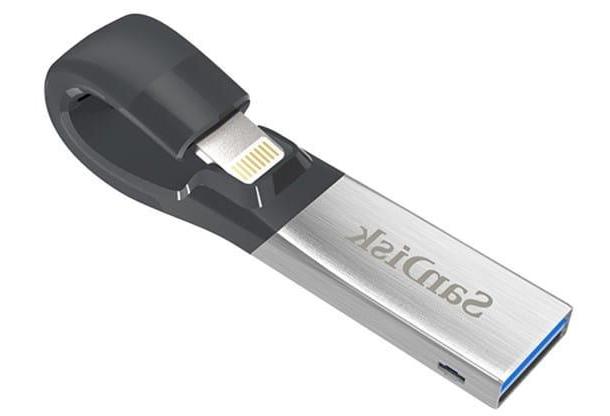
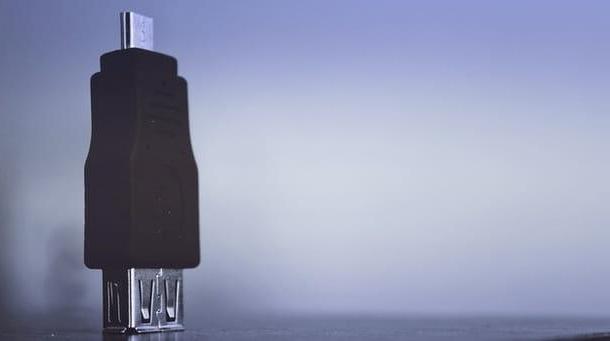
Before explaining how to download photos from your phone to the stick in a "direct" way, I want to tell you that this type of transfer is not possible with the common USB storage devices that you are used to using. This means that, to proceed, you need a particular one key with entrance lightning (specially designed for the iPhone) or a Wi-Fi storage devicethe portable hub file. Below I point out some solutions that are particularly suitable for your purpose.
Vedi offers your AmazonOnce you have purchased what you think is most suitable, all you have to do is install thecompanion app (available on the App Store) inside your iPhone and follow the on-screen instructions to download your photos. Unfortunately, in this case, I cannot be more specific:
Apple does not look favorably on the installation of "external memories" on its iPhone (by the way incompatible, natively, even with microSD), so there are no "standard" iOS procedures to download photos. The specific apps attached to each device can be very different from each other but, in principle, what you have to do is choose the images to download from the main screen of the app itself and confirm the willingness to transfer them.
How to download photos from mobile to stick


