


All modern smartphones and the most advanced cameras use GPS to save the geographic coordinates of each shot taken (unless the user explicitly deactivates the function). This information is saved directly inside the photos and can be easily retrieved from both your computer and portable devices.
With today's guide, we'll see then how to locate a photo on a Google (or Apple Maps) map using some free applications available for Windows, macOS, Android and iOS. These are extremely intuitive solutions that do not require any technical knowledge to be used, so don't waste any more time and find out immediately how they work.
How do you say? Would you also like to find out the geographical origin of some shots that don't have GPS data incorporated? Well, it is quite a complex operation. The hopes of succeeding in such an enterprise are very low, but with a bit of luck and with the "magic" of advanced search engines like Google Images it can be done. To find out more, read on.
How to locate a photo on Windows
If you want locate a photo on a map and using a PC equipped with Windows, you can rely on both internal operating system solutions and external applications.
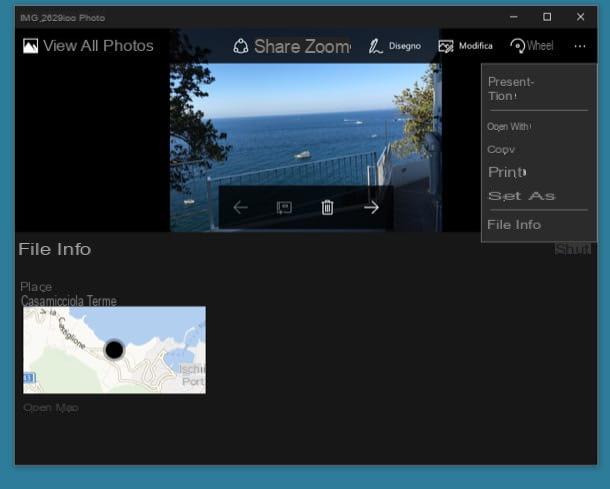
It was used Windows 10, you can read the geographic information included in the photos using the Photos app included “standard” in the operating system. The procedure you need to follow is very simple. After opening the image of your interest in the Photos app (if the Photo app does not start automatically when the image is opened, select the photo to locate with the right mouse button and choose the Open with> Photos from the menu that opens), move the mouse cursor up, press the button (...) that appears at the top right and selects the item File info give the riquadro che si apre.
At this point, scroll down to the bottom of the menu that appears below and you will find the place where the photo was taken marked on a map. By double clicking on the map, you can also enlarge it and better view the location where the photo was taken.
If you are using a version of Windows older than 10 or otherwise do not feel comfortable with the Photos app included in the Microsoft operating system, you can rely on XnView MP. If I had never heard of it, XnView MP is a free image viewer (for non-commercial purposes) that allows you to open all major graphic file formats and includes a bunch of interesting features, including viewing the GPS coordinates of photos via a Google Maps map.
XnView MP is compatible with Windows, macOS and Linux and is also available in a portable version, which can be run on any PC without requiring installations. To download the standard version of the software for Windows, connected to its official website and click on one of the buttons located at the bottom left: Win 32bit setup if you are using a 32-bit operating system or Win 64bit setup if you're using a 64-bit one.
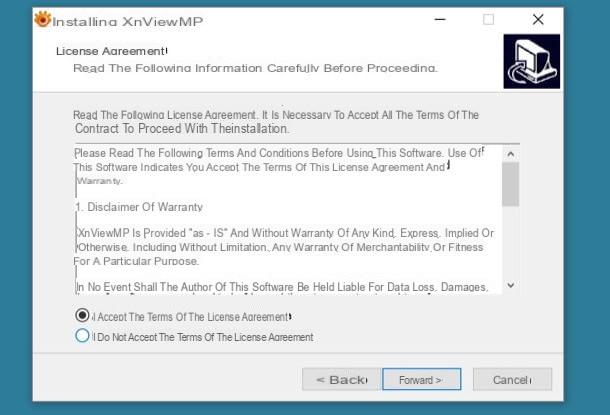
When the download is complete, open the file by double clicking on it XnViewMP-win-xx.exe and, in the window that opens, click first on Yes and then OK e NEXT. Then accept the conditions of use of the software, putting the check mark next to the item I accept the terms of the license agreement, and complete the setup by clicking on first NEXT for four consecutive times and then on Install e end.
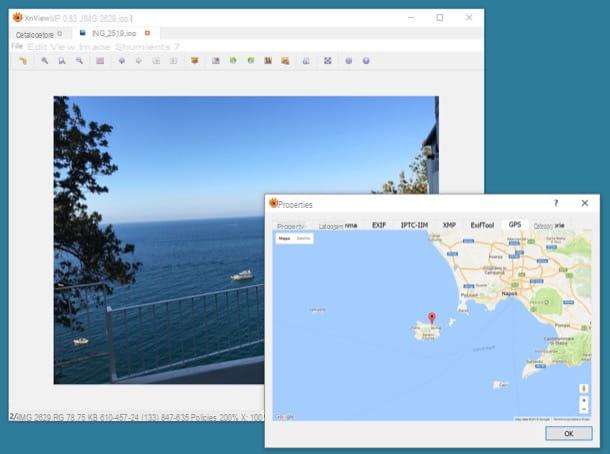
Now all you have to do is open the photo to be located with XnView MP, click with the right mouse button anywhere in it and select the item property from the menu that appears. In the window that opens, select the tab GPS and you will see the location where the photo was taken on a Google Maps map.
If you don't know how to open a photo with XnView MP, know that you have two ways at your disposal: if you want to open a single photo with the program without turning it into the default image viewer on your PC, right click on the photo to be locate and select the item Open with> XnView MP from the menu that appears. If instead you want to transform XnView MP into the default image viewer on your PC, right click on an image belonging to the type of file you want to associate with XnView MP (eg. JPG) and select the item Property from the menu that appears. In the window that opens, click on the button Open with, select XnView MP from the list of available programs and that's it.
How to locate a photo on Mac
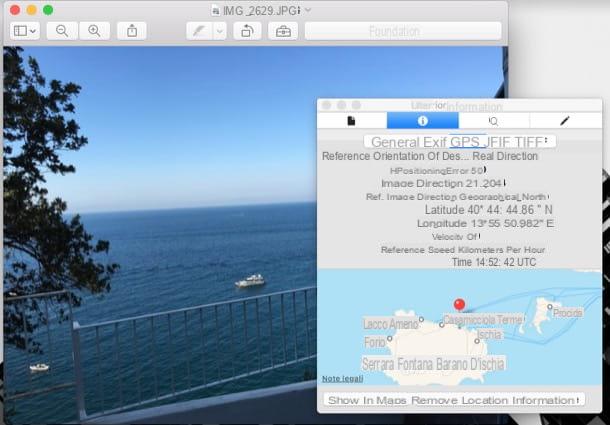
Do you use a Mac? You could also use XnView MP and locate photos on a map as just seen together on Windows. However I advise you to rely on Preview which is already included in macOS and does everything you need.
If you don't believe it, try it now: open the image you want to locate geographically by double clicking on its icon, press the key combination cmd + i on the Mac keyboard (in order to bring up the window with the technical details of the image) and first select the tab (I) and then that GPS. That's all!
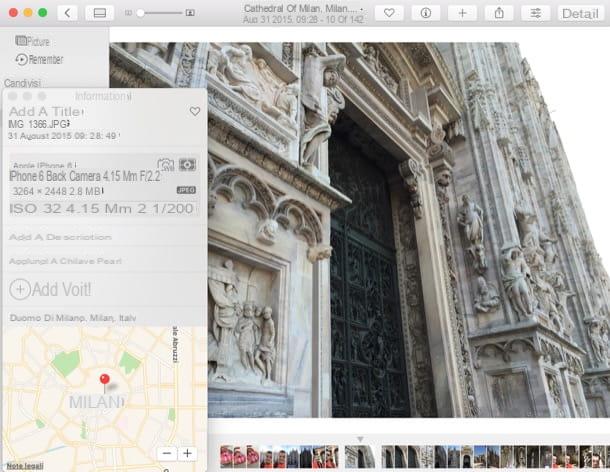
If you intend to locate an image that is part of the Gallery (the default app for organizing photos on Mac, iPhone and iPad), you can get the desired result simply by double clicking on the photo thumbnail and clicking on the button (I) located at the top right.
Also, I remind you that through the search bar placed at the top you can quickly find all the photos and videos taken in a specific location (eg by searching Milan you will be shown all the photos and videos made in Milan). Convenient, right?
How to locate a photo on Android
To find out the geographical coordinates of a photo taken on an Android smartphone, you can use various applications. I recommend a couple of them: one should be included in most terminals equipped with the green robot operating system, while another must always be downloaded separately from the Play Store. In both cases, however, we are talking about free solutions and within everyone's reach.
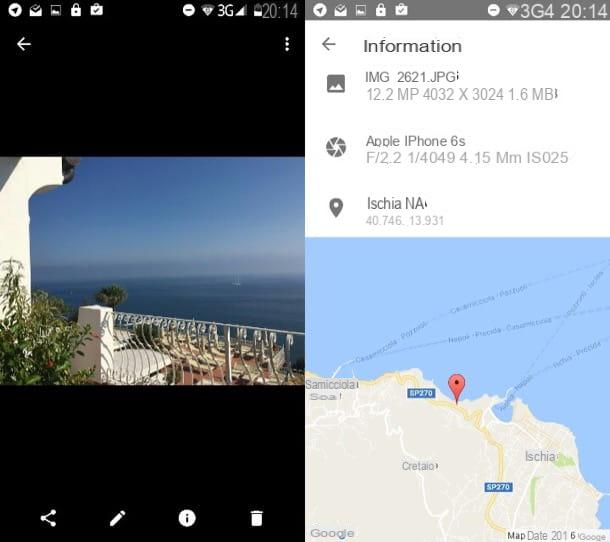
- Google Photo which is most likely already installed on your phone and allows you to view geographic information on a photo on a small map by simply selecting the image from the gallery, pressing the button (I) located at the bottom and scrolling the screen that opens up and down.
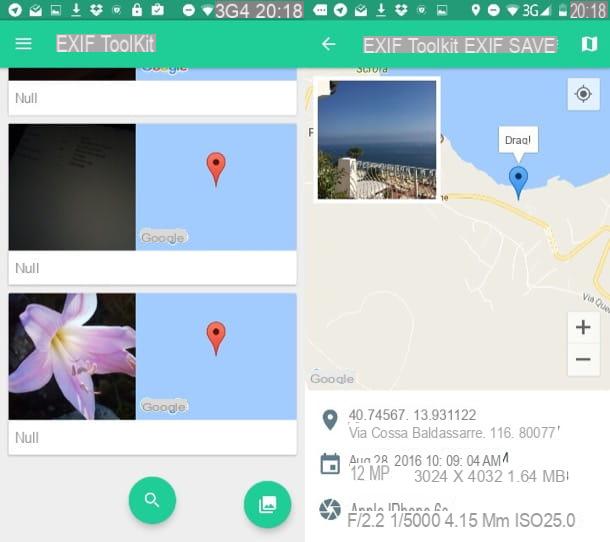
- Exif Toolkit which instead is produced by third parties and, as the name suggests, allows you to view all the EXIF data of the photos in detail. Its operation is very simple, in fact after having installed it just press on thephoto icon at the bottom right, select the folder with the images and choose the shot to analyze. The location where the photo was taken is shown both on the map and in the form of an address.
How to locate a photo on iPhone / iPad
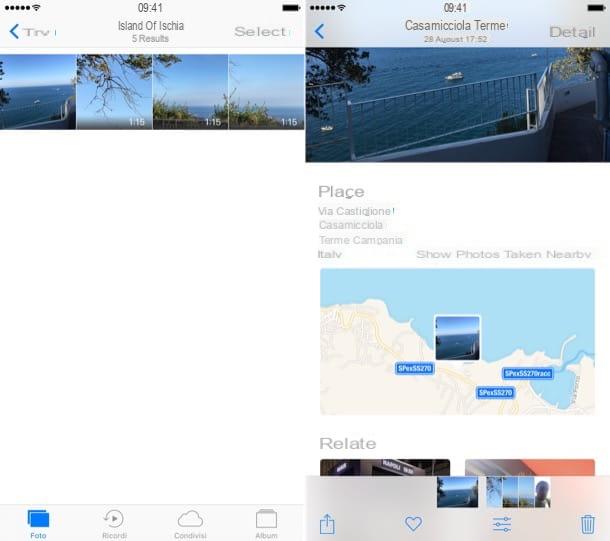
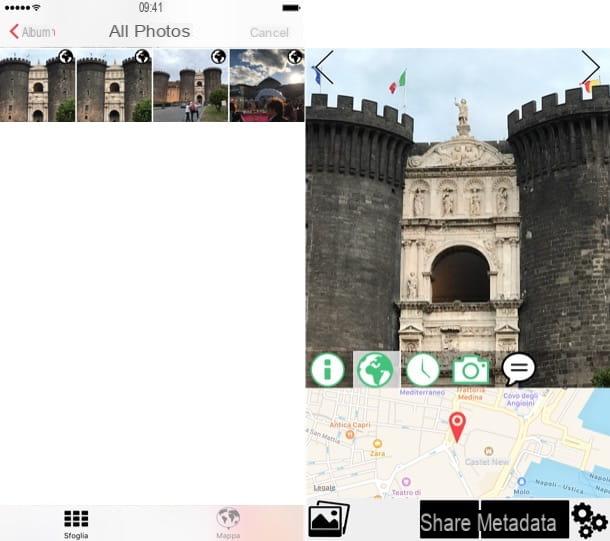
IPhones and iPads also offer different solutions for locating photos. First of all I point out that by opening the application Gallery iOS, selecting a click and making one swipe dal basso verso l'alto a map appears showing the exact location where the photo was taken.
Furthermore, by pressing the icon of the magnifying glass placed at the top you can search for all the photos and videos made in a specific place (eg by searching Ischia you will be shown all the photos and videos made in Ischia) and by going to the card Album of the Photos app and selecting the album titled Places you can view an interactive map with thumbnails of all the photos you have taken in the locations displayed on it.
If you are not comfortable with the Apple Photos app, know that there are handy alternative apps that allow you to precisely identify the location where a shot was taken. Among the easiest to use is Photo Investigator which allows you to analyze in detail EXIF data of photos taken with the "iPhone by" and locate them on an interactive map.
To use Photo Investigator, press the icon of photo at the bottom left, authorize its access to the iOS roll and select the image to locate (you can only choose those with the world icon next to it). Finally, click on the icon of globe And that's it.
How to locate a photo without GPS data
You would like it locate a photo that does not include data relating to the geographical position in which it was taken? As mentioned at the beginning of the tutorial it is a difficult task, but not entirely impossible.
Using the “brain” of Google Images, you can be able to identify the geographic location where a photo was taken by finding images similar to it. For example, if the photo you need to locate was taken in a place where there is a monument that is present in many other photos available online, Google will be able to recognize it and then tell you where the photo was taken.
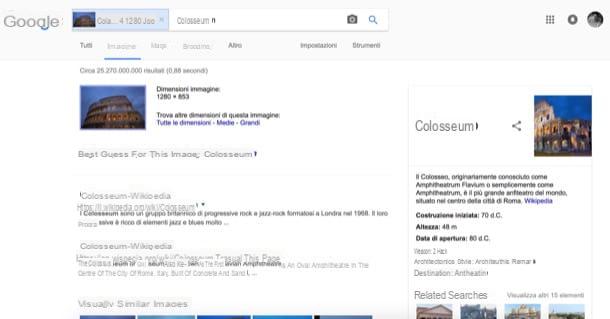
To try to locate a photo through Google Images, connected to the main page of the service, click on the icon camera in the center of the screen and select the tab Search for an image give the riquadro che si apre.
Then click on the button Choose File / Browse, select the photo to locate and wait for it to be uploaded online. If the photo is similar to other images online and Google can identify the content, it may tell you the location where it was taken. Good luck!
How to locate a photo


