


During a recent trip out of town, you made the most of your smartphone's camera, taking tons of photos. You would like to keep a memory of that day and you would like to know how to overlay photos, to make nice montages. If that's the way it is, let me tell you, you had a really good idea; I'll help you in no time at all to carry out this task.
If you are here now and are reading this article of mine, you will certainly be looking for some tools that allow you to overlay photos. On Windows PC and Mac there are several professional software for digital image processing, but I would also like to talk to you about tools that are within everyone's reach: applications for Android and iOS smartphones and tablets.
The spread of smartphones has meant that there is practically an app to solve any type of problem and it is through some apps that I will point out that you will be able to understand how to overlay photos quickly and easily. You will see that, if you follow all the steps that I will show you in this guide, overlaying photos will be a breeze. Are you ready to find out more? Very well! Keep your smartphone or tablet with an Android or iOS operating system at hand and try the tools for overlay photos that I will show you. As always, before we start, I wish you a good read!
Photo Layer – Superimpose (Android)
One of the applications you can use for overlay photos in a simple and effective way it is called Photo Layer Superimpose and it is a popular application available for free for Android mobile devices. The purpose of the application is to allow you to overlay photos and also offers a built-in tool for removing the background, as well as other basic editing tools to change the color tone of the image.
To use Photo Layer Superimpose as an app for overlay photos, you must first download it for free on your mobile device. Then follow the link below to download it directly:
- Photo Layer Superimpose - Download the app for free on Android via the Play Store
Once you have completed the download and installation of the app, open it by touching its icon to see how it works with me.
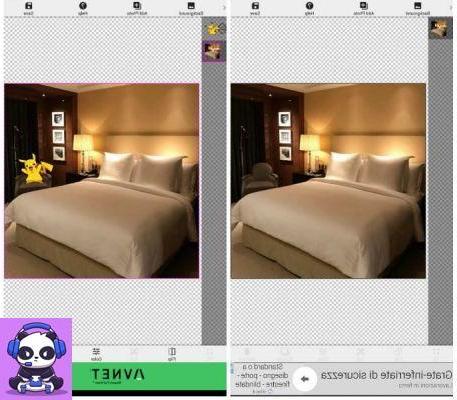
Photo Layer Superimpose is characterized by its minimal user interface to facilitate and speed up the process of overlapping a photo as much as possible. Push the button Load a background image to create the first level, obviously starting from the background. Once the image has been uploaded, you will have some buttons for resizing: you can choose whether to resize the image freehand or through the preset formats in the menu buttons below. When you've resized the image, tap the button Done to confirm. At this point you will need to add a second layer with the image to overlap. To do this, tap the button Add Photo and upload the image to add. Once you have loaded the image that will make up the second layer, you can rotate and resize it, so that it best fits the background image. Using Photo Layer Superimpose you can create and overlay a total of 11 layers.
Would you like to make further changes? PhotoLayer Suprimpose offers some basic editing tools which you can find in the menu below: Flip, Cut, Color e Shadow. Once you are satisfied with the result, you can save the two layers in a single image; to do this, just press the button Save and then on the button Finish.
PhotoLayer Suprimpose is a free app that, available only for Android, is supported through advertising banners not particularly invasive.
Superimpose (iOS)
One of the best applications you can use for overlay photos it is called Superimpose and is available for free on iOS devices. The application is very complete and is certainly on a par with PhotoLayer Suprimpose, the just mentioned app for Android. The strength of the app is certainly its simplicity of use and immediacy: by using the app it will be immediately clear which tools to use to overlay one or more photos; also the final effect will be quite professional, even if you have used an application with basic editing tools.
To start using Superimpose as a photo overlay app, you must first download it for free on your iOS mobile device: Then follow the link below to download it directly:
- Superimpose - Download the app for free on iOS via the App Store
Once you have completed the download and installation of the app, open it by touching its icon to see how it works with me.
Superimpose also stands out for its simple and minimal user interface but this is undoubtedly its strong point. Often, in fact, applications for image editing come with a user interface with a layout rich in elements, but it is excessively confusing.
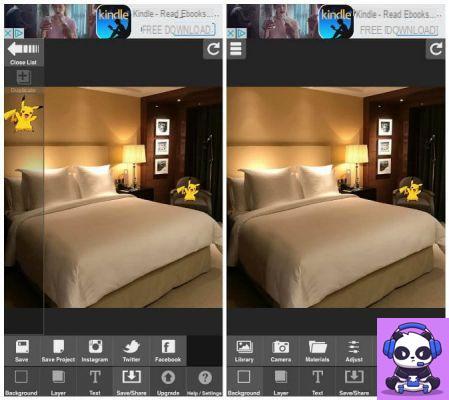
To overlay photos using Superimpose, just start by pressing the button background and the button Library to search your media library for the background image. Once selected, you will have some tools to resize or crop it, being able to choose whether to make freehand changes or through predefined tools. When you're done cropping, press the button end. At this point you will need to select the image to overlay. To do this, tap the button Layer and select the image to overlay from the media library by pressing the button Library. Alternatively, by pressing the button Camera, you can take a photo to superimpose on the spot. Once you've done the basic cropping and scaling for the image you want to overlay, press the button again end to add the image as a second layer.
For each layer created, the app will provide you with some tools for editing: for example, it is possible to blur the edges (Edge Fade), add shading and opacity (Shadow), cut it (Cut) and even lock the layer to prevent it from being accidentally changed (Lids). The instruments Adjust e Stroke, which allow respectively to modify specific parameters relating to the image (brightness, contrast, etc.) and to add an outline, are however paid. Also interesting is the zoom in and zoom out functionality, by double-tapping the screen: useful for zooming in on a specific part of the area to be modified.
Once you have made all the changes and are satisfied with the result, all you have to do is press the button Save / Share. You can choose whether to save the image created on the device memory or whether to save it as a project to be reused. The app also supports direct sharing of the image created on major social networks such as Facebook, Twitter and Instagram.
The version For of the application is paid and allows you to save the image created in high resolution as well as eliminate advertising. Superimpose Pro costs € 1,99. Alternatively, to eliminate only the advertising banners, you can spend only € 0,99.
Paint (PC Windows)
Would you like to learn a overlay photos using a Windows program? The simplest and most immediate tool you can use to overlay photos is also the most underrated: Paint. The default Windows software allows you to superimpose two or more images with ease. In the following lines I'll explain how to do it; you will see that it will really be a breeze.
To overlay photos, using Paint, the first thing you need to do is launch the program via its shortcut located in the Windows Start menu. You can find it by pressing the button Home (the flag icon located in the lower left corner of the screen) or by typing its name in the menu that appears and clicking on the first search result.
Once Paint is started click on the button Fillet located at the top left, select the item apri from the menu that appears and open the first photo that will form the background on which you will superimpose a second photo. The first photo does not have to have any particular requirements and can be of any format and any size, while the second photo will be better if it has transparent background so that the result of the overlap is professional and satisfactory.
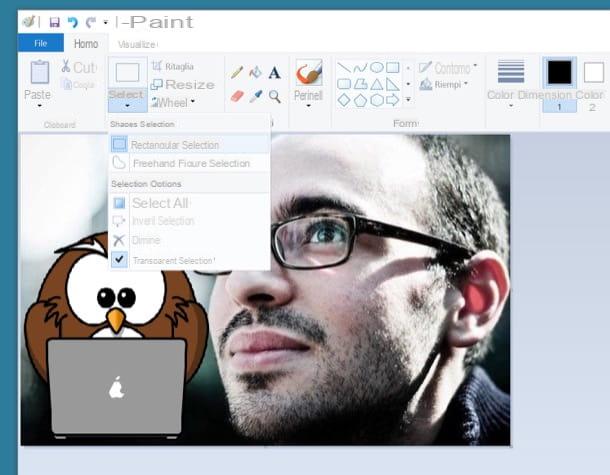
Once the first background image is open, you will need to insert the one you want to overlay. Then click on down arrow located under the button Paste (top left), select the item Paste from from the menu that opens and select the image with a transparent background to insert inside your photo.
As soon as inserted, the image that you will have superimposed will have a white background; don't worry, you can easily delete it by clicking on the down arrow located under the button Select. Click on the entry Transparent selection give the menu to compare.
At this point the most is done and you just have to position and resize the overlaid image as you wish. When you are done with overlay photos with Paint and you are satisfied with the result, you can save your composition by clicking on the menu Save with name. Did you see how easy it was?
Other programs for overlaying photos
As we have just seen, it is possible overlay photos even by simply using the Windows software, Microsoft Paint. However, this tool is to be considered basic. If you are looking for tools that allow you to obtain more professional results, you can turn to advanced software such as Photoshop or GIMP. I'll tell you about it briefly below.
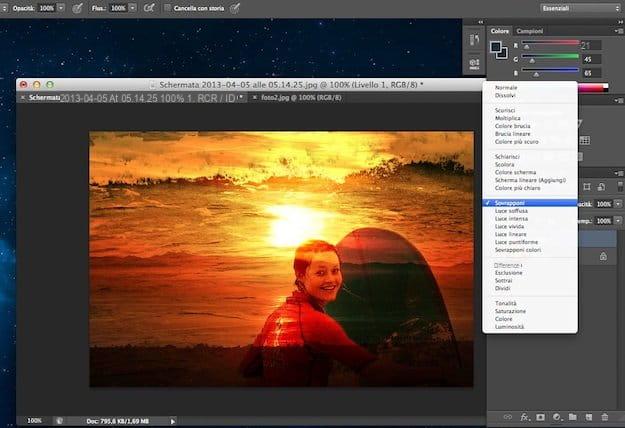
- Photoshop: Photoshop is the software of the famous Adobe Systems Incorporated company available on PC and Mac OS that provides you with numerous advanced and professional tools for editing and overlaying images. It is one of the most popular digital image processing software. However, it is software paid.
- Gimp: Gimp is a very valid photo editing program free and open source that you can use on Windows PC, MacOS and Linux to overlay photos. Its user interface is much simpler and more intuitive than Photoshop but the tools provided are just as good and professional.
If you want to learn more and want to find out how to overlay your photos using GIMP or Photohop you can read my previous articles on how to overlay two images with Photoshop, how to blend two images with Photoshop and how to overlay photos with GIMP: there you can find all the information you need.
How to overlay photos


