Have you just installed the trial version of Photoshop and would like some advice on how to get started with this powerful photo editing software? Perfect. I would say that you have come to just the right place.
With today's guide we will find out how to photoshopped photos using some of the program's basic functions, such as color and brightness correction, skin blemish removal, photo rotation, artistic filter application and more.
Of course I can't promise you that you will become a photo editing ace - for that you will have to study and practice for a long time - but thanks to the indications I am about to give you you will start on the right foot, yes.
Adjustment of colors, brightness and contrast
If you want to learn how to photoshopped photos to best balance the colors, brightness and contrast of your shots, you need to go to the menu Image and choose one of the items available in the submenu Adjustments.
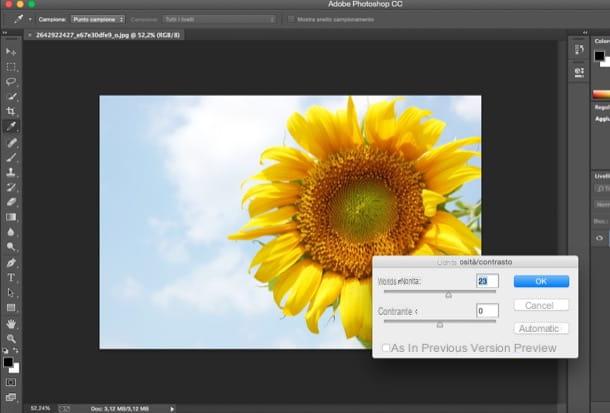
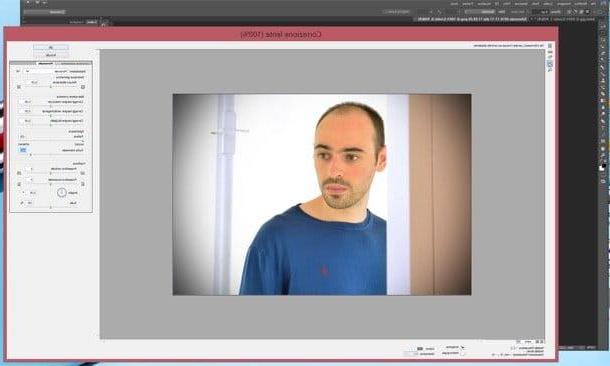
- Brightness / Contrast - is a panel that allows you to balance the brightness and contrast of the image by means of two convenient adjustment bars. It also includes the Automatic button which leaves Photoshop to adjust both values automatically.
- Shadow / Luci - a panel very similar to that for adjusting brightness and contrast that allows you to act on the amount of shadows and the light factor of the photos.
- Hue / Saturation - allows you to turn the chromatic tone of the photo towards various colors and to adjust the saturation, that is the intensity, of the colors themselves. Using the drop-down menu located immediately above the adjustment bars, you can choose whether to operate on all the colors of the image (Composite option) or only on the tones of certain colors, such as red, yellow and green.
- Curves - is one of the most powerful and versatile functions in Photoshop, but also one of the most difficult to master. Using special graphics, it allows you to act on the entire tonal range of the images, in order to adjust the lights and shadows of each color channel.
- Color balance - serves to balance the colors of the photo. It looks like a panel with three adjustment bars (each of which relates to a different hue) and options for acting on the shadows, highlights and midtones of the image.
Of course there is no magic recipe for using these tools: each shot has different characteristics and therefore requires a different treatment as regards the balance of colors, brightness and contrast.
In the early days, if you want to make your life easier, you can try using the functions Automatic tone, Automatic contrast e Automatic color available in the menu Image of Photoshop that provide to adjust these three parameters in an optimal way without you having to lift a finger. They are not foolproof, but they often help.
To learn more about these topics, I invite you to also read my guides on how to balance white with Photoshop, how to liven up colors with Photoshop and how to opacify a photo with Photoshop.
Rotating and resizing photos
After importing some photos to your PC, did you notice that some of them show upside down? In the menu Image Photoshop's sub-menu is also available Image rotation which allows you to rotate the photos in any direction and to "mirror" them (using the voice Flip Horizontal Picture to flip the photo horizontally e Flip Vertical Picture to flip the photo upside down).
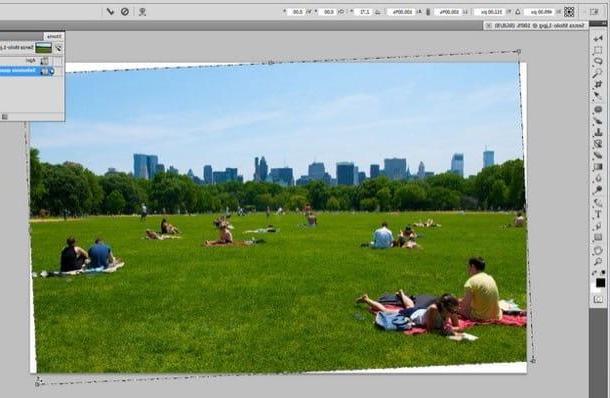
Did other shots come out a bit crooked? Press the key combination Ctrl + A on your PC keyboard (cmd + a on Mac) to select the image in its entirety and select the item Wheel from the menu Edit> Transform of the program.
If, on the other hand, you need to shrink a photo to publish it online, calling the function Image size from the menu Image Photoshop you can specify Width e Height to be taken on by your shot.
Find more info on the functions just mentioned in my tutorials on how to flip a photo with Photoshop, how to resize an image with Photoshop, how to straighten a photo with Photoshop and how to crop an image with Photoshop.
Removal of imperfections, writings and unwanted objects
Would you like to use Photoshop to remove moles, wrinkles, skin blemishes and other small imperfections (if we want to call them that) from your shots? It is not difficult.
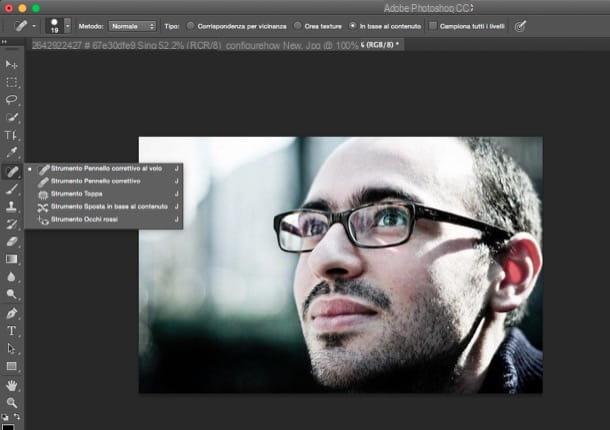
All you have to do is "take" a small piece of skin adjacent to the blemish to be removed and apply it to it. How? There are various tools you can use, one of the easiest to handle is the Spot Healing Brush which does all the work automatically.
To operate the Healing Brush on the fly you need to right click on the icon plaster you see in the Photoshop toolbar (on the left) and select the item related to the tool from the menu that opens. After that you need to adjust size e hardness of the brush using the appropriate menu located at the top left (the one with the ball icon and the number below) and act directly on the mole or wrinkle to be removed. More details are available in my post titled “how to remove pimples from a photo“.
As for unwanted writings and objects, you can instead rely on the function of intelligent cancellation of Photoshop that automatically fills the removed elements with adjacent image zones. It works especially well when the objects to be removed are located in an area of the photo that is not "crowded" or in any case not rich in particular details (eg a lawn, the sky).
How to use? Nothing easier. Activate one of the selection tools (ex. Rectangular selection o Bow) from the Photoshop toolbar, select the area of the photo to delete and press the key Canc on the computer keyboard (Backspace on Mac). In the window that opens, set the option Based on the content give menu to tendin Use and click on OK.
In the event that this technique does not ensure the desired result, you can act with precision using the tool clone stamp. I have explained to you in detail how to do it in my guide on how to clone with Photoshop.
Did you find that in some photos you came with red eyes? To solve the problem you have to operate the Red-eye tool by right-clicking on the Healing Brush tool icon in the Photoshop toolbar and selecting the eyes of the subject of the photo.
With Photoshop it is also possible to correct the color of the teeth and hide the "bacon". How? You can find everything in my guides on how to whiten teeth with Photoshop and how to slim down with Photoshop.
Selection, photomontages and caricatures
You would like to find out how to photoshopped photos to make funny photo montages or caricatures of your friends? So first you have to learn how to select an object precisely and how to cut it out from the original image without cutting it or taking excess portions of photos.
It is not a very simple thing but thanks to some advanced Photoshop features it is possible to obtain good results in a short time. What I recommend you do is activate the tool magnetic loop by right clicking on the icon loop and select the object or person to cut out by "tracing" its edges with the mouse (the selection will automatically rest on them).
Next, click on the button Refine Edge which is located at the top right and use the adjustment bars in the window that opens to refine the selection (helping you with the real-time preview of the final result). For more detailed information read my tutorial on how to select an object with Photoshop.
Once you've made your selection, you can copy the cutout person or object and paste it onto another background to create photomontages. For a practical example of what I'm saying check out my guide on how to change the face of a photo.
If you prefer caricatures to photomontages, select the item Liquify from the menu Filter Photoshop and, in the window that opens, use the tool Swelling to zoom in or the tool Piega to make the various parts of the face of the person in the photo smaller. Find more precise instructions in my guide on how to warp photos with Photoshop.
Artistic filters
Photoshop also includes a wide variety of art filters that you can use to turn your photos into small digital works of art. To go through them all (and apply them) all you have to do is go to the menu Filter> Filter Gallery> Artistic.
For a practical example of how to use some of these filters, read my posts on how to vignette in Photoshop, how to make HDR in Photoshop, how to stylize a photo in Photoshop, and how to fix a blurry photo in Photoshop. Also take a look at the tutorial in which I showed you how to use Photoshop to learn more about the functioning of some of the tools mentioned in this article.
Photo used in the article: Sunflower
How to photoshoot photos