


My love for photos is limitless: I like to squeeze them, twist them and transform them into true works of art worthy of being exhibited in a museum. Sure, I'm not an artist, but retouching images is one of the things I do best. I'm especially crazy about adding new elements, like stars, hearts and more, to my photos. Also filters and various effects are my passion, they manage to give a decidedly more artistic and captivating touch to the shots. The result is in fact always guaranteed.
The problem, in most cases, however, lies in the fact that not everyone is good at using special image editing programs or in any case cannot or do not want to install new resources on their computer. So why not resort to the use of special Web services that are very easy to use, even by the less experienced in the field, free and accessible directly and comfortably from the browser? I am sure that in this way you too can be able to beautify and decorate the photos in the best possible way. If you are interested in this, I therefore recommend that you read this tutorial of mine dedicated to how to retouch photos online for free through which, in fact, I will speak to you in depth about the thing, advising you which are the best online resources in the category and how to exploit them.
Then? Do you want'? Yup? Great. I therefore suggest not wasting any more time chatting and immediately taking action. Make yourself comfortable in front of your trusty computer, dedicate a few minutes of your precious time to reading this article, connect to the online services that I am about to tell you and put into practice the relative instructions for use. In the end, you will see, you will be able to say that you are very happy and satisfied with everything. Have fun!
Photopea
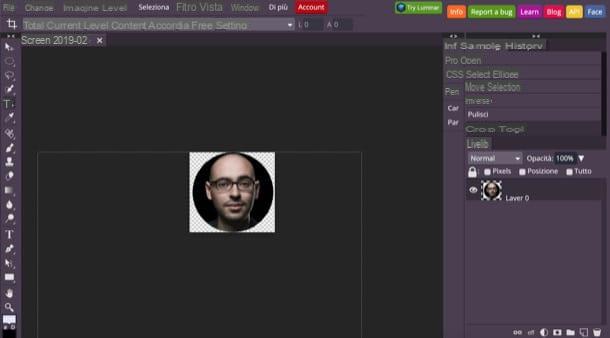
One of the first solutions that I invite you to try to retouch photos online is Photopea, a free service that can also be used without registration and without installing additional plugins, since it was developed in HTML5. Before explaining how it works, I would like to tell you that on its page there are advertising banners that you can remove if you want by subscribing to its Premium version, which starts at $ 9 / month.
To edit a photo with Photopea, linked to its home page, click on (X) that appears at the top right to close the welcome window and, if necessary, translate the site interface into British by selecting the item cityno from the menu More > Language (in alto to destra).
Pray, select the voice apri from the menu Fillet located at the top left and import the photo you want to retouch. Then use the various tools located in the Photopea toolbar to edit the image: after selecting one, you can adjust the degree of intensity from the menu located at the top and use it by acting directly on the photo located in the work area on the right. .
As you have already noticed, Photopea also allows you to manage image layers from the panel Layers located on the right side of the page and even manage the history of changes made from the pane Story. Surely these features of the service will be useful to you, especially when you are dealing with somewhat complex jobs.
When finished, save your work by selecting the item Export as from the menu Fillet, select the output format you prefer (eg. PNG, JPG, etc.) and presses the button Save to complete the download of the modified file.
Blinge
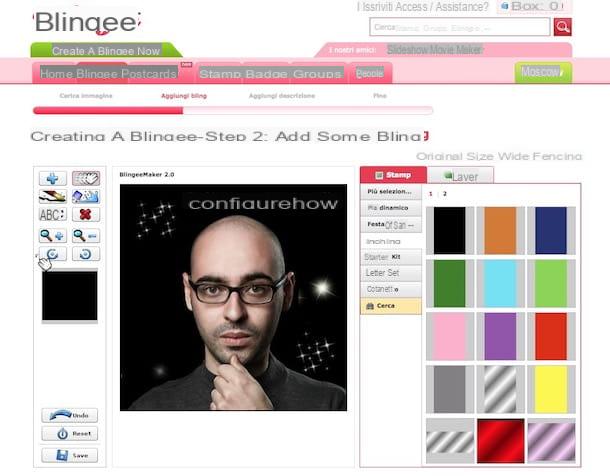
Another useful resource for free online photo retouching that I want to suggest you try is Blingee. It allows you to embellish the images by adding decorative and personalization elements of all kinds, especially the glittreates that are so crazy on the Web. The only thing to take into account is that the edited images become public in addition to the fact that service you need to create a dedicated account and that you need to have Flash Player (for more info, read my post on how to download Flash Player).
To use Blingee, the first thing to do is to log on to the service's website and click on the green button Create a Blingee now!. At this point, click on the button Open File / Choose File and select the photo on your computer you want to retouch. If, on the other hand, you want to act on an image that is online, click on the tab URL and typing the relative link. The same goes if the image you want to intervene on is on Facebook: click on the relevant tab, connect to your profile and select it. Then click the button Create a Blingee.
In the web page that opens, click on the entry Your image is ready, Click here to continue to the next step to continue. The Blingee workspace will then load with the photo you chose. To add a special effect to your photo, click on it at the bottom of the workspace.
At this point, click on the button "+", present in the toolbar on the left, and then in the point of the photo where you want to insert the special effect. If you want you can make a given effect the background of your photo: after selecting it, click on the button in the shape of overturned bucket and then in the background of your photo.
To move a decorative element, however, you have to press the button in the shape of hand present in the toolbar on the left after which you have to click on the reference element and place it where you deem most appropriate. If you select the button in the shape of "X" red, you can delete the decorative elements by selecting them instead.
If instead you want to add some writings, click on the button ABC on the left, select size and font, click where you want to write in the photo and type your text. The toolbar on the right allows you to choose the color instead.
When you are satisfied with the result, press the button Save present in the toolbar on the left. In the web page that opens, click on the entry Your image is ready, Click here to continue to the next step.
Finally, give your creation a title in Title and write a short description in Description. Finally click the button Hello, fill out the form to create your account on the service and then click on the image to view the various download and sharing options.
iPiccy
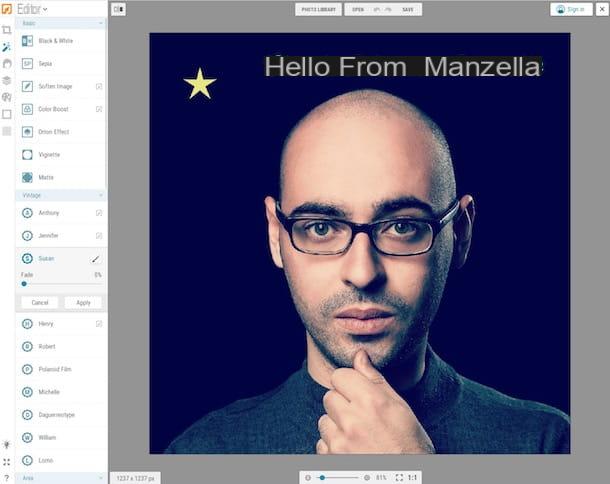
Another nice free online photo retouching service that I think you should try is iPiccy. This is a resource that allows you to access a complete and well-structured online photo editor but at the same time very easy to use. Even in this case, however, you need to have Flash Player on your computer.
To use it, connect to the home page of the service's website and cycle on the button Edit a Photo that you find at the top then press the button Open who always stands up and choose computer from the menu that opens to take the photo on which you want to work from the PC. If the image to be edited is on the network, select instead Web image and type the relative link, while if you want to take one at the moment with the webcam choose Webcamin fact.
So use the left sidebar and the buttons it contains to make all the necessary changes to your photo: by clicking on Auto fix you can leave to iPiccy the task of automatically adjusting the parameters of the photo (brightness, colors, etc.), by clicking on Resize image e Crop picture you can resize or cut the image etc.
The buttons located further to the left of the sidebar instead allow you to access the tools and commands available to apply various effects to the photos (Photo Effects), to retouch faces (Retouch), to add various design elements such as texts, stickers etc. (Designers), to draw freely on the image (Painter), to add frames (Frames) and texture to taste (Textures).
In all cases, when you add elements to the image you just need to select them to see a special menu appear, always on the left, through which to manage all their properties. As for the effects and various tweaks, all the necessary adjustments can be made using the submenu that opens automatically after selecting the resource to use.
If you then want to undo or redo the latest changes, you can use the buttons with the arrows that stand at the top, while clicking and holding the button with the i two squares always present in the upper part of the screen, on the left, you can compare your photo before and after the changes.
When you are satisfied with the result, you can save the edited image on your computer by clicking on the button first Save and subsequently on My computer from the menu that opens. If you want, you can also choose the option Facebook to share the photo on Mark Zuckerberg's social network.
Polarr

In an article all about how to retouch photos online for free it is practically impossible not to mention Polarr. Haven't you ever heard of it? Strange, it is a very famous resource. In any case, there is no problem, let's fix it immediately. It is a famous online service for photo editing that allows you to apply countless filters to photos and to intervene on various parameters of the same. Note that the service is free (which is why I'm talking about it in this article) but some advanced functions are only available for a fee, upon subscription to a special subscription.
You ask me how to use it? I'll explain it to you right away! First of all connected to the editor home page, click on the button Open photos that you find in the center and select the photo on your computer on which you want to go to act. When upload is complete, click on the button "+" at the bottom right, then on the card Tutto in the menu that opens and choose which tools to use to edit your photo: there is the button for filters, the one to adjust the color, the one to correct facial imperfections, to apply special effects etc.
Then click on the icon of the chosen tool that has been added to the right side bar and use the customization and adjustment options present in the menu that opens to make all the necessary changes to your image. To cancel them and restore a previous state, click on theclock with arrow that you find at the top right and select, from the menu that opens, the change you want to restore.
Once you have the desired final result, save the edited image to your computer by clicking on the rectangle with arrow upward is located at the bottom right. Indicate the final file format (you can choose between JPG, PNG and TIFF), the quality and the name you want to assign to the photo and then presses the button Save a copy.
If you want, before saving the image on your computer you can also choose whether to add a watermark and how to intervene in relation to the metadata by clicking on the tab Filigree and adjusting the available options as you see fit.
Pixlr
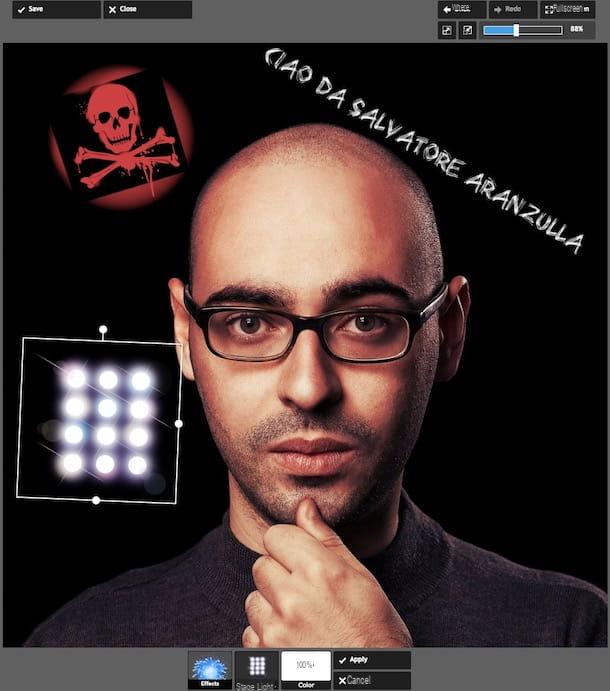
To finish off, as they say, I want to talk to you about Pixlr. It is a very useful portal for what concerns the possibility of retouching photos online for free, which provides Internet users with three different resources to edit and decorate images. There is no need to register and it works flawlessly with all major web browsers. Again, you really need Flash Player, otherwise it won't work.
As I told you, the portal allows you to access three different resources useful for retouching photographs. You will find them indicated below. Choose the one that you think will do the most for you and start using it right away.
- Pixlr Editor - It has a user interface practically identical to that of the famous Adobe Photoshop. All changes to photos can be made via the bar with numerous tools on the left, while at the top there is a convenient menu for selecting filters.
- Pixlr Express - It offers the same functions as the aforementioned Pixlr Editor plus some ad hoc filters, frames and various stickers to decorate the photos. The interface is sufficiently practical and intuitive.
- Pixlr o-matic - Its simplicity of use is disarming. It allows you to apply filters, frames and various effects to the chosen images, returning noteworthy final results in perfect Instagram style. The user interface that takes up that of the photographic studios is also nice.


