Synchronizing data under Google Chrome makes it possible to find all identifiers, bookmarks, settings and history on the different Chrome sessions connected to the same Google account. Among its parameters, we find the extensions, which can be synchronized in order to install them automatically. A significant help in the management of its Google Chrome extensions.
The guide below aims to synchronize Chrome extensions so that they can be reinstalled automatically on other devices, on Windows computers, mac0S, Chromebook.
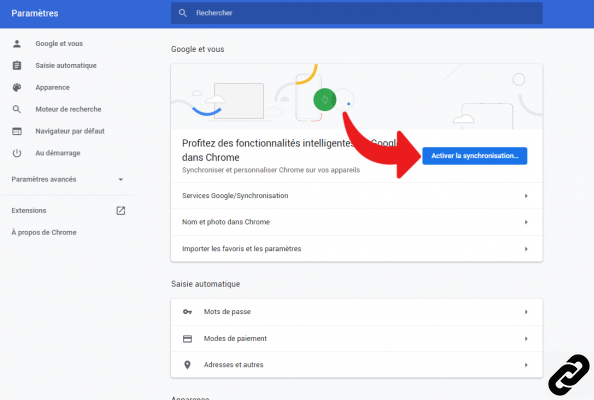
- If your Google account is already signed in, you can go toStep 4. Otherwise, go to chrome menu (icon with three dots at the top right) then click on Parameters.

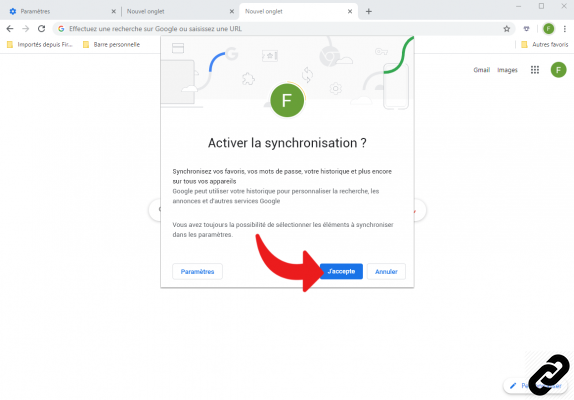
- Click on Enable synchronization... to sign in to your Google account. Then just enter your username and then your Google password.
- A window will then appear on the screen allowing you to confirm the synchronization of the data by clicking on I agree.
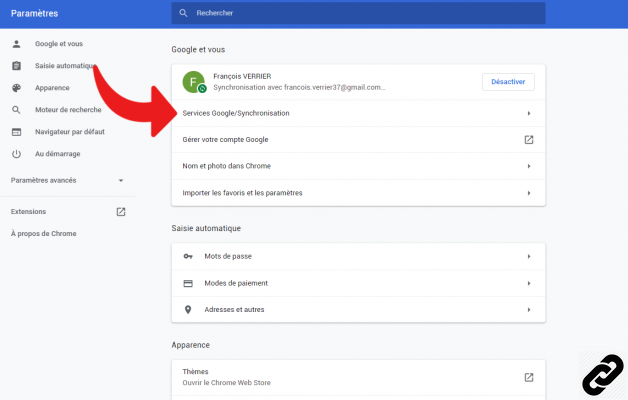
- To define the synchronization of extensions, simply return to the Chrome menu via the icon at the top right and select Parameters.
- Once the account is synchronized, it appears in the Parameters under the tab Google and You, here select Service Google/Synchronisation.
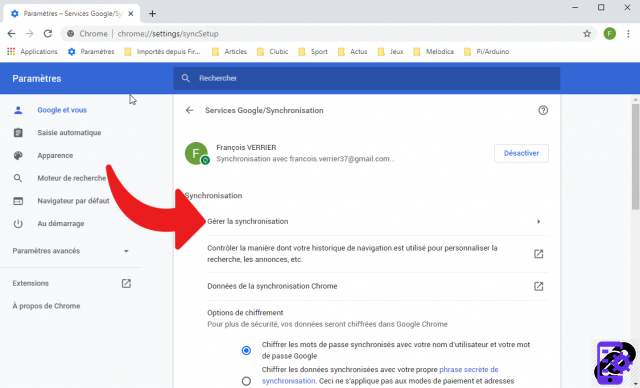
- Then choose Manage synchronization.
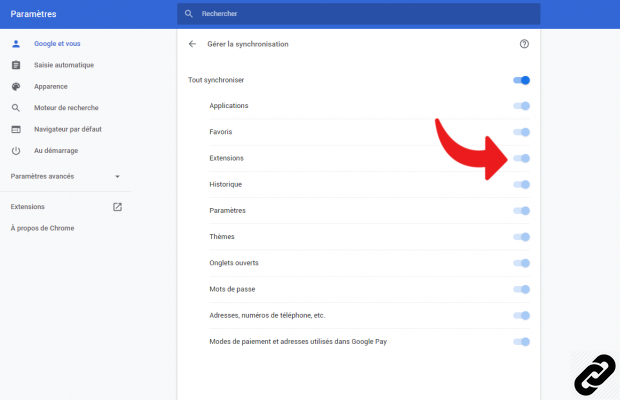
- In the new window that appears, the user can choose to synchronize everything or only the extensions via the slider provided for this purpose. Just go back to validate the changes.
Find other tutorials to better manage your Google Chrome extensions:
- How to install an extension on Google Chrome?
- How to remove an extension on Google Chrome?