


Scrolling through the photo gallery of your Android smartphone, you realized that the saved images are so many and, above all, that they are not organized in the order in which you would like. That's why, also taken by the fear of running out of enough space for apps, you thought of removing the photos from your device and saving them in a more "safe" place, such as your computer, organizing them in convenient folders to find them quickly.
It is certainly a great idea, yet a very specific question is making room in your head: what if transfer photos from Android to PC it was too difficult, maybe outside of your technological skills? Rest assured, it is instead a very simple operation, which can also be completed by those who, like you, are not very accustomed to computer science: below I will explain the simplest and most effective techniques to move photos from Android devices. to the computer, both for Windows and Mac, even in wireless mode.
I managed to calm you down, right? Perfect, it's time to get down to business! All you have to do is sit in front of the computer, take your Android device and continue reading this guide: I am sure that, by following very carefully the advice and the tips I am about to give you, you will succeed without problems in your intent, even if without having particular technological skills. Having said that, I just have to wish you good reading and good work!
Transfer photos from Android to Windows
The first procedures I'm going to illustrate concern the operating system Windows. I anticipate immediately that, to put everything into practice, you will need the USB cable supplied with your device Android; Plus, you won't need to download third-party programs, as everything you need is already in your operating system.
File Explorer
Exploit File Explorer it is definitely one of the easiest ways to transfer photos from Android to PC Windows: to be precise, File Explorer is the program designed to manage files within the Windows operating system, already present since its installation. Moreover, the most recent versions of the Microsoft operating system already have the necessary drivers available for the correct recognition of Android devices, therefore it will not be necessary to undertake any additional downloads.
To move photos to your computer using File Explorer, first grab the USB cable and use it to connect your Android device to the computer. Then move to your Android device, call up thenotify area swiping your finger from the top of the screen to the bottom, select the notification USB options, put the check mark up File Transfers and wait for the device to be recognized by the PC (this could take a few minutes).
In order for everything to go well, make sure that the entry Debug USB of your device is disabled: to do this, go to the menu Settings> Developer options (or Development Options) and, if necessary, remove the check mark from the dedicated box. How do you say? This menu does not appear on your device? This means that it has never been enabled, so USB Debugging cannot be active.
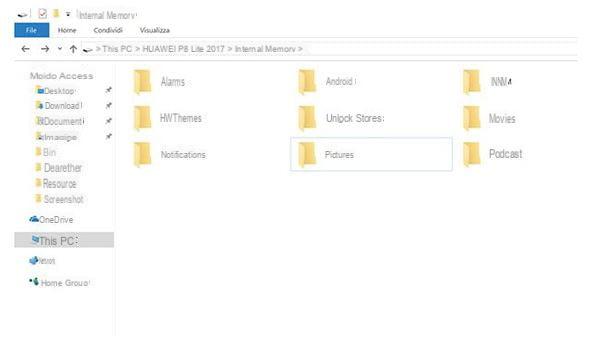
Now open theFile Explorer by clicking on the icon in the shape of gialla poster found in the Windows taskbar (bottom left), click onandroid device icon located in the left bar, double click on the icon Internal Memory o External memory (depending on where your photos are stored) and then on the folder DCIM: done that, you can transfer photos to your computer and organize them in folders with a classic cut and paste.
If this procedure did not satisfy you, you can opt for the image transfer through the Windows acquisition wizard: after opening File Explorer and connecting your device as I explained above, recall thenotify area say Android, fai tap sulla voce USB options and check the box Photo transfer (PTP). Return to File Explorer, do click destroy on 'your device icon and select the item Import images and videos give the menu to compare.
Once the scan is complete, enter the name you want to give to the collection in the appropriate text box, check the box Import all new items now e pulsing sul pulsating Import: in this way, your photos will be saved in a sub-folder with the name of your choice, contained in the folder Images Windows. After following these steps, you can manually delete photos from your Android device.
How do you say? Is your version of Windows having trouble recognizing your Android device and need additional drivers? Then I invite you to consult my guide on how to connect Android to PC to get the necessary instructions to install them.
Windows 10 photo app
If your operating system is Windows 10, you can move your photos even faster using the app Gallery, also already present from the installation. First, set Android to mode Transfer of photos as I showed you a moment ago, then move to the computer, open the menu Home Windows by clicking on the icon pennant located at the bottom left, scroll until you find the icon Gallery and select it with a click (you can get the same result by typing the word "photo" in the search bar of Cortana and choosing the first available app).
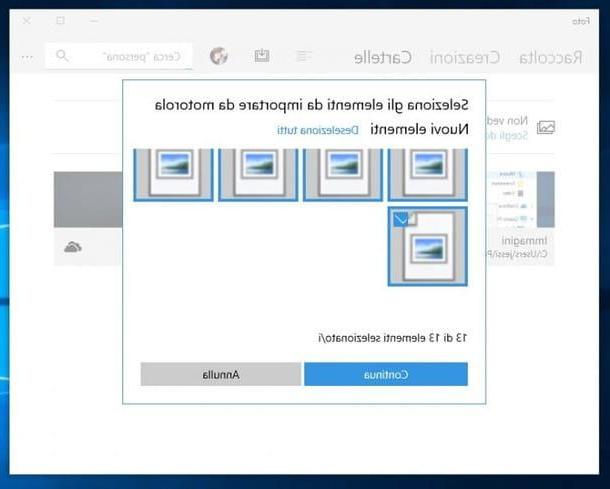
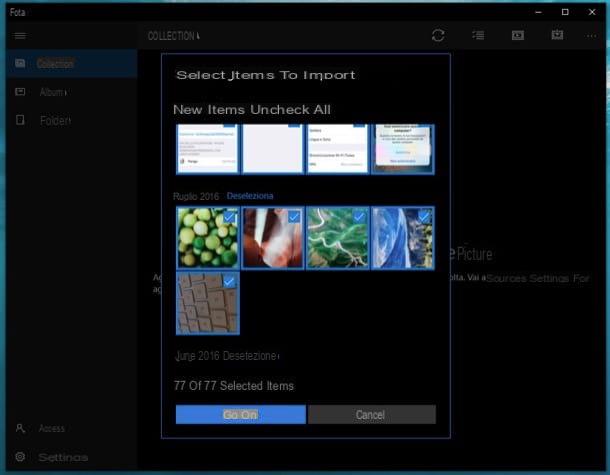
Once the app is open, click on the button Import, select the voice From a USB device, wait for the system to complete the analysis of the connected device, click on the button Continue and on the link Change the import location, choose the folder where you want to save your photos and finally click on the button Import. Once the procedure is complete, also in this case, you can manually delete the images from your Android device.
Transfer photos from Android to macOS
You have a Mac? Don't worry, transferring photos to this type of computer is just as simple. All you need is the USB cable of your device and, again, you can choose between two different procedures: the first involves the program Image capture, already installed on MacOS, while the second requires a software download Android File Transfer. Peacefully choose the solution that best suits your case.
Image capture
As I have already mentioned to you a moment ago, Image capture is a tool already included in macOS, designed specifically for transferring photos from smartphones, tablets, cameras and other compatible devices. To transfer photos from Android to your Mac using Image Capture, first connect the device to the computer via the USB cable, then call up the Android notification area, press the banner USB options and tick the box Photo Transfer (PTP).
Once this is done, return to your Mac and, from LaunchPad (the rocket icon located on the Dock), select the folder Other and then click on the icon Acquire Image. You can transfer your photos in two different ways - the first is simply dragging them with the mouse, moving them from the Image Acquisition window to the folder of the Mac where you want to save them.
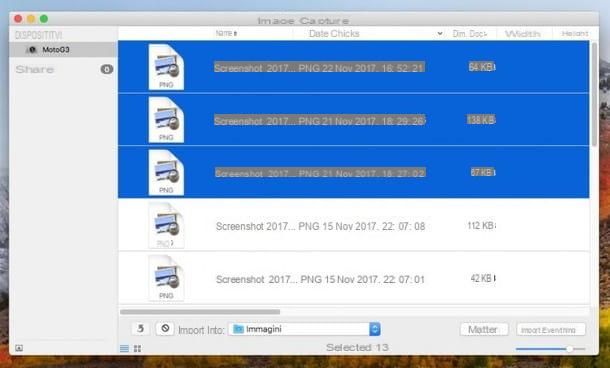
The second, on the other hand, involves guided acquisition: click on photos to download (or make a multiple selection using the key cmd), choose the folder in which to save the photos from the drop-down menu Import intoclick on your button Import (or your Import everything to download the entire gallery) and wait for the procedure to complete. Check that all the photos have been downloaded, then, if you wish, proceed to manually delete them from your Android device.
Android File Transfer
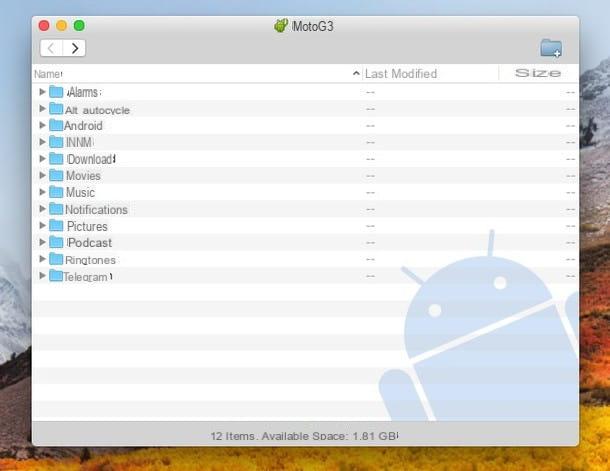
Did Image Acquisition not fully satisfy you? Then you can take advantage of the program Android File Transfer, available for free, and dedicated to transferring files and photos from Android to Mac. To download it, connected to the program's web page, then click on the button Download now, launch the downloaded file and drag its icon to the folder Applications say macOS.
At this point, to start the program, double-click on the aforementioned folder (or, from the Finder, select the menu Go> Applications) fai click destroy icon Android File Transfer, select the item apri from the context menu that appears and then click on the button apri (this safety measure must be taken only at the first start). Press the button now Start, then on the folder DCIM (o sdcard0/internalSD > DCIM if the photos are saved on the microSD), select the photos that interest you (with the help of the button cmd) and drag them to the most appropriate folder on your Mac. Once you are done, feel free to delete the photos from your device.
Transfer photos from Android to PC wirelessly
Go looking for a way to transfer photos from Android to PC that does not require the use of cables? Then this is the guide part for you: I will explain how to use AirDroid, one of the best management apps in its class, and how to take advantage of the cloud services available on the Internet.
AirDroid

AirDroid is an app with enormous potential, to say the least, which allows the management and complete control of an Android device directly from the computer: among its features, in addition to transmitting the Android screen to PC, it also boasts the ability to transfer photos using an Internet connection, without using any cable.
I warn you right away, however, that the free version of AirDroid has limitations in terms of space: you can in fact transfer as many 200 MB taken a picture per month and each file cannot be larger than 30 MB. To get rid of these restrictions, you can subscribe to a Premium plan at the cost of dollars 1.99 per month or dollars 19.99 per year. For the transfer to be possible, both your computer and Android device must be connected to the same WiFi network.
Having made this necessary premise, the time has come to install AirDroid on your computer: then connect to the program's website and first click on the button Download now and then the icon corresponding to the operating system at your disposal. To proceed with the installation on Windows, start the downloaded file and click on the buttons OK, Next, Agree, Install and Finish.
For MacOS, start the file dmg, drag the AirDroid icon to the folder Applications on the Mac, open with a Double-click this folder, then start the program by doing click destroy on its icon by selecting the item apri from the context menu and finally pressing the button apri (this procedure is only necessary at the first start).
Once the installation is complete and the program has started, click on the entry Register / Sign up located below the button Log in, fill in the proposed fields with the requested information (a new browser window opens), press the button Subscribe and wait for the confirmation message. Once this is done, close the browser and return to the program, type theemail address and Password chosen during registration and click on the button Log in and, only if you are on Windows, on the button Allow access.
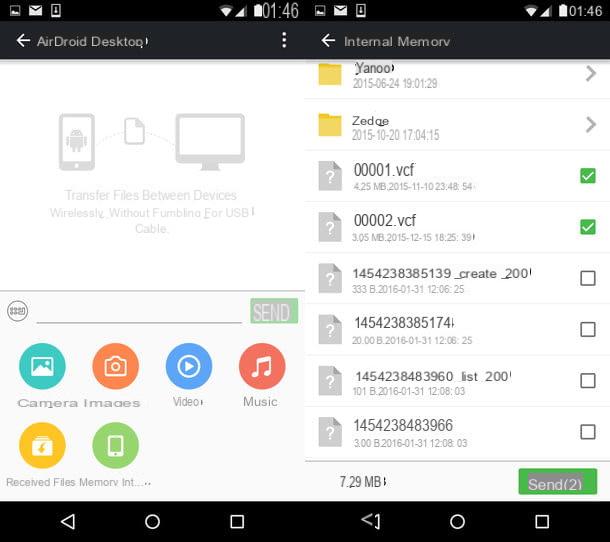
At this point, download the AirDroid app on your Android device, launch it, skip the initial tutorial by doing quattro swipe to the left, press the button Login or Register and, where required, enter thee-mail and Password previously used.
Now tap the button Log in, then repeatedly on the button Allow to grant the required permissions, press the icon now Transfer and select your computer name (eg. Desktop Android) from the screen that opens. At this point, press the icon Images, select the photos you are interested in transferring and tap the button Send to proceed with the move. Once completed, you can delete the photos from your device.
Cloud services
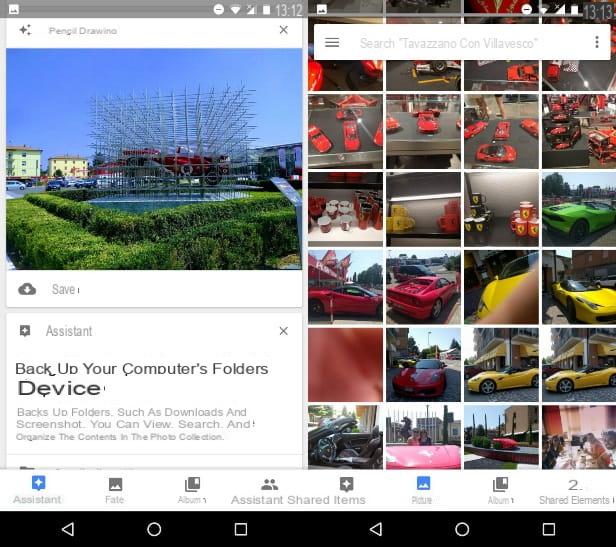
How do you say? AirDroid does not satisfy you or the limits imposed by the free version are too restrictive? Then I advise you to contact a cloud service: there are really many, for every need, but the most reliable for this purpose are Google Photos, OneDrive e dropbox.
Each of them is equipped with both an Android app and a computer “companion” program, which will help you access the photos taken from your device via the Internet, and move them to your computer with a simple installation of the Android app. For all the details on using these services, I refer you to my guides on how Google Photos works, how OneDrive works and how Dropbox works.
How to transfer photos from Android to PC


