


After being pleasantly impressed with the functionality of your Mac, you changed your mobile phone and bought your first iPhone. You find the Apple smartphone very easy to use but there are some functions that you have not yet had the opportunity to explore. For example you don't know yet how to transfer photos from iPhone to Mac and the idea of losing all the shots you have already taken with your "iPhone by" terrifies you.
Don't panic! If you are reading these lines you already know that you have come to the right blog at the right time. With today's guide, I will explain how to export all the photos from your iPhone and save them on the Mac in the easiest, fastest and safest way possible. All you have to do is take five minutes of free time and put into practice the advice I am about to give you. I guarantee you that you will only need to read this tutorial once and you will learn all the steps by heart.
You just have to choose the transfer method you prefer the most. What am I referring to? The fact that you can copy photos from iPhone to computer in various ways: you can use Apple's Photos application, the image capture tool included "standard" in macOS or iCloud online services. Each method clearly has its pros and cons, but overall you are spoiled for choice. To find out more, keep reading, you will find everything explained below.
Photo application

Let's start with Gallery, the default photo management app on macOS and iOS. Its main strengths are ease of use, perfect integration with iCloud services and integrated editing functions. On the negative side, it should be mentioned that it stores photos and videos in a proprietary archive that cannot be used freely by other applications (even if by now many Mac applications are able to "see" the photos and videos in the Photos database) .
transfer photos from iPhone to Mac with Photo, connect your "iPhone by" to the computer using the supplied Lightning / Dock cable and wait for the application to start automatically. If this does not happen, select the icon Gallery from the macOS Dock bar and go to the tab Import application (top right).
At this point you are shown all the photos in the iPhone roll and not yet imported to the Mac. To import them to your computer, press the button Import all new photos located at the top right and wait for the procedure to be completed. If, on the other hand, you want to transfer only certain photos and leave the others on the phone, select their previews with the mouse (by holding down the cmd keyboard) and click on the blue button Import selected xx.
If you want to automatically delete the imported photos from the iPhone, before starting the transfer on the Mac put the check mark next to the option Delete items after import (Always at the top right).
ICloud Photo Stream

Another technique for transfer photos from iPhone to Mac is to exploit the function of Photo stream offered by Apple through iCloud. With Photo Stream, all the photos you take with your iPhone (or other iDevices in your possession) over the past 30 days are automatically saved online in a library that can hold up to 1.000 images. The service is completely free, it is active by default and does not affect the online space available on iCloud Drive.
To verify that Photo Stream is active on your iPhone, go to Settings device, select the items iCloud> Photo from the menu that opens and make sure that the lever for the function My Photo Stream is set to ON (otherwise activate it yourself).
With Photo Stream enabled, photos taken with your iPhone will be accessible from Gallery without the need to physically connect the phone to the computer or connect it to the same wireless network as the Mac. All you have to do is go to the menu Photos> Preferences (top left), select the tab iCloud from the window that opens and put the check mark next to the item My Photo Stream (if not already present).
ICloud Photo Library
If you want to keep the photos on iCloud permanently and want to automatically synchronize them with the Mac (without physically connecting the iPhone to the computer), activate ICloud Photo Library. This is an Apple service that permanently stores photos and videos made with the "iPhone by" on iCloud.
Unlike Photo Stream, iCloud Photo Photo Library erodes the available storage space on iCloud Drive. This means you need to ditch the 5GB free plan and activate a paid subscription for the service.
To subscribe to one of the iCloud paid plans (starting from 0,99 euros / month for 50GB of storage), go to the menu Settings of iOS, select the you don't know, then the chart relating to the space currently available on iCloud, the option Change storage plan and choose the type of subscription you prefer. If you are using an iOS version earlier than 10.3, the same option is accessible from the menu iCloud> Storage> Change Storage Plan.
To activate the iCloud Photo Library, go to the menu instead Settings> [Your name]> iCloud> Photos iPhone (or Settings> iCloud> Photos if you are using an iOS version earlier than 10.3) and move to ON the relative levetta all'opzione ICloud Photo Library. More info about it can be found in my tutorial on how to store photos on iCloud.
Once iCloud Photo Library is activated, all photos and videos taken with your Apple devices will be automatically downloaded to the Photos application. To check that everything is working correctly, go to the menu Pref Renze of Photos on macOS, select the tab Apple ID / iCloud from the window that opens and make sure there is a check mark next to the item Gallery (otherwise you put it). If you're having trouble syncing your photos, go to System Preferences> Apple ID / iCloud and try disabling and re-enabling the option Gallery.
Please note: after activating the iCloud Photo Library, try not to import the photos to the Mac "manually" (as we saw in the first chapter of the tutorial), otherwise you risk creating "duplicates" in the Photos application library.
Image capture
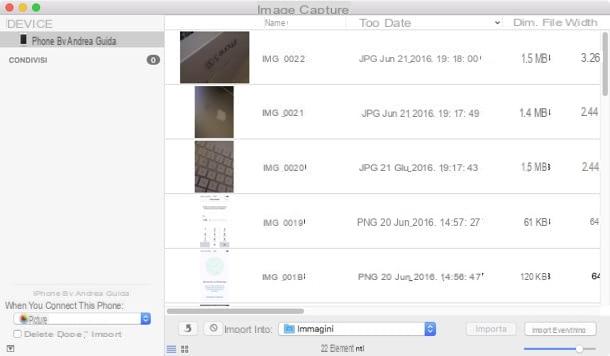
If you find Photos a bit too cumbersome and / or you prefer to save your photos in a folder on your computer without tying them to a specific application, you can go to the folder Other Launchpad and start the utility Image capture, which allows you to extract photos and screenshots from the iPhone without going through Photos.
How does it work? Nothing easier. Select the iPhone icon from the sidebar of the program, indicate the folder in which to export the images (via the drop-down menu Import into) and click on your button Import everything to copy all photos and screenshots to your Mac or select with cmd + click the images to import to your computer and click on the button Import but I will complete the operation.
Small tip: If you want to prevent Photos or other applications from automatically launching when you connect iPhone to Mac, click on arrowlocated at the bottom left of the main screen of Image capture and select the item No application from the drop-down menu that appears.
iCloud.com

If you've activated iCloud Photo Library, you can also access your photos - and then download them to your Mac - via the iCloud.com website. By connecting to iCloud.com, logging in with your Apple ID and clicking on the icon Gallery you can in fact "browse" all the contents of your photo library and download them to your computer with a simple click.
Going into more detail, to download photos from iCloud.com all you have to do is select the images to download (using Ctrl+clic/cmd+clic to select individual contents or Ctrl+A/cmd+a to select them all) and press the icon of nuvola located at the top right.
AirDrop
Do you have a fairly recent Mac? Then you can transfer photos from iPhone to Mac also through AirDrop, a wireless technology that uses Bluetooth and Wi-Fi to share data between two Apple devices. Works with iPhone 5 and later and most Macs manufactured after 2008.
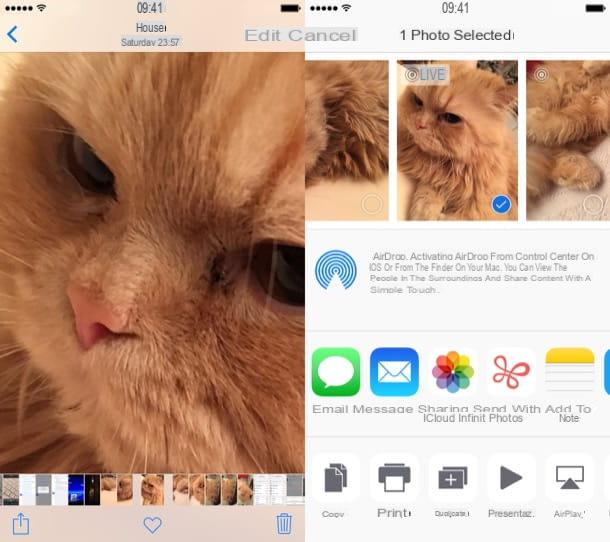
To share photos via AirDrop, open the app Gallery on the iPhone, select the images to send to the Mac and press the icon of sharing (the arrow inside the square). At this point, select the icon for your Mac from the screen that opens and wait for the transfer to be completed.
If you're having trouble, check that Bluetooth is turned on on both devices and that AirDrop is set to Contacts only o All. For more details read my guide on how AirDrop works.
Other cloud storage services
iCloud isn't the only cloud storage service that allows you to store photos online and automatically synchronize them with your computer.
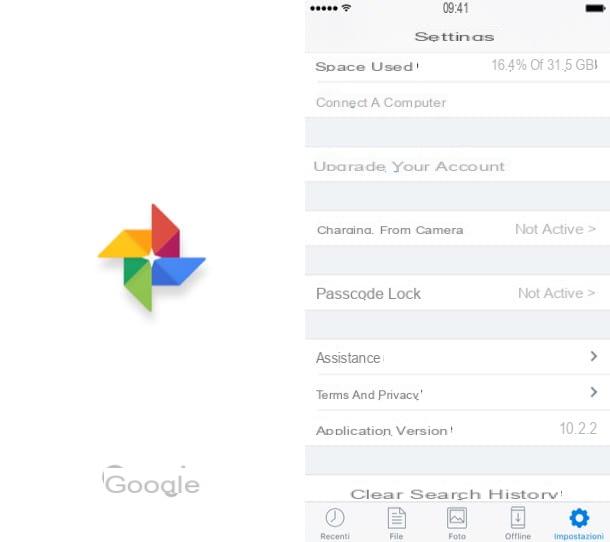
Using, for example, Google Photos you can have an automatic, unlimited and free backup of all the photos and videos made on the iPhone without any effort. The application works in the background and saves all images (up to 16MP) and all movies (with a maximum resolution of 1080p) on Google Drive without eroding online storage space. The content synchronized with the app can be downloaded to the Mac using the Google Drive client or by connecting to the web version of Google Drive.
Another possible alternative to iCloud Photos Liberia is Dropbox, which with the feature Upload from camera allows you to automatically archive all photos taken with the iPhone to the cloud (and then synchronize them with the Mac). The service has a limit of 2GB of space in its free version, but there are bonuses available for those who install Dropbox on their devices and invite other people to try the application. For more info read my guide on how Dropbox works.
Finally, I would like to point out Send Anywhere, an excellent free application compatible with iPhone, macOS, Windows, Android and any web browser that allows you to share various types of files from one device to another in a very simple way; just select the files to share, wait for the generation of a numeric code and provide this code to the destination of the files. It all works "magically" over the Internet.
How to transfer photos from iPhone to Mac


