


iTunes is a very popular software developed by Apple, thanks to which you can organize - as well as play - music, movies and podcasts on your computer. It also allows you to access Apple Music and manage iOS devices from your PC. It is available both for Windows, in the form of a free download, and for macOS, where it is pre-installed "as standard", and also includes the drivers necessary to communicate directly between the computer and devices such as iPhone and iPad.
I bet, however, that you already know these things: if you are here today and you are reading this tutorial, it is because the need to transfer the photos you have taken with your iPhone to the PC but you cannot (or do not want to) install iTunes on the latter, so you can't physically connect the two devices to each other, right? Perfect, then know that I will be happy to give you a hand and help you reach your goal!
In fact, with today's tutorial, I'll show you how to transfer photos from iPhone to PC without iTunes using a series of cloud services and third-party applications that could definitely be right for you: you just have to choose the one that seems most suitable for you and start using it, following the instructions I am about to give you. That said, there is nothing left for me to do but wish you good reading and have fun!
iCloud
If you want transfer photos from iPhone to PC without iTunes, the simplest solution you can use is iCloud: Apple's cloud platform that allows you to save your data online and synchronize them between various devices, using the Internet. There are two iCloud services dedicated to photos: Photo stream e ICloud Photo Library.
- Photo stream is a totally free service that does not affect the storage space on iCloud (which, for the basic plan, free, is 5GB) and allows you to keep only the photos taken in the last 30 days, for a total of 25.000 shots , excluding live photos.
- ICloud Photo Library, on the other hand, it is a more complete service: it allows you to upload photos, live photos and videos to the cloud without limits of time, duration or resolution, however, eroding what is the storage space on iCloud and, therefore, "forcing" the user to subscribe to one of the paid plans of the service (starting from 0,99 euros / month for 50GB of storage).
To activate photo sync with iCloud on your iPhone, you need to do this: first, open the app Settings (the gear icon located on the home screen) and check that the screen shown is the you don't know. If not, click on the per item login on iPhone and log in with your Apple ID. If you don't have an Apple ID yet, create one by following the directions in my guide about it.
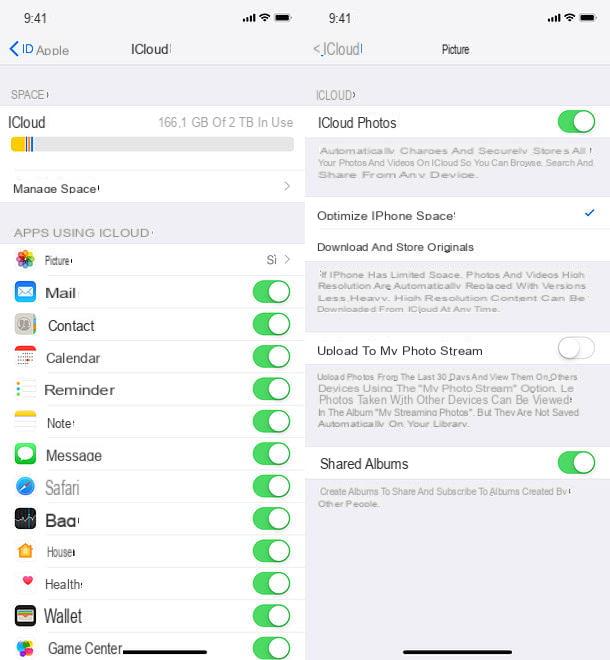
At this point, to activate Photo Stream or iCloud Photo Library, tap on you don't know app Settingsi went his iCloud> Photo and move up ON the service lever ICloud Photos or to the service Upload to my photo stream, in base alle your preference.
As already mentioned above, the iCloud Photo Library erodes the storage space on iCloud, so it is almost mandatory to subscribe to one of the paid plans of the service: to do this, go to the menu Settings> [your photo]> iCloud> Manage space, fai tap sull'opzione Change plan and select one of the available plans: 50GB (0,99 euros / month), 200GB (2,99 euros/mese) o 2TB (9,99 euros / month).
Well: now all you have to do is wait for the automatic upload of your photos to iCloud and proceed with their download from your computer, using the site iCloud.com (valid only if you have activated iCloud Photo Library) or the iCloud client for Windows and macOS (also works for Photo Stream).
iCloud.com
If you have activated the iCloud Photo Library, you can view and download photos (and videos) from your iPhone to your PC using the iCloud website.
Connect, therefore, to the iCloud web panel using the link I just provided, log in using your Apple ID (the same one you configured on the iPhone) and click on the icon Gallery present on the page that opens. If this is your first time accessing the service, you may have to wait a few minutes for your photo and video library to be optimized and made available online.
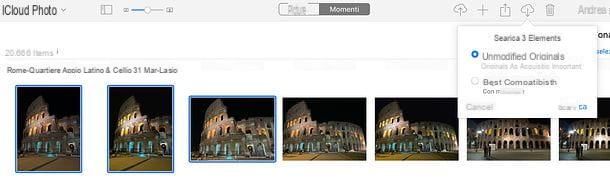
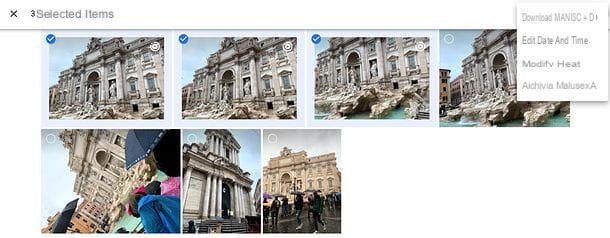
Once you have access to the library, browse the contents in it using the tabs Gallery o Moments and locate the photos you intend to download to your PC. After that, select their thumbnails (you can perform a multiple selection using the key combination Ctrl + click on Windows or that cmd + click on macOS, or Ctrl+A/cmd+a to select all) and click on the icon cloud with down arrow (located at the top right), to start downloading it to your computer.
By clicking on the v present next to the download button, you can choose whether to download the photos in original unmodified or with better compatibility (with modifications).
ICloud client
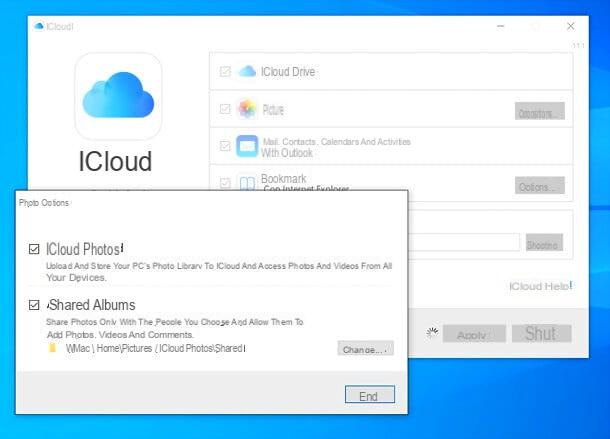
If you want to activate the automatic download of photos taken with your iPhone to your PC and / or you want to download photos from the Photo Streaming service, you must use the iCloud client, which is available as a free download on Windows and is included by default in macOS.
So if you use a PC Windows, connected to the Windows 10 Microsoft Store and download the iCloud client from there, alternatively get it from the Apple website.
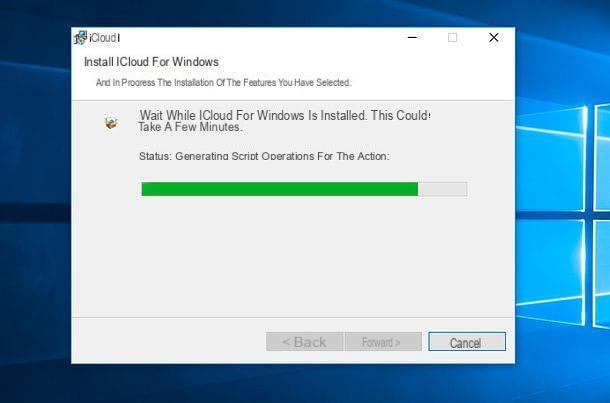
In the latter case, when the download is complete, open the .exe file obtained and, in the window that opens, put the check mark next to the options I accept the terms of the license agreement e Automatically update iCloud for Windows and other Apple software. Then click on the buttons Install, Yes, Yes e end, to conclude the setup. If prompted, agree to reboot the system and, when you log in to Windows again, log in to the iCloud client using your Apple ID data (the same one configured on the iPhone).
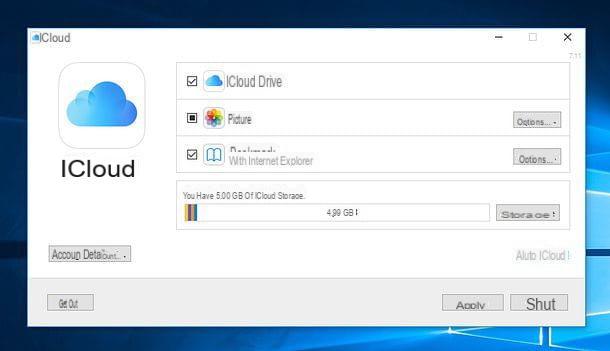
At this point, to activate the automatic download of photos from iCloud to your computer, all you have to do is check the box Gallery. The photos will be synchronized in an optimized version on the PC and downloaded in full version when selected in the File Explorer (in the iCloud contained in the folder Images).
If you use a Mac, you can turn on automatic photo syncing in the app Gallery doing it like this: open System preference (the gear icon located on the Dock bar), select the icon of Apple ID / iCloud and make sure your Mac is connected to the same Apple ID used on the iPhone, otherwise fix it.
At this point, click on your button options placed next to the icon Gallery (which must be checked) and select, from the screen that is proposed to you, the option ICloud Photos or that My Photo Stream, depending on the service you use on the iPhone. Once this is done, click on the button end, per salvare ichangementi.
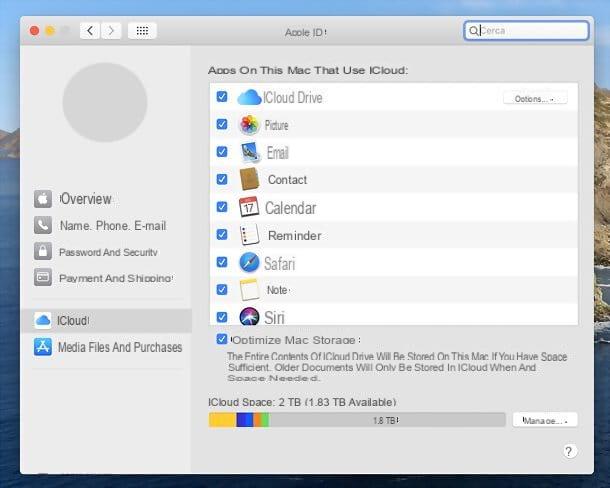
If you want, you can activate the option Optimize Mac Storage that, in case of need, deletes the photos and videos downloaded on the computer to free up space, while leaving the possibility to recall the contents deleted from iCloud.
To take advantage of this feature, open the application Gallery (the colored flower icon located on the Dock bar), go to the menu Photos> Preferences (top left), select the tab iCloud from the window that opens and check the item Optimize Mac Storage. Easier than that?
Google Photos
If you are not going to subscribe to a paid plan for iCloud but still want to store photos and videos on the cloud without limits, you can rely on Google Photos which, in its free basic version (with a limit of 16MP for photo resolution and 1080p for video resolution), allows you to save photos, live photos and online videos at no cost, without space limits, synchronizing them on various devices , including PCs.
Alternatively, you can take advantage of a more advanced synchronization service, which preserves photos and videos in original resolution, but foresees the erosion of the space available on Google One (Basic 15GB, free) and therefore almost necessarily leads to the subscription of a paid plan, starting from 1,99 euros / month for 100GB. More info here.
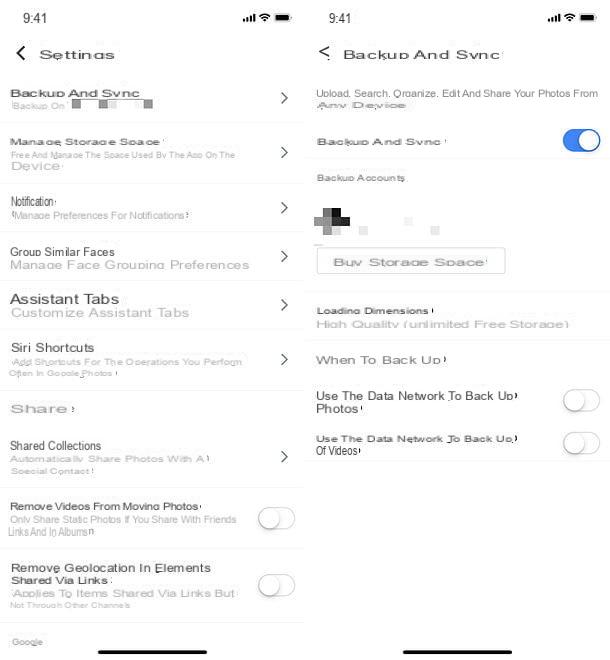
That said, to enable automatic syncing of photos and videos to Google Photos, you need to download the service's official app on your iPhone. Once this is done, start the application, log in with yours Google account (or create one at the moment), press the ☰ button located at the top left and select the item Settings give the menu check if you press.
At this point, go on Backup and synchronizationsposta su ON the levetta relating to Backup and synchronization (if necessary), tap on the item Upload size and choose an option from High quality (for free backup of photos and videos) or original (to take advantage of the full version of the service).
Mission accomplished! Now wait for the photos to be uploaded to the Google cloud space (to speed up the operation, I recommend connecting the iPhone to a power source, a Wi-Fi network and leaving the Google Photos app running on foreground) and download them to your PC using the web panel Google Photos or the client Google backup and sync for Windows and macOS: everything is explained below.
Google Photos site
If you want to download photos from Google Photos without installing programs on your PC, connect to the web version of the service from your favorite browser and, if necessary, log in with your Google account (the same one you configured in the app on iPhone ).
At this point, select the photos to download to the PC, placing a check mark on their thumbnails (top left), click on the ⋮ button located at the top right and select the item Download from the menu that opens, to start the download.
Google backup and sync
If you'd rather have photos uploaded to Google Photos automatically synced on your PC, get it Google backup and sync: Google's official cloud services client for Windows and macOS.
Therefore, connect to this website and click on the button first Download related to Backup and synchronization and then Accept and download. Once the download is complete, if you are using a PC Windows, april il .exe file ottenuto e, nella finestra che compare sul desktop, clicca sul pulsador Yes, to start downloading all the files necessary for the client to work.
If you use a MacInstead, open the package .dmg you got, drag Google backup and sync in the folder Applications macOS and start the program, double clicking on its icon and responding apri to the warning that appears on the screen.
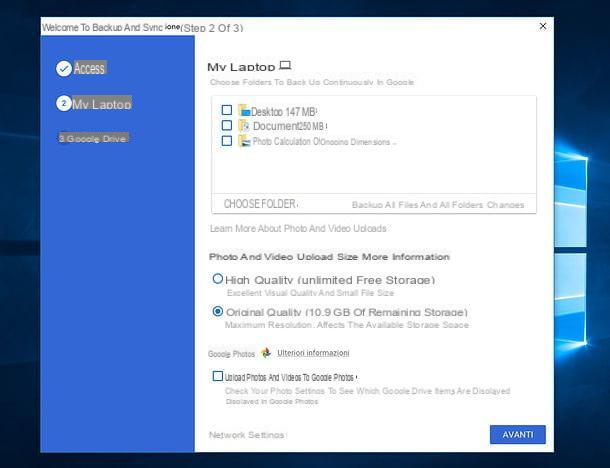
At this point, regardless of the operating system used, click on the button Start, log in to your Google account (the same one configured on the iPhone), press the button OK and, if you want, choose the PC folders to synchronize with Google Drive (by checking the option relative to Google Photos, photos and videos will be saved to the latter), then click the button NEXT.
At this point, press again on OK, make sure there is a check mark next to the item Sync my Drive to this computer (in order to activate the synchronization of Google Photos and other Google cloud services with the PC) and press on starts e Close, to finish the initial client setup procedure.
From now on, you should find a folder with photos (and videos) uploaded to Google Photos in the folder Google Drive of your computer (accessible from the desktop or from the File Explorer / Finder sidebar). If not, connected to the Google Drive web panel, click onicona dell'ingranaggio collocata in alto a destra e seleciona la voce Settings give the menu check if you press.
At this point, metti il segno di spunta accanto alla voce Create a Google Photos folder, award-winning end (top right) and that's it. The Google Photos folder should now appear in the Google Drive folder on your computer.
AirDrop

If you only need to transfer a few photos from iPhone to computer and your computer is a Mac, you can take advantage of AirDrop: an Apple wireless technology that allows you to share data between Mac and iOS devices using the Bluetooth network and Direct Wi-Fi. It is available on all MacBook Pro made from 2008 onwards (except the 17 ”MBP at the end of 2008), i MacBook Air made from the end of 2010 onwards, i MacBook made from late 2008 onwards (except the white MacBook from late 2008) and the iMac produced from 2009 onwards, as long as these are equipped with macOS Yosemite or later. On the iPhone, however, it is available on iPhone 5 and later equipped with iOS 7 or later.
That said, to copy your photos from iPhone to Mac using AirDrop, first make sure the connections Bluetooth e Wi-Fi are active on both devices (if you don't know how to do it, read my guide on how to activate Bluetooth). Next, open the app Gallery on iPhone, tap on the item Select located at the top right, select the photo thumbnails to copy to the Mac, press the icon sharing located at the bottom left and choose the item related to yours Mac (Eg. MacBook Pro) from the menu that opens.
If you're having trouble, make sure your iPhone and Mac are close enough and AirDrop is set up correctly: on Mac, april il Finder, select the voice AirDrop from the left sidebar and verify that the menu Allow to find me a is not set to Nobody. On iPhoneinstead, hit the menu Settings> General> AirDrop and make sure the option is not selected Reception not active. For more information, feel free to read my guide on how AirDrop works.
Send Anywhere
If you don't have a Mac, you have a PC Windows, you can find a good alternative to AirDrop in Send Anywhere: a service that allows you to share files between various devices in a very easy and fast way, through a smartphone app and codes to type in the browser (there would also be a dedicated client for Windows and macOS but, for the purposes of this guide , it seems superfluous to suggest it).
Send Anywhere is free, but with limits: it allows you to upload files up to 10 GB in size and the download links expire after 48 hours. To eliminate these limitations, you can upgrade to Send Anywhere Pro which, for $ 5,99 / month, offers 1TB of storage, with a limit of 50GB for uploads and links with a customizable expiration.
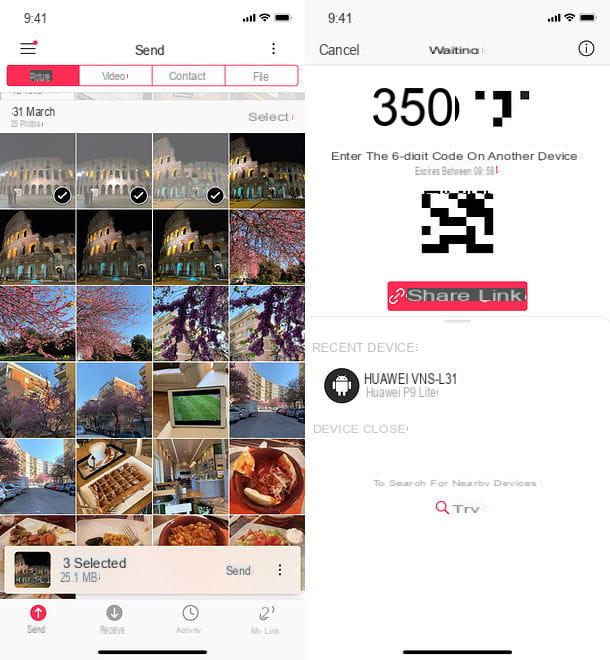
That said, let's get to the action: Download the Send Anywhere app to yours iPhone, start it, grant it all the permissions it requires, go to the tab Gallery and select all the photos you want to send to your computer. Then press the button Send (bottom right) and you will be notified of the code to download the files.
Then open the browser on your PC, connected to the Send Anywhere website, type the code of the download in the field Input key and press on down arrow, to start downloading the photos to your computer. Easier than that?
How to transfer photos from iPhone to PC without iTunes


