


After reading my guide on how Instagram works, you have become an avid user of the famous app. Your shots are also having some success with the public but, from time to time, you would also like to share them from your computer, where you regularly pour all the shots you take with your digital camera. Well, know that you can!
By resorting to the use of some special tools or some "trick" within everyone's reach, it is possible to succeed. If you want to know how to upload photos to instagram from pc, know that I'm here to explain in detail how to do it. These are extremely simple procedures to complete, but in any case I advise you to focus above all in relation to the use of the first solution I will talk about, as, being an official Instagram resource, it does not present any risks related to infringement of the terms of use of the service.
Before resorting to the use of third-party solutions, in fact, you must take into account that Instagram wants to keep the ability to upload photos an exclusive function of its apps (and its online services). Users who turn to software or services developed by third parties may face "punishments", such as the cancellation of hashtags (which reduces the degree of visibility of the images) or even the account suspension. In this regard, know that I do not take any responsibility for any penalties applied to your Instagram account following the use of unofficial programs. Clear? Well, then let's ban the chatter and take action. Have a good reading!
How to upload photos to Instagram from PC
Let's get right into the tutorial by seeing how to upload photos to Instagram from PC leveraging Facebook Creator Studio, Instagram Web, Instagram for Windows 10 and BlueStacks.
Facebook Creator Studio
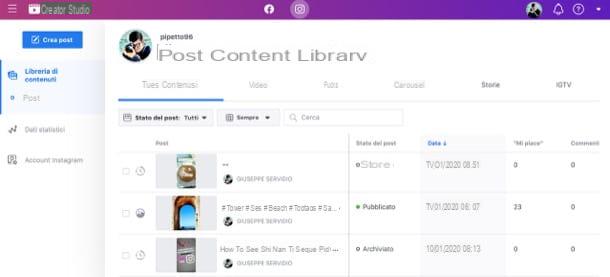
The first solution I want to tell you about in this guide is Facebook Creator Studio. This is a tool used to manage corporate Instagram accounts connected to a Facebook page. Furthermore, it is possible to use it for publishing photos and videos on Instagram from a computer, as, to use them, just use a simple browser.
That said, to make use of it, first connect to its official website and log into your account Facebook, if you haven't already. Now, press the button Start and, in the main screen of Creator Studio, first press on the buttons NEXT (twice) e end, so as to close the initial tutorial that is shown to you.
Next, click on the icon of Instagram located in the top menu, in order to connect the account relating to the photographic social network: to do so, click on the button Link your account and then OK. After this preliminary step, you can publish multimedia content within Instagram from a PC. How? Well it's that easy! First, click the button Create post which you can see located in the upper left corner. Then, in the menu that is shown to you, press on the item Instagram feed.
Now, upload a photo, choosing from those present in your computer's media gallery, by clicking on the button From uploaded files.
Alternatively, if the photo you want to upload to Instagram was previously posted on the page Facebook connected to the account, press the button From the Facebook page, in order to select it, taking it from the media library of the Facebook page.
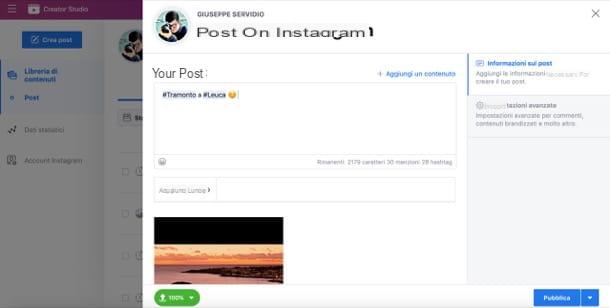
Once this is done, all you have to do is customize the publication of the post: use the text field Write your caption, to add a description of the photo to be published. You can also add the geographic tag, through the section add location.
Finally, at the end of the changes, to upload the photo to Instagram from PC, press the button Public. If, on the other hand, you want to schedule the publication, so that the upload is done at a later time, first press the icon (▾) and then on the voice Programming, in order to select theNow and day of publication. Finally, press the button again Programming And that's it.
Instagram Web

As already mentioned in the opening of the post, another solution for caricature photo your Instagram gives PC is what concerns the use of Instagram Web, the online version of Instagram, in combination with an extension for modifying the user agent.
If I had never heard of it, theuser agent it is a string that the browser communicates to the sites that are visited and that allows them to identify the navigation program, the operating system and the device in use.
If properly modified, this string allows you to "disguise" the identity of the browser and makes the sites you visit believe that you are using another device. In your case, you can make Instagram believe that you are using a smartphone or tablet.
change the user agent of your browser, you can resort to its settings or, if you prefer, to free extensions that you can easily find online. In this regard, below you will find the instructions dedicated to all the main browsers for surfing the Internet.
Chrome
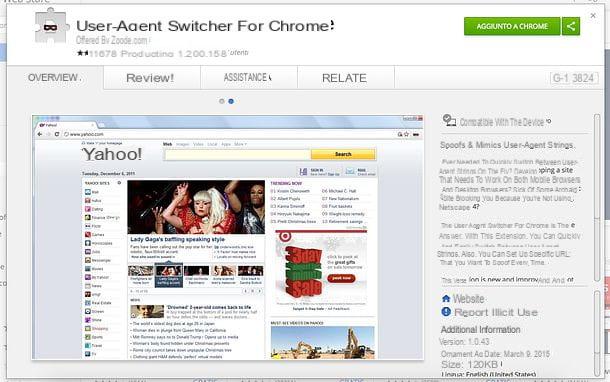
It was used Chrome, you can change the user agent using User-Agent Switcher for Chrome, a free extension available on the Chrome Web Store.
Then connect to the page of Chrome Web Store hosting the extension and first click on Add and then Add extension.
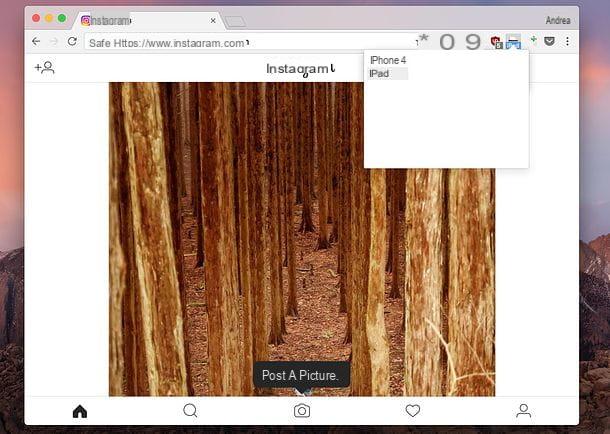
At this point, open a new tab of Chromei went his Instagram.com and change the browser user agent to match that of a mobile browser.
To do this, click on the del icon sheet with black mask located at the top right, select the user agent of a mobile device in the menu that opens (eg. iOS> iPad) and upload your photos as you do on smartphones and tablets, by pressing the button capacitor positive (+) lead.
Please note: after using Instagram, remember to reset Chrome's default user agent by clicking on the icon User-Agent Switcher and selecting the voice Chrome> Default on the menu if you press.
Firefox
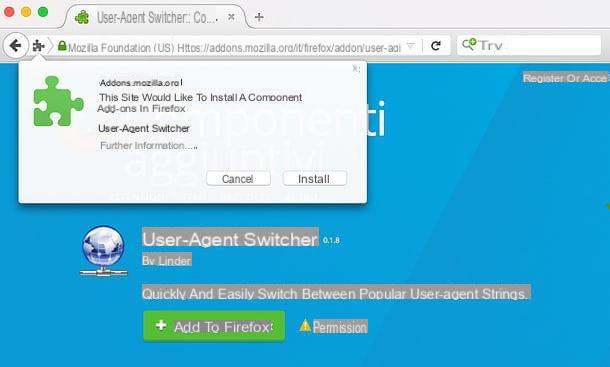
If you're using Firefox, you can easily change your browser's user agent using the free User-Agent Switcher extension. Then connect to the site page Mozilla Addons that hosts the extension and installs it on your PC, by pressing the button first Aggiungi to Firefox e poi quello Install which appears at the top left.
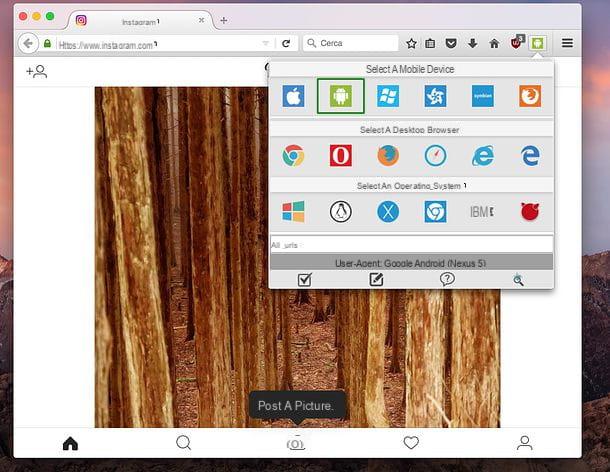
When installation is complete, open a new Firefox tab, connected to Instagram.com and change the browser user agent by clicking on the globe located at the top right and selecting any of the icons found under the item Select a mobile device in the box that opens. For the changes to take effect, you will need to reload the page.
Please note: after using Instagram, remember to reset the default Firefox user agent by clicking on the globe located at the top right and selecting the checkmark located at the bottom left of the box that opens.
Edge
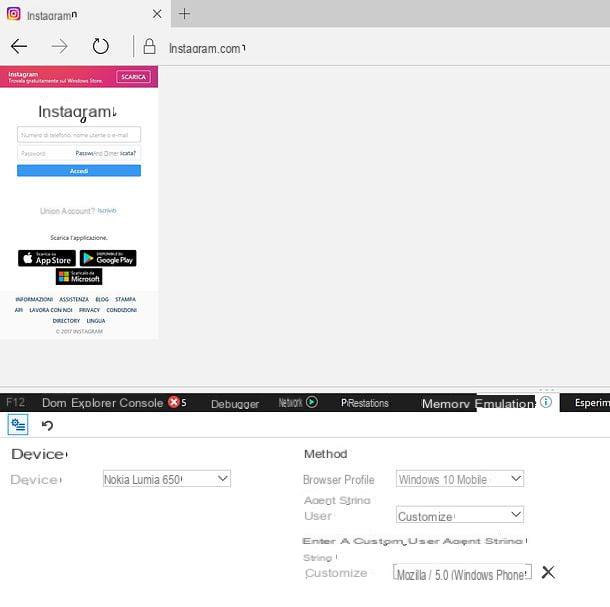
In Microsoft Edge it is possible to modify the user agent using the development tools included in the browser. Then connect to Instagram.com, pigia sul pulsating (...) located at the top right and select the items Other Tools > Development tools in the menu that opens, to bring up the panel dedicated to development tools.
At this point, select the tab Emulation Edge (if you don't see it, click on the arrow at the top right), expand the drop-down menu Device and select the name of a smartphone or tablet (eg. Microsoft Lumia 650) from the latter. By doing so you will view the Instagram site as if you were using a smartphone or tablet.
Safari
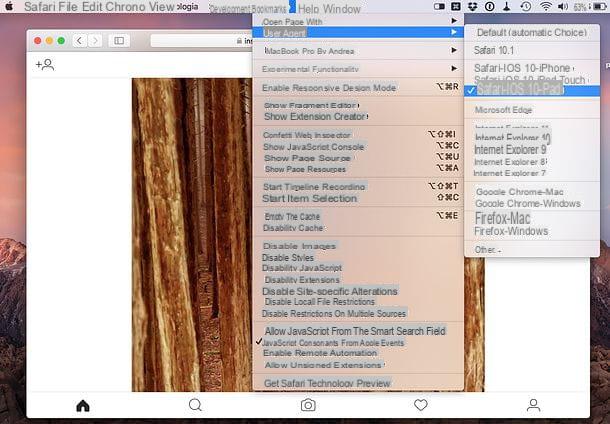
If you have a Mac and use Safari, you can act on the user agent settings by using the development tools included in the browser.
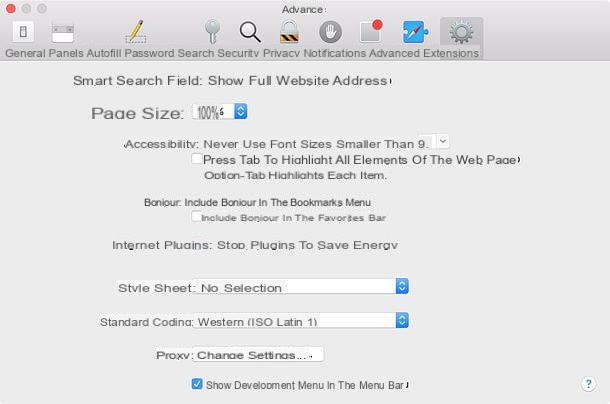
To activate these tools, go to the menu Safari> Preferences (top left), select the tab Advanced in the window that opens and put the check mark next to the item Show menu Sviluppo nella barra dei menu.
At this point, go on Instagram.com, go to the menu Development> User agent Safari and select one of the options related to Safari - iOS.
Once you have changed the user agent, regardless of the browser you use, you can upload photos to Instagram from your PC by simply clicking on the icon capacitor positive (+) lead located at the bottom center and selecting the image you want to post.
On the page that opens, use the icon with the two arrows located at the bottom left to activate or deactivate the automatic zoom of the photo and the icon with the two circular arrows which instead is located at the bottom right to rotate the image in various directions.
After that, click on the button NEXT located at the top right, type a caption and the hashtags you want to associate with the photo in the appropriate text field and press on Share (top right) to post the image to your account Instagram.

Unfortunately there are no filters and effects available in the Instagram app for smartphones, but it is possible that they will be implemented in the future.
Instagram for Windows 10
As you surely know, there is also one official Instagram app for Windows 10, which, at least for the moment, does not allow you to post photos on the well-known social network but supports Stories, allowing both viewing and publishing.
If you have a computer equipped with Windows 10 and you want to use it to post your Stories on Instagram, open it Windows Store (just search for the term “store” in the Start menu), search Instagram within the latter and proceed with the installation of the app by pressing first on its icon and then on the button Get. If you are reading this post from Windows 10, you can access the store page with Instagram by simply clicking on this link.
Once the installation is complete, start Instagram for Windows 10, log into your account and start using the app just like you usually do on your smartphone (except for uploading photos, which is currently not available).
To view the stories uploaded by your friends, or rather, by the users you follow on Instagram, click on theirs photo at the top of the app screen. If, on the other hand, you want to post a story, click on the icon camera which is located at the top left and uses the PC webcam to take photos and videos. You can also post stories in “boomerang” format and in “press and hold” format.
BlueStacks (Windows / macOS)
As an alternative to using Instagram Web, to upload Instagram photos to PC you can also use BlueStacks. If you have never heard of it, know that it is an emulation software for Android which, available for Windows and macOS, allows you to launch any app for the Google operating system for smartphones, directly from your computer.
Another important thing to underline is that the emulator, as it is free, supports itself with the presence of advertising banners that recommend the download of some sponsored apps. However, the latter can be removed by purchasing a subscription to the service, the price of which is $ 4 / month or $ 40 / year.
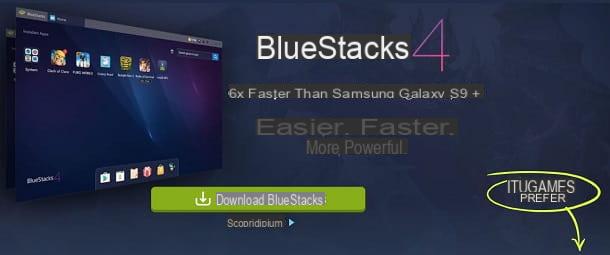
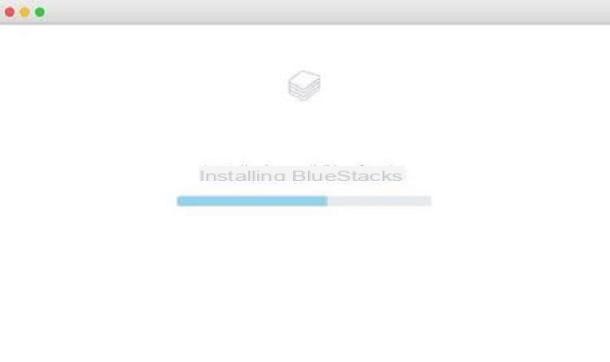
Without these necessary premises, if you intend to upload photos to Instagram, using BlueStacks, connect to the official website of the emulator and click on the button Download BlueStacks, to download the latest version of the emulator on your PC.
Then wait for the download of the software installation package and, at the end, start it by double clicking on it. Now follow the instructions for step by step Windows e MacOS that I am about to show you, to install BlueStacks in the correct way.
Su Windows, first press on Yes in the window of User Account Control, then click the button Install now and wait for the automatic download of all the files necessary for the correct functioning of the program. When finished, click on the button Full.

If you need to install BlueStacks su MacOSinstead, wait for the file to download.dmg previously taken from the official website, then start it by double clicking on it. Once this is done double-click on the BlueStacks icon, in order to start the installer. To confirm the opening and start the installation, press the button apri.
Next, click Continuation and then Install now, type the Password of the Mac administration and press the button Install Assistant. Then wait for the software installation to be automatically completed and, if prompted, press the button Apri the system preference.
In the Mac settings panel, first press on Allow and then on the symbol of padlock (it is located in the lower left corner). Now type the again Password on the Mac and then press on Unlock, in order to finish installing BlueStacks on macOS.
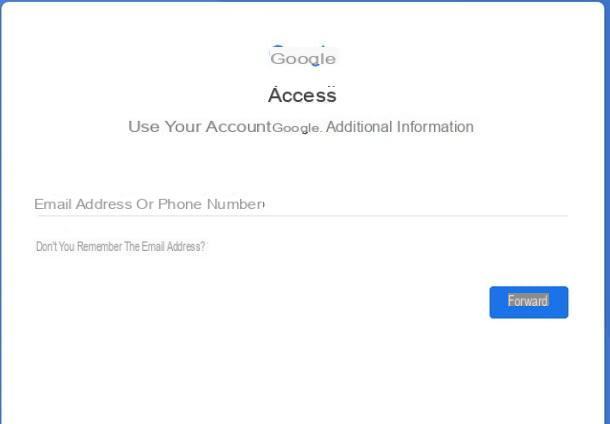
Now that you have installed BlueStacks, you have to configure it with a Google account, following the steps I am about to show you, which are identical on both Windows and macOS.
Click on the button Start and, on the next screen, log in with the data of the account you have, typing, in the respective text fields, theemail address and Password. Then press on first NEXT and then Accept and finish the configuration by pressing the button Get started with BlueStacks.
Well: at this point you have finished configuring BlueStacks with your Google account and you can start downloading applications from the Play Store.
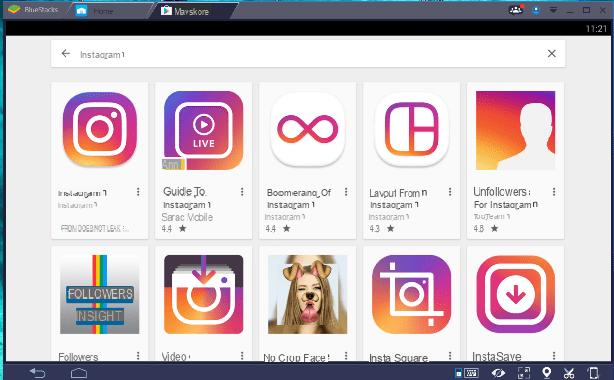
Open, therefore, the Play Store, by pressing on its icon located on the screen Home, search for Instagram within the latter and proceed to install the app by first clicking on its icon and then on the buttons Install e Accept.
After installing the Instagram app on BlueStacks, start the latter, log in to your account and use the app just like you would on a smartphone. Hence, he clicks on the icon capacitor positive (+) lead located at the bottom center and select the photo to post to your account.
Depending on what your needs and preferences are, you can upload photos to Instagram from PC by selecting the images available in the computer memory or those present on the integrated memory of BlueStacks.
To use the images already on your computer, click on the entry Choose from Windows located in the Instagram window from BlueStacks, to use the images stored on the BlueStacks memory, presses the voice instead Gallery of the app.
How to upload photos to Instagram from PC


