


Collectibles in this chapter:
Hats: 2
Problems: 6
Enemies: the bullies, the teacher
Step-by-step procedure
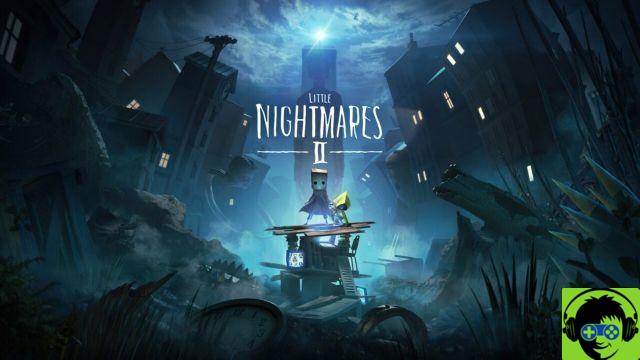
After washing ashore and entering through the only available door, you'll find yourself in a decrepit building with the remains of a person with their head through a television hanging above you. This marks the beginning of chapter two.
Go forward a bit and you will see a hole in the wall. Go up to the deserted street outside. Right in front of you is what looks like an old bar or restaurant with an open window.
Go through and you'll see a wooden door with an exploded hole that's big enough for Mono and Six to go through. You will then enter a room with broken televisions and a window too high for you to walk through on your own. Walk over and Six will give you a helping hand. She will not be able to pass, so you will have to help her on the other side.
Once you're done, you'll see another broken TV - this one attached to some sort of rope mechanism. Jump, grab the rope and swing several times in front of the TV.
After a few swings, the TV will drop and propel you up. From there you can swing and land on the ground in front of you.
Go through two doors and you'll find yourself on a ledge with another TV on it. This is connected to the one below which Six is now standing. Push that TV and it will bring the other up, allowing Six to reach the area above you.
Head back through the doors and you will see that a broken section of stairs separates the two of you. Six will reach out to you so that you want to run, jump and grab her hand so she can pull you up.
Go up the remaining stairs and go through two more doors with a door serving as a bridge between them. This is where Six landed when you pushed the TV out earlier, but it's worth going back because that's where you'll find the first problem in the chapter.
Collect it and return to the previous level. This time you're going to want to cross the beam. It's broken in the middle, so you're going to have to jump.
You will reach a partially closed door through which Mono and Six can easily enter a room with what is left of a hanged man. The door to this room is smashed and smashed so you can sneak in.
You are now in a room with a television. This one is not broken but it gives off a lot of static electricity. Approach the TV and Mono will touch his hands to the screen.
On the screen is what looks like an arched hallway and you will need to use the joystick to adjust the transmission. Once you've done it right, the image will come closer until you're drawn to it.
Start running towards the end of the hallway and you'll see a door with an eye engraved in it. As you get closer, you are ejected from the transmission and the television turns off. Go up through the window and get down into the dumpster below.
In front of you is another dumpster which, with the help of Six, can be moved to reveal a hole in the wire mesh.
Crawl around and you'll find yourself in the playground outside a school. In the far corner of the playground you'll find your second problem next to a broken bike.
Pick it up and then head to the main entrance of the building. You can't get into it that way, but if you go up the stairs and get on the dumpster, you'll find the first chapter hat.
Take it, then drop down next to a goal post and you can see a long rope made out of what looks like leaves.
Climb on this rope and enter the school through the window. From where you land, keep going until you hit a switch. Shoot on it and you will see light shining through one of the images suggesting that there is something behind. There are many objects lying around in the immediate vicinity.
Take one and throw it on the board so that it falls down to reveal a hole. Climb and cross and you'll fall into a small room with a singular chair inside with a number of tools.
If you walk around you will see that the floor is loose in the middle of the room - a hatch. Once you find it, jump on it until it opens and you fall into a crawl space under the ground.
Follow the path until you face a drop. Jump to the next piece of floor and from there onto the floor. You will see a vent. Open it, crawl through and you'll fall into a hallway with lockers.
Climb over the overturned locker and you'll get your first glimpse of the school teacher, although at this point you only see her shadow. Keep moving forward until you pass a hanging bucket. The next hallway is also full of lockers, but you need to proceed with caution. A few steps in front of you is a ball and just before it is a floor that looks a bit looser than the others.
Jump on it to avoid triggering the trap that sends a swinging bucket in your path and continue until you reach a fallen light. Crouch underneath and approach other overturned lockers. You'll get a glimpse of a tiny figure before it disappears. Crawl under a space in the lockers and you'll see an open door leading to another hallway.
The next hallway is lined with more lockers and you can make out another floor trapped about three planks past the desk overturned in front of you.
Jump over another trapped floor and continue. The door right in front of you leads into an empty bathroom and gives you another glimpse of one of the school bullies, but other than that there is no solution.
Instead, turn the corner and approach a monkey toy at the end of the room. When you reach it, bullies will push a locker down. Be careful to avoid it when it falls, then use it as a platform to climb over the two lockers blocking the door.
Go down and continue in the next hallway. There's another trap ahead, but it's harder to spot because it's not the floor that necessarily looks loose.
It's actually the one that's directly in front of the duck toy, but you'll need to turn this off because it drops a light and you need it to climb the table. Just make sure to dodge as soon as you step onto the floor so the light goes over your head rather than crashing into you. Get off the table and keep walking.
Towards the end of the next hallway, a bully will push a locker above Mono, and then a group of them will kidnap Six. By the time Mono breaks free, Six and the bullies are gone.
If you try to chase them as they went you will just see them escape using a rope ladder which they pull out. Instead, climb over the locker and grab the hammer.
Sneak up on the bully by the door in front of you, use it to bring him down from behind, and move into the next room, still holding the hammer in case you need it.
The next room contains another bully, but you can let their own traps do the work for you this time around.
Sneak onto the floor and as soon as you step on the loose floor, crouch down and let the swinging bucket hit the bully. I recommended that you take the hammer with you in case the bully notices you approaching you, because if he does, the chances of the trap hitting him decrease.
You will then come across a door with a hole and a chair leaning against it. Go up and go into the next area. Open the third locker in row six and you'll find the third chapter problem inside.
Pick it up and cross the hallway. You will pass a closed elevator that needs a key. You will need to enter, but first, of course, you have to find the key.
Keep moving forward, pass a locker room and enter a classroom. This is where you'll get your first real look at the teacher and at this point she looks pretty normal. She teaches early in class, but turns around frequently to write things on the board.
When she's not looking, you have to sneak into the room. Take it slowly and use the desks as a cover because if she turns around and sees you all the bullies will pounce on you. Once you have passed through the classroom, you will come to an open door.
Enter and you will see the key above a bookcase. Climb on it and it will start to fall. At this point, jump to the side to avoid getting run over. The fall of the bookcase will catch the teacher's attention, so be prepared to hide in the box near the binders as she comes in to investigate.
When she can't find you, she locks the door so you can't go back. A small vent opens however after you collect the key if you haven't already, crawl through.
You come out of a closet at the front of the classroom and the teacher is much closer and she is moving now, walking around to check that her students are behaving. Wait for her to walk away and sneak up to the first office. Again, use the desks to protect yourself as you come back on your way. I found that the best way was to go from the first desk to the middle back and then to the one closest to the door.
Once out, go back to the elevator and use the key. The elevator will open and take you to the next floor. Move into the next room and you will see a tyrant drawing on the ground with chalk.
He's on a chain and there's a pipe next to him, so the best thing you can do is grab his attention and pull him towards one of the walls. It will run at you and the chain will prevent it from knocking it down. Use the time he spent to grab the pipe. Hit him with the pipe and use it to open the door.
On the other side of the door there are drawers to mount that lead to a ventilation system. Follow it and you'll find yourself in some ceiling rafters. Falling on the beams will cause some bottles to crash and the teacher downstairs will investigate so quickly and hide in the box.
When she's gone, go through the beams. Eventually you'll hit another bottle, but if she investigates there's another box to hide in.
When the coast is clear, climb the makeshift rope hanging above you to the upper level and cross the beams. You will see a plank of wood that can be pushed to allow you to reach another vent. Do it quickly because the teacher will hear you and come after you and this time there is nowhere to hide.
Follow the ventilation system and you will reach a bookcase. The professor, who seems to be moving quickly, is prowling inside, so you need to be quiet.
Go down on the bookcase below, then on the floor and you will see a sliding ladder. Push it to the next library and go up there to find the second and last hat of the chapter.
Go back down and push the ladder to the next bookcase. Go up and jump to the lower library. Follow the path of the shelves, jumping from one to the other. When you land on the second bookcase, a stack of books will drop and grab his attention, so run until you reach a space in the shelves that you can browse.
On the other side, you will see two large towers of books. Jump on the first one and climb the pounds, moving around until you are able to move on to the next one. As you hang on to the next tower, more books will drop and she will start looking for you again.
She's going to use her long neck to peek around the tower so you have to keep turning to avoid her gaze. Eventually, she will lose interest and leave the room. When she's gone, jump on the ramp.
In the next area you will see other bookcases and a box of books on the floor. You can see scratch marks on the floor in front of the box, suggesting that it has been dragged before. Pull the box across the room and up to the door the teacher left through. Get on the box and open jump on the handle to open the door.
You will enter a reception area which, if you continue, leads to a grand staircase.
Right in front of where you entered is a locked door. You want to go through it, but first you have to find the key. Go up the stairs and turn left and you will find the fourth problem between the handrails.
Pick it up then go back, turning right this time instead. At the end of the room, you will see a broken chess piece. A tower. Put it back together and get on it so you can jump at the handle and open the door.
Disassemble the tower again and take the top piece with you as you will need it in the next room. Inside you will see a large chessboard with a pupil attached to one of the pieces.
This puzzle requires a number of steps to solve. First, across the room, right in front of where you entered, you'll see a screen. Pull it up so it goes up and you can see the diagram behind. This tells you what to do with the chessboard.
Basically you have to replicate what's on the diagram. Per the diagram is a table with a piece of queen on it. You'll want to remove the top and put it back on the board. Leave it for now and take the tower you used earlier. Place it on the piece in front of the table by the knight. Climb on the table and collect the king's coin on top.
You now have all your parts and you just need to position them according to the diagram. The queen's top goes on the room closest to the knight and the king goes on the room closest to the pupil. The tower goes to the room next to the table with a bottle on it.
Once all the pieces are in place, the light above the table will come on. Use the tower to climb on it, then jump to hang from the light. This will cause the shelves at the back of the room to open, revealing an isolated chair. On this chair is the key needed to open the door below.
Pick it up and head back to the door, open it and go through and find yourself in a room full of trash and plates.
Go down the stairs and you will see a closed door, a cart, and a vent. First pull the cart to the vent. Push open the door she was blocking and you'll enter a pantry to find the chef's remains. Above is your fifth problem. Use the body to climb up and grab it.
Leave the room, get on the cart and crawl through the vent to drop into the kitchen. In front of you there are shelves and as you get closer to them you will see bullies in the next section and a ladle on the floor.
Climb up and grab the ladle and use it to defend yourself against four bullies. The first one can be taken by surprise and the others will come to you one by one, so it shouldn't be too difficult.
The last bully's head remains intact, and you'll need to pick it up and carry it so you can infiltrate the next area.
Now, carrying the head of the bully, crawl under the table and into the neighboring area - a dining room. If you get too close to a bully, they'll push you around a bit, but other than that, they'll leave you alone now that you're in disguise. Walk around the room avoiding bullies until you reach the final table.
At the end where the two tables meet, you can dodge and crawl under it. As you crawl, you will see one of the bullies on the table above you, pushing a pot.
Drop that before you go out or it will end up crushing you.
Once you leave the dining room you'll find yourself in another hallway, this one full of other bullies. They won't bother you, so keep going until you reach a warped door that you can slip through.
While you do this, Mono will fall off and your mask will shatter, but it's done. You are now in a room lined with shelves. In front of you is a closed door with a button to open it.
Mono is too small to reach it, so you're going to have to climb the shelves. Once you have reached the top you can climb onto a small open cabinet and from there jump onto the first cabinet. In front of you there is a stack of books, so get on them and into the next cabinet. A plank of wood is leaning against the cupboard and the light. Go through it and jump on the drawers in front of you. Climb and jump on the rope behind you and use it to swing to the other side. Follow the path until you reach a jar containing a brain.
Throw it away so the jar shatters, then go back down and you'll see the glass shattered. Take the brain and throw it on the button to open the door.
The teacher is in the next area, so you'll have to crawl through the vent to find yourself under the countertop to avoid it.
She'll be moving around a bit, so when she turns away from you, sneak into the space under the drawers in the middle of the room. Eventually, she will leave the room with the door open, so follow her into the next room.
You have to climb into the drawers and onto the counter, crouching behind the glass jars to avoid being seen. When her back is turned, cross the counter. Don't try to rush because if she sees you, you will probably die eventually. Jump from the first counter to the second and then through the window, making sure to hide behind jars whenever she looks.
In the next room, right in front of you, is a library.
Climb it up and go through the vent above. Follow the vent and push the grill to the end and you'll find yourself in another hallway full of lockers. On the ground in front of you is a hammer.
Pick it up and continue. In front of you, a tyrant draws on the ground. This one can be taken out by triggering their trap by walking on the second floor after the carpet. Walk away so that the trap hits the first bully but misses you. The rest can be knocked down with the hammer. Continue and turn around the corners. When you turn the corner and walk past a new set of lockers, two more bullies will jump - one in front and one behind you - which you'll need to hit with your hammer.
Turn to the next corner and you'll see a bully hiding behind an overturned locker. Be on your guard, because as you approach another will jump out of the locker behind you.
The timing can be a bit tricky as Mono is slow to swing his weapon, but as a rule bullies will scream right before they're about to pounce so swing around at that point and more often than not, you will get a hit.
Once you've dealt with all the bullies, keep your gun and go through the open door at the end of the hall. The fifth floor away from the door triggers another swing trap, so be prepared to dodge it. Once you walk through the door, you'll find yourself in a bathroom with two bullies hanging Six up in the air with a rope tied to a plank of wood.
Use the hammer to take down the bullies, then hit the board until it shatters. Six will fall, but she's free so go ahead and help her up. Now that you are reunited, you can escape through the window, but it will take both of you to open it.
On the windowsill you will see a large plank of wood that you can cross to reach the next building.
Crawl through the window and you'll find a room with a piano inside. The piano is attached to a rope mechanism and there is a handle on the side. Turn it until the piano hangs as far as it will go, then drop it. The piano will hit the ground hard enough to shatter it. Now that it's half stuck in the floor, the mechanism will no longer work so follow Six's example and step on the piano. Stepping on the piano keys a few times will earn you an achievement, so do it before you climb to the top.
Jump a few times and the piano will crumble the rest of the way and you'll find yourself in the room below. Inside the room is a locked door and a vent that Six will signal you to. Allow him to help you and you'll see a bully stab what looks like a frog with a key. There is a gun behind her so jump down and Six will start making noise on the piano to distract the bully.
Sneak up, grab the gun, and punch the bully from behind. Take the key and Six will help you lift the metal door so you can get back to it.
Unlock the door and go into the next room. Inside you will hear the sound of piano music and see a tyrant drawing with chalk and a weapon lying on the ground. Sneak up on the bully and Six will take care of it.
You want to continue, but a cupboard is blocking your way. Take out the drawer and use it to climb up and down. Go down the hallway and you will come to some stairs.
Climb them and you will reach a landing and the only way to move forward is to climb cupboards and books. Six will give you a first boost.
Once you reach the top you will see two things: a wooden crate and a metal grill covering a vent.
Push the crate down so Six can use it to follow you, then open the gate with their help. Crawl through and follow the ventilation system until you reach a music room which is unfortunately occupied by the professor playing the piano.
You start on a wooden shelf first and want to go to the opposite side where you can see a vent, but first you have to lower the metal beam to make a bridge.
To do this, jump into the closet below, making sure you only move while she is playing, otherwise she will hear you. On the other side of the room is the handle of a mechanism that will lower the metal beam to allow Six to pass through. Walk towards him and lower the beam.
Next to you is a box with wheels and you'll need to push it into the cabinet you dropped before. Again, only do this while she is playing. Use it to climb back up into the closet and up the path you came from, using the books as a ladder so you can follow Six through. The opening of the gate will catch her attention and she will chase you through the vents, so crawl quickly, making sure to push the secondary gate quickly.
At the end of the ventilation system, you'll need to jump to another opening, but Six will be there to help you through.
Jump through the opening and you'll slide onto a roof and land in a dumpster. Go up and go forward until you reach a series of wooden planks fixed together to make a bridge on the other side of the city.
Go through them and continue until you reach an open dumpster. Push it forward until the cover closes, then push it to the side until it's as close as possible to the next ledge, which admittedly isn't very far. There is a TV near the dumpster. Climb on it and use it to jump on the dumpster, then run and jump over the ledge.
Go up then continue to advance until you reach an alley blocked by rubble. On the ground you will see a paper boat and next to it is your last problem in the chapter.
Pick it up and walk towards a broken wooden door. Go through the door and you will enter a storage room. On the ground in front of you is a yellow raincoat that Six will pick up.
Once she carries it, she will wave you towards the door and pull you up so you can reach for the doorknob. Open the door and enter what looks like a tailor shop.
There is nothing to do here except walk out the window and continue. Keep going until you reach a metal door blocking your way. Next to it is a dumpster with a TV on it.
Six will stimulate you and you can use the TV to climb up to the roof above. Go down to the other side and push the wooden board that covers a gap in the fence.
Once Six has passed, climb into the dumpster against the wall and open the vent. Follow the ventilation system and you'll find yourself outside a hospital. Crawling through the open window marks the beginning of Chapter 3 of Little Nightmares II.


