


Windows is a very well known system in the world and has always been a standard of computers, albeit questioned by a very powerful and well developed Linux, present in various distributions. It is known that as an operating system it is quite delicate: it becomes infected, but above all it accumulates temporary data in the form of files and registry keys.
This article aims to clean up, make effective and maintain your system with the possible help of some free tools available on the web, all using the computing power at your disposal. In two words: speed up Windows!
Preliminary information
We always recommend doing an installation through one 100% genuine and original license, this is to avoid data loss or hacker attacks. We are aware that purchasing a license on the Microsoft store has a high cost. For this we have selected for you Mr Key Shop, a reliable site with free assistance specialized in in your language, secure payments and shipping in seconds via email. You can check the reliability of this site by reading the many positive verified reviews. Windows 10 licenses are available on this store at very advantageous prices. Furthermore, if you want to upgrade to the latest versions of Windows operating systems, you can also purchase the upgrade to Windows 11. We remind you that if you have a genuine version of Windows 10, the upgrade to the new Windows 11 operating system will be free. Also on the store you can buy the various versions of Windows operating systems, Office packages and the best antivirus on the market.
Speed up Windows
Windows load optimization on RAM and paging
Before starting with the system configuration I would like to mention the operation of the virtual memory (also called "paging" or "paging"): excess or long-standing data in RAM is written to disk in a paging file, "pagefile.sys“, So as to empty the memory and allow a more efficient use of the programs; if the RAM is full this process will take place as fast as possible.
The problem with paging is that it writes to disk, slowing down other operations in progress on the computer; the idea is to use it as much as necessary or remove it and this depends on the case. Each version of Windows has an adequate amount of RAM, thanks to which you can resize the paging, limit its use or even remove it, also based on the tasks that the computer is required to perform.
On a PC with office tasks, such as writing, printing and browsing, with a sufficient amount of RAM you can safely disable pagination; in this way the hard disk of the computer will only have to read the system data and will not have to write to the virtual memory file as well.
The situation is different if the computer will have to perform some video rendering and special effects: given the high consumption of resources it is a good idea to leave paging active and only limit its use.
To speed up Windows we therefore recommend carrying out the procedure for removing the paging file only if the amount of RAM installed on the system corresponds to that marked in the "Adequate quantity" column of the table above, while it is advisable to carry out a simple reduction in the case of which responds to the "Sufficient quantity" column.
To limit its continuous use by Windows we will have to act on the system registry via "regedit“: Let's look for it from the Start menu of Windows 7, Windows 8.1, or Windows 10.
Now we will need to expand the keys until we get to the subkey
HKEY_LOCAL_MACHINESYSTEMCurrentControlSetControlSession ManagerMemory Management
From the right column we select the value with a double click DWORD "DisablePagingExecutive”And we set it to value 1; this value disables the continuous paging of the RAM. We select the DWORD value "LargeSystemCache”And we also set this to 1; this value tells Windows not to care about the memory occupied by its files, which will improve startup speed in a small percentage.
The next step to speed up Windows is resize or move the paging file; Windows continually resizes the paging file on the system drive based on usage, but despite the convenience it fragments it. By choosing a fixed size on the newly installed system or on a defragmented disk, important performance degradations are avoided.
The paging size I suggest is half the installed RAM if you use games, equal to the adequate amount of the system (see table above) if you use video editing programs or the like, nothing in the case described above, i.e. for office use with an adequate amount of RAM (second column ).
To speed up Windows it is useful, in computers with multiple hard disks (NOT PARTITIONS, note!), To put the paging file on the second disk in order to parallelize the work of the disks themselves: one loads the files, the other reads and writes on pagination; if you set paging on the second disk, it is a good idea to have it formatted shortly before, so as to place the paging file in the initial and fastest part of the disk itself.
In computers with a drive SSD (solid-state drive) it is a good idea to avoid paging (where possible) on the SSD itself because it would cause premature wear; having more disks available, move paging to the traditional hard disk; in the case of laptops it is advisable to double or increase the available RAM to the limit and disable paging.
Let's move on to the opera: from Control Panel you select "System and security> System"And, from the left column,"Advanced system settings".
From the panel that appears, select the "Advanced"And, in the section"Performances", You will need to click on"Settings".
From the second, small panel that appears, we choose the "Advanced"And in the section"Virtual memory"We select"Change".
At this point we will see the units (indicative of the DISC PARTITIONS, attention!) And the size of the paging associated with it; change the settings according to the intended use of the computer and according to the recommendations above.
Disk space optimization
Disk space is not a performance priority but system cleanliness and storable data. Often while browsing temporary data accumulates on disk, in addition to what we download and forget in the downloads folder. These data are garbage that it is good to remove, after all the computer is not and must not be a dump, but an efficient work tool, just as we check and wash the car.
Of course, in the download folder there are also data of interest, but it will be the user's precaution to store them in a special directory or disk.
We will talk more about disk performance to speed up Windows after cleaning, otherwise it will be less effective.
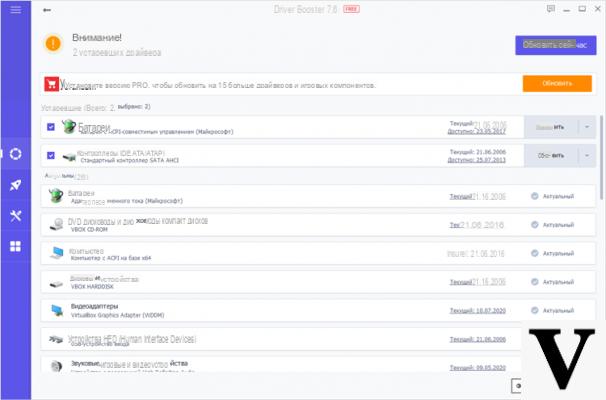
To free up space we will use a free tool, CCleaner.
DOWNLOAD | CCleaner.
As soon as it is started we will immediately see the cleaning section ready for execution but we will first have to make additions, that is to add two or three folders that in Windows NT 6.x are not cleaned properly or are not cleaned at all.
The recipe is a bit annoying to implement but it will give important results: open the Control Panel and go to Tools> Folder Options from the menu bar (if you are using Windows 10, open the Control Panel and press the ALT key to bring up the menu bar).
Move to the tab viewing and put the check mark first on "Show hidden files and folders", then look in the list "Hide protected and system files”And remove the check mark. Date Ok.
Now let's go back to CCleaner: click on the button "options"On the left side, then next to the button"Custom“; here you can add all unwanted folders or files to be cleaned using the command "add" to the left. The path to always add is
C:UsersNomeUtenteAppDataLocalTemp
If you are using Adobe After Effects also add:
C:UsersNomeUtenteAppDataRoamingAdobeCommonMedia Cache Files
e
C:UsersNomeUtenteAppDataRoamingAdobeCommonMedia Cache
Remembering to replace a username your username. Now you can go back to the cleaning section and empty the disk.
Note VERY well: cleaning deletes the history and cookies of browsers (except those opened at the time of cleaning) and of the system, so some searches will have to be redone and some accesses to the sites will have to be rerun.
Later we find "System Restore", Whose service"Copia shadow volume”Is in the list of services (which we can completely disable in part 3“ Windows efficiency optimization “). Its use of the hard drive is disproportionate, however it should be emphasized that it could be theonly way to recover files in case of ransomware infection.
To get there we will have to right click on Computer / This PC (on the desktop or from the Start menu) and choose "Property“; the system information window appeared we search from the bar on the left "Advanced system settings".
In the window that appears, select the "system protection", Select the system partition and click on the"set“; in the nth window that appears, select the "remove”To remove all the restore points made up to the moment (one for each program installation or update) and, if we are sure that we will not need the restore points, disable them by selecting the sticker at the top.
If you want to keep this option active, you can repeat the cleaning procedure at regular intervals.
Finally we can (and we must, we do everything we can to speed up Windows, right?) uninstall unnecessary programs, those that you think you will never use again and those that install, like weeds in the wheat, along with other programs that we use regularly.
To do this we can go to the Windows Control Panel or CCleaner, clicking on "Instruments”From the left bar, the program list will appear automatically. Attention to satellite programs, required by the so-called "suites" (Adobe Creative Suite, Ahead Nero etc ...): once removed, if required they will be restored.
Windows efficiency optimization
Now that the disk is clean we can think about improve performance and speed up Windows, a point expected and requested by many; the efficiency of Windows actually concerns the whole computing apparatus, and in the next section we will deepen how to improve the performance of the hard disk.
A complex operating system is composed of many modules, necessary for the needs it is programmed to meet; usually not all the features of Windows are used however, they are loaded anyway, occupying memory, using the disk for loading and lengthening the boot time. It is therefore logical to think of disabling some functions (services) that are not used in the system.
To do this, press the key combination WIN + R and type the command inside
compmgmt.msc
followed by Enter. Expand the items now Services and Applications> Services.
You will now see a very long list of system services, but you shouldn't be scared as there is a description for each. However, if you are not sure how much you are changing, I strongly recommend that you leave the current settings.
Below I list the settings that I apply myself to some services, in alphabetical order, to speed up Windows:
- Secondary access: disabled (only useful on workstations)
- Windows Image Acquisition: manual (if you are using a camera but not the software supplied with it) or disabled
- Cache WPF fonts: disabled
- PC security center: disabled (it will break the boxes with a message, don't go over it so you never see it again)
- DNS Client: disabled (DNS names will be resolved the same, but not cached)
- Copia shadow volume: it may be disabled as it is intended for “System Restore”, however it may be the only way to recover files encrypted by ransomware; you have to think about it before acting
- Offline file: disabled (except workstation)
- Helper IP: disabled (if you are sure, like me, not to use IPv6) or Automatic (delayed)
- Service host / system diagnostics: disabled (they are two distinct services)
- Home Group Listener: disabled
- Machine Debug Manager: disabled (appears with MS Office)
- Client Distributed Link Maintenance: Automatic (delayed)
- MS .NET Framework NGEN (all): disabled (if not using Visual Studio) or manual
- Windows time: disabled (time synchronization with server, not necessary)
- Home Group Provider: disabled
- Server & Hosting: Automatic (delayed)
- Windows Font Cache Service: disabled
- Diagnostic Policy Service: disabled
- WMP Network Sharing Service: disabled
- Program Compatibility Troubleshooting Service: Automatic (delayed)
- Windows Error Reporting Service: disabled
- Print spooler: disabled (if you are NOT using printers) or automatic
- Windows Defender: disabled
- Windows Search: disabled
NB: these are Windows 7 services, identical to Windows 8.1; many are also present in Windows 10, sometimes with an altered name.
Further changes are to be considered dangerous for the stability of the system or mutilating useful features, find out more by looking for information service by service.
Now let's also think about the system log to speed up Windows: in it there are all the hexadecimal settings of Windows and programs, some too many and unused; as for temporary files, the registry also suffers from accumulation, in this case of invalid keys, ie obsolete settings that Windows always loads with removed or updated programs.
To clean the registry as well CCleaner is back in the game: from the bar on the left select "record“, So as to arrive in the appropriate section; first the register is analyzed (central button at the bottom) and then it is cleaned (button at the bottom right); note that if you want you can select the keys not to be removed and you can create a backup of the keys you are removing.
Now that we have cleaned the system it suits us check which programs we want to start with the system: if we leave everything active at boot the hard disk will have to read more data, lengthening the boot time, and the system will have to deal with more memory allocated for nothing.
To check what we really need we always use CCleaner: from the bar on the left we select "instruments", Then the subcategory"avvio“: Here the registry entries of the programs that start with the system will appear; select the elements you need item by item and disable them with the appropriate button on the right. Also note the tabs concerning the various browsers (plugins can be disabled) and that of the context menu (the “right click”).
Note: if we realize that we needed a program when starting, we go back to the previous position and re-enable the registry key; that's why I recommend not deleting any items from the list.
Disk performance optimization
Finally, we take care of the "mechanical" performance of the computer hard disk, so as to speed up Windows. These operations are to be considered periodic over the long term if you do not often modify the contents of the pc or only with a new installation, or you have never done so, if you mount a SSD (and I'll explain why).
A function to activate is "Disable flushing of disk write cache”For the system disk, even more so if SSD: the write cache serves as a temporary storage space while waiting for the disk to write the requested data; if you avoid the sudden emptying, the system will avoid as much as possible to call the disk for writing, since it will keep the (dynamic) portion dedicated in RAM full.
In this way Windows will avoid having to perform a write, and therefore a disk operation, for each modified byte (in SSDs it slows down the wear a little); in the very frequent case that more writes take place under one MB when this buffer is filled, a single I / O call will be performed on the disk.
To get there, we type the key combination WIN + R and once again we type in it
compmgmt.msc
followed by Enter. In the window that appears, select "device management" (or "peripheral management“) From the left column; in the list in the center of the window we look for "disk drive“, Expand the section and select the hard disk drive of the computer (if in doubt which one it is, if you are using external hard disks, disconnect them all) and double click.
A new window appears, let's go to the "criteria"And select the check box with the description"disable flush write buffer to disk".
Another function to try is the prefetch: this procedure takes care of identifying the executables that start with Windows, also tries to guess which ones might be used frequently in the future, and loads them into memory during system startup, speeding up the start of programs once started the system.
The Prefetch and its successor Superfetch copy the data to be loaded into memory into a system folder, "C: WindowsPrefetch”And can take up some space as content is added (note: not updated) all the time.
In SSD both functions must be deactivated, as the efficiency and speed of the SSD are so high that they do not require a partial loading of the programs in memory and to save them some wear.
To make it effective again we need to empty the "C: WindowsPrefetch" directory, so as to renew the strictly necessary content on the next reboot, and then follow the last step.
In the case of SSDs we will have to put our hand to the system log to disable it, so we press the key combination WIN + R and inside it we write
regedit
followed by Enter. Let's navigate to the key
HKEY_LOCAL_MACHINESYSTEMCurrentControlSetControlSession ManagerMemory ManagementPrefetchParameters
The parameters that concern him are "EnablePrefetcher"Ed"EnableSuperfetch“; these parameters have the options in common, to define the type of executable to store:
0 - disabled
1 - programs only
2 - system only
3 - programs and system
The default option of both prefetchers is 3; however, having an SSD, these parameters must be set to zero.
La defragmentation it is the final part of disk optimization, since it changes the location of the data physically on disk, and should be done immediately after fixing the Prefetch. In a traditional hard disk, data is written to the series of blocks (cluster, which is the smallest disk storage unit) closest to the head position, if the blocks at a certain point are not enough for the amount of data the head is moved and writing will continue to the next set of blocks.
This writing method is unhealthy for reading performance: when you have to read a file, the hard disk will struggle to recover the pieces, the head will often move, wasting precious time.
This thing is absolutely from AVOID if you have an SSD drive, the combined reads and writes would increase its wear, not to mention that the internal structure (as if they were many keys put in parallel) the more fragmented it is, the better it works. In fact, in SSDs, the pieces of a file are stored in the various chips inside them, but in reading they are interrogated simultaneously.
If you have a traditional hard drive I recommend using Auslogics DiskDefrag, of course free. Select the system unit, then from the list button select "defragment and optimize".
In the settings you can select a specific check, with which the main system files are placed at the beginning of the disk during the optimization; if you witness the work of this program, with the use of this option, it will also leave a "hole" in the middle of the files, just after the system ones: it will be used by Windows to recreate the Prefetch files (which we removed before , if not disabled) of programs left at startup.
With a platter hard drive, the first two system starts after these last two optimizations will be somewhat slow due to the re-creation of the Windows Prefetch; it is a good idea to reboot the system twice immediately after the optimization, only then you will see the results obtained.
Speed up Windows - Startup Optimization
Often we do not even notice it but the installation of new programs crowd the system startup: many of them auto-start with Windows and this could considerably slow down the first loading of the entire system.
Usually many of these apps have an icon that is located in the area next to the Windows clock and, apart from the most important services, can be removed to speed up Windows startup. The advice is to enter the Windows Task Manager and, through the card Start, choose which services to delete and which ones to keep running! My advice is to leave the drivers, the antivirus in their place and remove everything else instead.
Deleting a program from the start does not bring complications except the simple fact that you will not find it ready for operation but it will be you who will have to start it when you need it.
Speed Up Windows - Shutdown Optimization
Here is another problem that is well known in the Windows landscape and that can be caused by an incredible number of factors. Sometimes the system fails to shut down quickly due to some program still running and that you forgot to close, or it could be a problem related to some corrupted or modified registry entry. In this case we recommend that you use a janitor like CCleaner.
And if that doesn't help ...
If you do not get the desired results by following this guide, I simply recommend that you remove your current copy of Windows or reset your PC (perhaps keeping the data) in the case of Windows 10, then follow the guide again. In the case of a very “dirty” system, it may be difficult for Windows to be recoverable, as the system files and the registry have now been excessively modified. C'est Microsoft.
Doubts or problems? We help you
Remember to subscribe to our Youtube channel for videos and other reviews. If you want to stay up to date, subscribe to our Telegram channel and follow us on Instagram. If you want to receive support for any questions or problems, join our Facebook community or contact us on Instagram. Don't forget that we have also created a search engine full of exclusive coupons and the best promotions from the web!


![[Free] Software to Play and Listen to Music on Windows PC -](/images/posts/bce57ef3d2bc9852e0fa758f66120b13-0.jpg)