Vacation time, or almost, and you will surely like the idea of taking some captivating photos to emphasize your excursion, be it to the sea or in the mountains. Personally I'm more of a mountain vacation type, but I don't disdain the sea, as long as there is obviously something to photograph besides the sea at sunset, the sea at night, the sea at dawn and the rough sea.
With this little guide I'll reveal some interesting tricks to use on vacation or even during a weekend by the sea, in the mountains or by the lake.
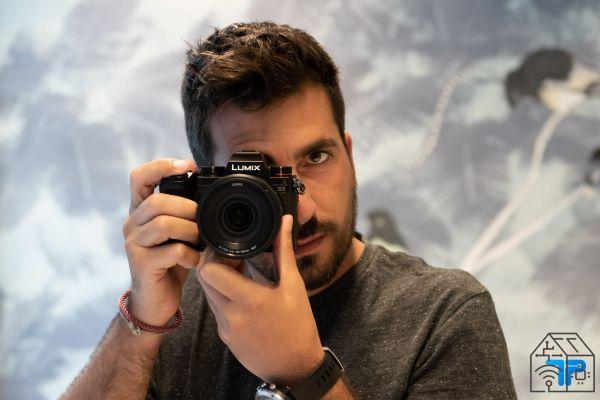
READ ALSO: Reflex in 2019: is it worth buying one?
Five photos to take on vacation: the themes
I have divided these photos into 5 themes, so they will not be exactly 5 shots but more "5 kinds of photos" or "5 ideas for photos on vacation". This because each type of advice is very different from the other and is distinguished by the use of a particular photographic technique. No cameras were harmed to take these photos. These tips for five photos to take on vacation are the result of many past experiences and above all of many mistakes made, so don't worry if you don't succeed at the first try. It is right to experiment and it is right to make mistakes, but never let yourself be intimidated by an apparent complexity on a photographic level.
Five photos to take on vacation: a story to tell
Don't forget that the best thing you can do with your camera is to tell stories. Everyone likes stories and, thanks to the very advanced means we have at our disposal today, everything becomes easier. Yes, because between cameras, Instagram, Facebook and various social networks it is easy to tell something that leaves its mark or simply use your art and your creativity to depict something differently.
In this case, I'm obviously talking about portraiture or street photography, a genre that maybe not everyone likes but that certainly tells something.
A practical example to tell something in a creative way is the use of the technique of Panning: it is a photographic technique that serves to convey the sensation of movement to the viewer. It is one of the most difficult techniques in my opinion to perform. Eg, you will find when you try that the actual focus on the moving subject is not easy and will often create micro blur which will require more attempts, so it is definitely a technique to be mastered well.
[amazon_link asins=’B07D6XP5VL,B07NNWL2GB,B07B9RXC8M,B073D2SMMX,B07HKQDBHK,B00GPE5XD4′ template=’ProductCarousel’ store=’gamspri02-21′ marketplace=’IT’ link_id=’29fd5c0f-bda1-4e30-9a73-7d0f485fffc8′]To perform a good panning is enough to adjust the right shutter speed to the moving subject. In general, keep as a reference that 1/200 is a correct shutter speed for panning of a racing car, 1/60 is right for a cyclist and 1/30 for relatively slow moving subjects, such as runners. Remember to adjust the ISO according to the light and, above all, try to keep an aperture as closed as possible to avoid further focusing problems. A value between f / 8 and f / 11 will work fine in most situations, but you may also need to close more.
Similarly, you can tell a story with a ritratto.
Last year, in Sardinia, I was fascinated by the story of Edoardo, a gentleman who has a small shop in San Teodoro and who made me smile because first of all he "believes it" much more than me or any other guy in the my age, and also because it represents the story of an entire city. His shop, the same for years, his homemade products, a long history. In short, I liked it and I photographed it.
You may find the same ideas for telling wonderful stories too. The same thing can be done with an animal, caught on the fly in a fantastic pose, captured at the perfect moment in its environment, avoiding disturbing it, as I did to portray a fabulous Elk posing, a kind of Canadian deer that I saw. and "captured" (photographically speaking) at Yellowstone Park during a decidedly out-of-town trip.
Five photos to take on vacation: the long exposure
Will you ever miss the moment during a trip when you decide to take a long exposure? Definitely no.
This technique is easier if you are at the sea or near a river as the water is moving and the final effect will be fantastic.
This technique is definitely a classic, but it is always spectacular as a type of photo and it will surely be a fantastic way to show your friends the holiday photos without falling too much into the banality of any selfie in the mirror.
[amazon_link asins=’B01F1JJ5ZU,B00HF6HJFG,B01514W0OS,B01M2WBTSG,B004GYXRRE,B0179FHTFW,B00E4FNHFC,B00E9N90M8,B00E4FODAU’ template=’ProductCarousel’ store=’gamspri02-21′ marketplace=’IT’ link_id=’ba01061f-d02e-41dc-8466-3bc38cc0dae8′]
To take this kind of photo during the day, however, you will need an ND filter, which stands for "neutral density". It is a glass to put on the lens that can be dark or darker ... or dark only in some parts. Thanks to an ND filter you can block the entry of light into the camera and, consequently, take long exposures even during the day without these resulting white and burnt photos. There are various types of ND and based on this you can expose for more or less time. Check the diameter of your lens to find out which ND filter to fit correctly (otherwise it will be too small or too large).
For this type of photo it is absolutely essential to use a tripodotherwise it would be impossible to make a correct shot, and to calibrate the exposure time well. This factor is a very complex variable, because depending on the light present in the scene and the type of ND filter in your possession, you may have to expose "only" for 30 seconds or even reach 7-8 minutes, depending on what you want to achieve. Clearly, if your ND filter is not dark enough, taking an excessive long exposure will lead to overexposure and a consequent white (and therefore “burnt”) photo. For this reason, I advise you to make a few attempts in order to better adjust yourself avoiding following the indications of the exposure meter as it will not be able, in this case, to predict your intentions. Don't forget to keep the aperture very closed and the ISO extremely low, otherwise you will still have overexposure problems.
Five photos to take on vacation: the sunset
Even this technique and this photographic genre is rather "classic" and already seen, but you could make sure that it is not simply trivial but that it is also a creative and unique shot. Shooting at sunset is a great "trick" of photography above all because the colors are more subdued, the light creates more diffuse and less clear shadows and, in general, everything that is hit by the sun takes on more beautiful colors to see. In short, everything becomes more fascinating.
Try to use rather fast times if you are in "normal" conditions and close the aperture to best portray the landscape. If there is also a stream in the sunset area, you could use the tripod to take a long exposure of a few seconds, even without ND filter, it is not necessary in this case (or in any case it is not strictly necessary). Capturing a sunset can be beautiful in the city but also fantastic in the mountains, to portray a wonderful glimpse.
As already written above, to photograph the sunset it is not strictly necessary to open the diaphragm excessively as it is right to maintain a good depth of field. In the same way, it can be useful to use a relatively fast time to better capture the colors and the light projected in the sky, without forgetting that this figure depends on what you want to photograph: if there is also a stream in the scene, you will have to take this into account. and try to use a slower tempo.
Five photos to take on vacation: HDR
HDR stands for High Dynamic Range and allows you to exceed the dynamic range potential of your camera and thus capture a perfect photo from the point of view of lighting throughout the scene.
Thanks to HDR you can capture even more spectacular landscapes, better manage the sky and, just to stay on topic with the point above, really capture every nuance of the sunset, thus avoiding leaving areas in shadow. It is a technique that requires a "merging“, That is, a union of shots. This means that it cannot be a single shot but, in any case, at least three. The trick is very simple: using a tripod, take three photos with the same frame but with different lighting. For the first photo underexpose, for the second weight the exposure by averaging the three photos, and for the third overexpose, even reaching the point of having the photo almost burnt (not entirely though). Then combining it in post-production with programs such as Lightroom (which integrate an HDR merge function), you will get an incredibly perfect result that will allow you to compensate for the scene.
This technique is particularly useful when you want to photograph the perfectly exposed sky and do the same with the lower part of the scene as well, the one that perhaps contains a hedge, a forest or a landscape. With just one shot, in some particular situations, it becomes difficult if not impossible to obtain the perfect exposure: you will always have to decide to overexpose or underexpose one of the two parts. Thanks to the HDR technique, all this will no longer be necessary.
Be careful: Many cameras and practically all smartphones integrate an HDR function. In most cases it behaves quite well, but the whole operation is performed directly in the camera (so camera or smartphone take at least three photos and combine them) and this guarantees an immediate result but less freedom of processing or color management. . By doing the operation manually as I have described, you will be able to post-produce the shot in the best way ever, thus obtaining a much higher quality result than an automatism or a function that automatically joins the shots.
Five photos to take on vacation: night photography
Did you think I was forgetting about it? Definitely not, night photography is my favorite genre, I'll tell you ad nauseam (yours) or until death (mine, of course). I love to photograph the sky or the cities at night because I am a lover of the night in itself. At night everything changes, everything changes, everything can be looked at with other eyes, starting from the sky.
[amazon_link asins=’B0734XFL9B,B07839ZHPB,B00COLBNTK,B013SJZVIU,B015CGRREI,B07GLMGZHS’ template=’ProductCarousel’ store=’gamspri02-21′ marketplace=’IT’ link_id=’33e7f63c-8695-413d-b9f1-457f7abef1d1′]
Thanks to night photography we can show others something that would be difficult to see at night, such as the rotation of the Earth's axis, the Milky Way carved into the sky or simply some landscapes with completely different lights.
I love to photograph the lights of massive cities at night, such as San Francisco. Or move to the mountains to look at the stars or even portray the beach with different colors.
The trick in night photography is to plan everything well and have a tripod and a lens that is bright enough to allow better light entry (such as a wide-angle f / 2.8 lens, perfect for taking night photos). Yes, because, contrary to what you think, at night it is necessary to go to an extremely dark place (if you take photos of the stars) to avoid the light pollution of the city, raise the ISO (1600-3200), open the iris as far as possible (better if f / 2.8 but also at f3.5 you can do something) and keep times long enough, between 20 and 30 seconds. And if you can, it would be a good idea to use a remote control to shoot, thus avoiding touching the camera.
This because, touching the camera, you could move it and generate the annoying micro-blur inside the shot, the one you will notice too late, when you are already at home in front of the computer.
[amazon_link asins=’B01N133BI6,B076KQHFFK,B00C1Y01T8,B008A3PDMY,B078SPD9Z1,B0014E2374,B019QO15JU’ template=’ProductCarousel’ store=’gamspri02-21′ marketplace=’IT’ link_id=’1a19918f-125b-4e4e-9602-1f20769042e0′]Otherwise, if you are interested in more urban scenarios, know that the technique changes profoundly, because the ISO will be kept on average low (250-800), the aperture slightly smaller and the exposure time much faster. This is because, given the presence of the light from the street lamps, you will have to make sure not to overexpose the shot and therefore find the right average with the light present.
Unfortunately there are no fixed settings to use in the same way every time, everything changes according to the place where you are and the light present.
Either way, night photography is a great way to portray a scene, be it star-studded in a dark place, or in the city.
Five photos to take on vacation: conclusions
Brush up on an old technique, learn a new one, make mistakes, run, always carry a heavy backpack with you and hear the complaints of your partner because you stay too long to photograph a place. All this is part of the common scenario of a photographer or a photography enthusiast on vacation, what really matters, is being able to achieve a result that first of all satisfies you and your expectations, regardless of what others think.
They may criticize you or tell you that your photo is technically wrong, but other than that it is still a subjectively expressed art form. Therefore, demonstrate your skills without falling into banality and create something different and better every time. Holidays are a perfect time to dedicate yourself to this type of photo, because you are resting and above all you are dedicated to your greatest passion.
Tagsfotografia guide tutorial vacation travel Five photos to do absolutely on vacation