


You need to cut out some photos to post on your social profiles but, having recently been in the world Mac, you don't have the faintest idea which programs to use for this purpose? Don't worry: if you want, I'm here to give you a hand and help you complete this technological "feat".
Be vuoi scoprire how to crop a photo with Mac, all you have to do is take five minutes of free time and continue reading: below, in fact, you will find a list of solutions that can surely do for you. I already anticipate that, to achieve your goal, you can use both the applications already included "standard" in macOS and some third-party resources, based on your needs.
How do you say? Can't wait to find out more? So let's put the chatter aside and go into the heart of the tutorial. Come on, make yourself comfortable, take the time to familiarize yourself with the various solutions listed below and follow my instructions to cut the photos on your trusty Mac. I wish you good reading and, above all, have fun!
Programs for cutting photos with Mac
Let's start this guide by considering a few programs for cutting photos with Mac. As I already told you in the introduction of the article, there are also some pre-installed in macOS.
Gallery
The first solution I recommend you try is Gallery, the default photo library management application pre-installed on all Apple computers and mobile devices. It integrates various editing tools, including one that allows you to cut photos in a very simple way.
To use this, first start the Photos application by clicking on the stylized flower present on Dock bar or in Launchpad. Then, select the position where the photo of your interest is located (eg. Gallery, My albums, etc.), using the left sidebar; locate the shot you want to edit and double-click on it preview, in order to open it.
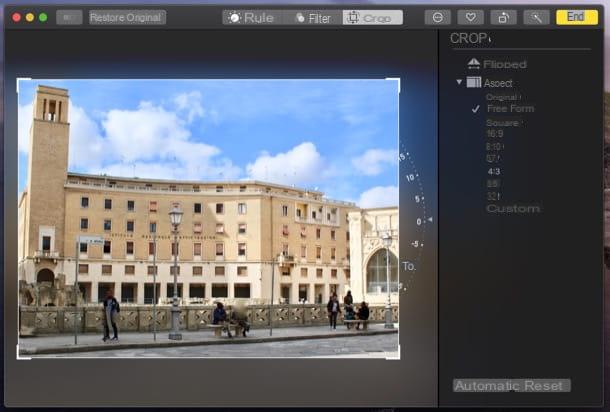
Once you have opened the photo of your interest, click on the button Modification, located in the upper right corner of the window, click on the button Cut out, placed high, and served gods cursors found in the corners image, to crop it.
By acting on the sidebar on the right, you can also select a standard crop format (eg. PM16:9, PM4:3, etc.) and eventually click on the button Automatic to perform an automatic image cropping.
When you are ready to do this, click on the yellow button end, located at the top right, in order to save the changes made. In case of second thoughts, however, click on the button Reset, on the right, to undo the changes made to the photo and restore its original appearance.
Preview
Preview, the default macOS application to open images and documents in PDF format, is another solution that is certainly useful for your purposes, ideal if you need to crop a photo downloaded from the Internet or copied from an external drive (e.g. a USB stick or a memory card).
To use this, you must first open the image to be cropped. If double-clicking the image does not automatically open in Preview, right-click on its thumbnail and select the items Open with> Preview give the menu check if you press.
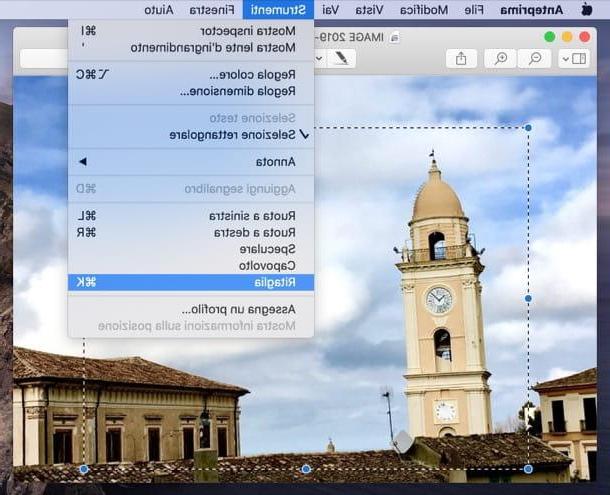
After opening the image with Preview, press and hold the left mouse button (or trackpad) and enclose in one selection the area of the photo you intend to keep. Once you have made your selection, go to the menu Tools> Crop Preview (top) or press the key combination cmd + k on the Mac keyboard, to crop the image. The changes will be automatically saved to the original file, without the need for additional steps.
XnConvert
You need crop multiple photos at once? Then don't think twice and download the free application to your Mac XnConvert, which allows you to retouch images in series, applying a wide range of edits and effects to them.
To download XnConvert on your Mac, connected to the official website of the program, scroll down the page and click on the button Mac DMG 64bit. When the download is complete, open the package .dmg you got and drag XnConvert in the folder Applications Of computer.
Next, in the folder Applications macOS, right click onXnConvert icon I awarded her apri twice in a row, in order to “bypass” the restrictions imposed by Apple on software from non-certified sources (this operation is only necessary at the first start of the).
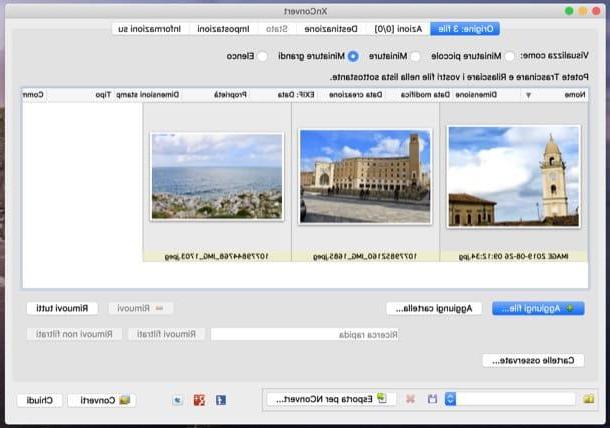
At this point, to crop your photos with XnConvert, all you have to do is select the tab Origin in the main window of the application, drag them into the same and select the folder in which to save the cropped images by clicking on the button (...) located inside the card Destination.
After that, go to the section Actions of XnConvert, click on the button Add action, top left, and select the items Image> Crop from the menu that appears. Then fill out the form that is proposed to you, specifying the size in which you want to crop the photos, and click on the button Converted, to complete the operation.
The edited photos will be automatically saved to the location you chose earlier. Convenient, right?
How to crop a round photo on Mac
You need to crop a round photo on Mac? Then know that you can succeed in your intent with the aforementioned Preview. In fact, all you have to do is select the portion of the photo you want to keep, using the elliptical selection tool, and then remove the excess background.
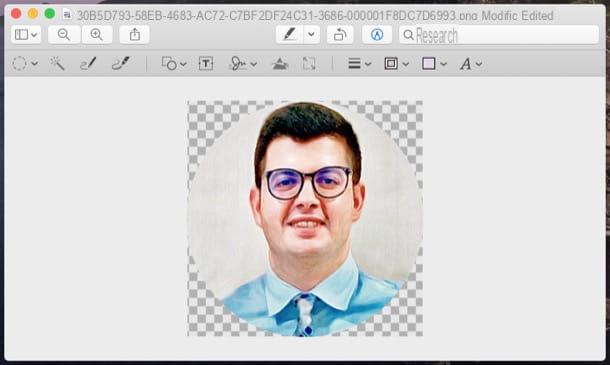
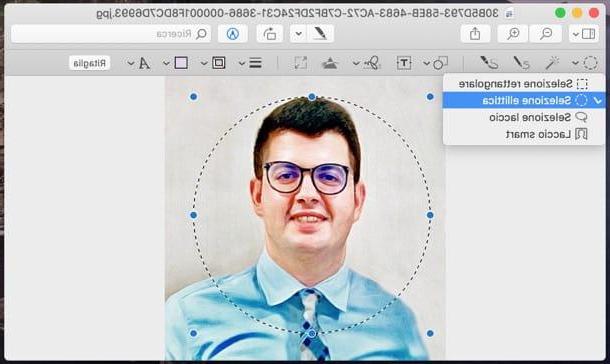
Open, therefore, the photo you intend to crop circularly in Preview (by double-clicking on it or by right-clicking on it and selecting the items Open with> Preview from the context menu). Then, click on the icon of pencil at the top, press the button (⌵) located next to the icon dashed square and select the tool Select elliptical give the menu to compare.
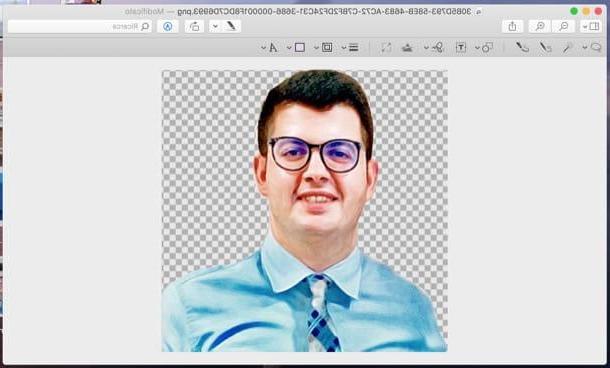
At this point, draw the circle on the portion of the photo you intend to keep, taking care to keep the button pressed Shift on the keyboard (to draw a perfect circle), click on the button Cut out (top right) and, in the box that opens, click the button Converted, in order to allow the conversion of the image in the format PNG (useful for creating the transparent background).
The changes will be automatically saved to the original file.
If you want, you can also crop round photos on Mac using third-party software, such as Photoshop e GIMP. If you want to learn more, I suggest you take a look at the guide dedicated to how to cut a photo in a circle.
How to crop photo silhouette on Mac
You have the need cut out the outline of a photo on Mac and, therefore, to cut out one or more subjects present in it? Let me explain how to do this by using some applications suitable for the purpose.
Preview
The first solution I invite you to try is Preview, which I have already told you extensively in some of the previous chapters of the tutorial. Thanks to the function Smart lace with which it is equipped, it allows in fact to cut out the subjects of a photo in a rather simple way.
To do this, first open the photo you want to edit in Preview, then click the pencil at the top right, then on the button (⌵) placed next to the symbol of dashed square and, in the menu that opens, select the item Smart lace.
At this point, hover the mouse cursor over the perimeter of the photo, so as to highlight it with a Red line, trying to be as precise and accurate as possible (the final result you will be able to obtain will depend on this).
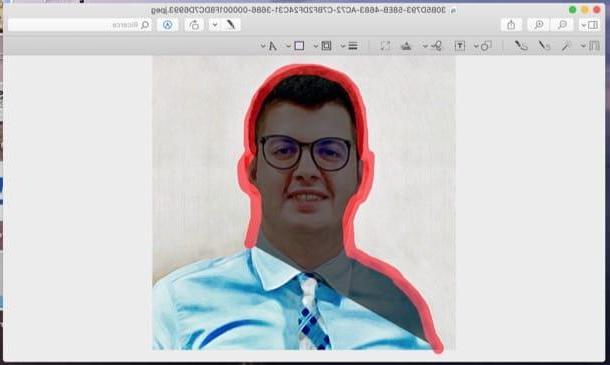
When done, click the button Cut out, located at the top right, and confirms the conversion of the image in PNG, useful for maintaining the transparency of the background.
The changes will be automatically saved to the original file.
Photoshop
On your Mac you have installed Photoshop? Well, in that case, you can take advantage of some of the many tools integrated into the famous Adobe photo editing program to create a silhouette from an image.
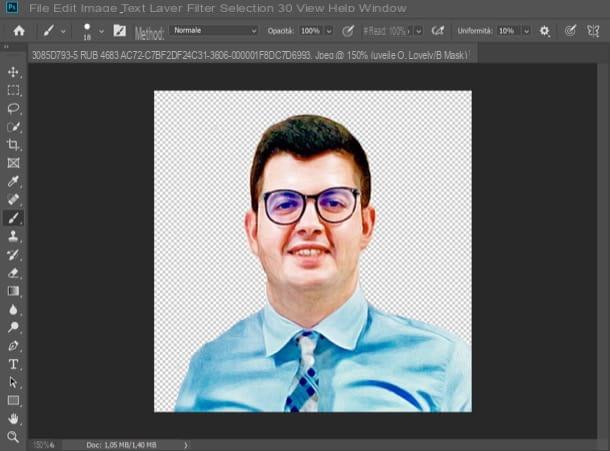
To go into more detail, after downloading Photoshop and importing the photo of your interest into it, activate the mode Quick maskby clicking on the rectangle with circle located in the lower right corner of the window, select the black colour in the color palette and then color the elements you intend to keep (therefore the subjects), using the tool Brush.
Therefore, deactivate Quick Mask mode by clicking on the symbol again rectangle with circle located at the bottom right, select a tool of Selection from the toolbar on the left, right click on the selection you just made and click on the item Select reverse give the menu answer.
It might be useful, then, to soften the selection by clicking on the button Refine Edges, and use the adjustment bars to perfect the work done. Finally, remember to save the output image in PNG o GIF, to preserve the transparency of the background.
For more detailed information on how to cut out with Photoshop, read the guide I dedicated to the subject.
GIMP
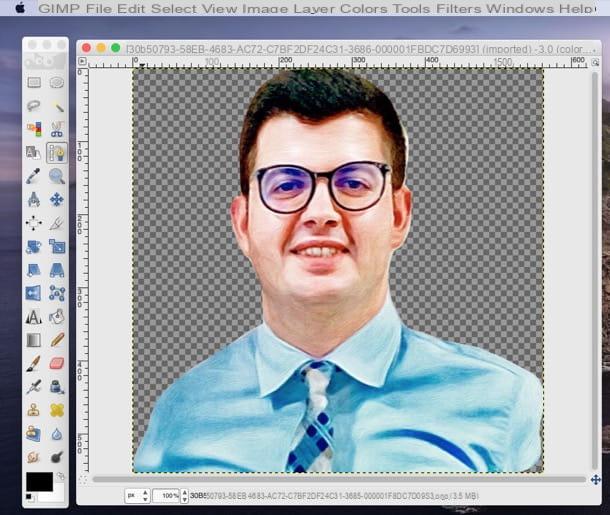
If you prefer to resort to GIMP, the best free and open source alternative to Photoshop, know that even this well-known photo editing software allows you to cut out the shape of photos on Mac in a very simple way.
After downloading the program and importing the photo of your interest into it, select the item Toggle Quick Mask from the menu Select, in high.
At this point, call it back Path tool, by clicking on the icon fountain pen placed on the toolbar on the left, and trace the edges of the subject you want to cut out of the photo (trying to be as precise as possible): to complete this operation, all you have to do is click the edges of the whole subject slightly spacing the various connecting anchors.
Then refine, if necessary, the selection of the most curved parts of the image, moving the connecting lines, and then disable the quick mask, selecting the item again Toggle Quick Mask from the menu Select of GIMP.
Now, click on the entry From the track present in the menu Select, click on the item Invert present in the menu Select and press the button Del / Backspace on the keyboard, to delete the portion of the photo you have decided to remove.
Remember, then, to export the photo in PNG o GIF, if you want to preserve the transparent background, and that's it. For more information on how to cut out with GIMP, check out the guide I just linked to.
How to crop screen photos on Mac
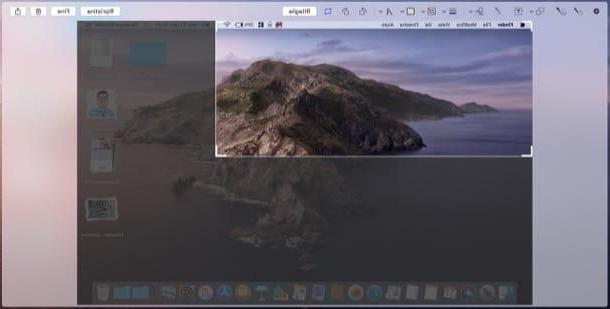
We conclude this tutorial by seeing how to crop screenshots on Mac. First, you must therefore take the screenshot: if you want to capture the entire screen, you simply have to press the key combination cmd + shift + 3; if you want to capture only a portion of the screen, instead, you have to press the keys cmd + shift + 4, after which you have to press and hold the left mouse button and highlight the area of your interest.
To crop the photo taken on the screen, then click on screenshot thumbnail that appears at the bottom right and will open the editing tools "on the fly" included in macOS (from macOS Mojave onwards).
In the window that has opened, click on the icon clipping (the one depicting the rectangle), made use of the indicators appeared on the screen to define the area of the image you want to keep and the one you want to remove and then click on the button Cut out, located in alto a destra.
To conclude, click on your button end, located at the top right, and the edited screenshot will be saved in the default location where all screen captures are saved (e.g. the Desk).
How to crop a photo with Mac


