


How host an image on the Internet? This is a question I am often asked and that you may want to perform for more than one purpose. For example, let's say you want to create an online archive to always have a digital copy of your favorite photos. In this case, using an image hosting service can help you free up space on your computer. Using a hosting service could also be the best choice if you need to share photos on an Internet site or forum to show them to other users, for example, or if you want to share several photos taken with a friend and want to avoid send them via email, clogging up his inbox with all the attachments. With this in mind, therefore, once you have uploaded the images to the hosting service of your choice, just share the link directly that refers to that particular image or photo album created.
If you find yourself in one of these descriptions, then you should definitely take a few minutes of free time to read this guide of mine calmly. In fact, I want to talk to you about the detail of how to host an image through one of the many hosting services. How do you say? Would you like to host an image but you are not sure what image hosting services are and how they work? No problem, I'll explain it to you right away. Image hosting services are nothing more than Internet sites on which you can upload your images for free and then share them via a link provided by the service itself.
Oh, I almost forgot… since most of the time it is an extremely simple process, you don't even have to install a program on your PC. If you are interested in the topic and want to find out how to host an image on the Internet to share it with your friends on forums, blogs or even social networks, all you have to do is use one of the services I'm about to tell you and follow the directions I'm about to provide you. That said, I wish you a good read and a lot of fun!
ImageShack
If you want to know cohost me an image on the Internet, you absolutely cannot miss a stop at the ImageShack site. What I am about to tell you about, is in fact one of the most used and long-lived free hosting services for images that allows you to easily share any type of image or photo on the Web.
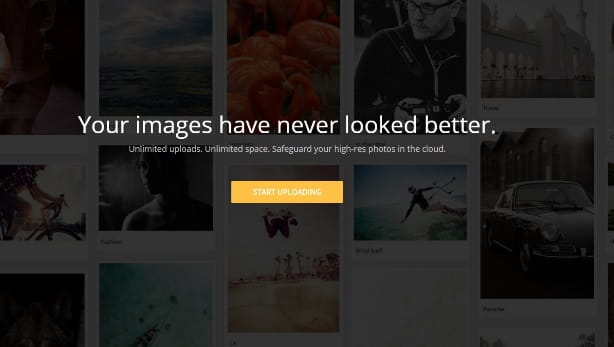
To upload a photo to ImageShack, all you have to do is connect to the main page of the service and click on the Start Uploading button. At this point you will have to carry out a normal registration procedure on the site. Then manually enter the required data: Email, Username, Password e Confirm Password and then press the button Sign Up For 30 day Trial. You will then need to confirm the link Activate Now present in the email that will be sent to the registered email address. Next, hit the button Skip this step for two consecutive times: the first time to skip the profile customization procedures and the second time to avoid paying and thus take advantage of the 30-day free trial.
In fact, keep in mind that the ImageShack site has definitely evolved compared to the past and now, when you register, you will be asked if you want to subscribe to the service. If you do not take out any subscription you will only have 30 days free of using ImageShack. After this trial period the service will be paid only.
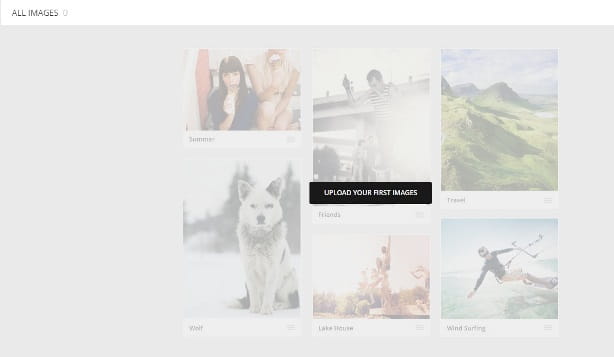
Once this step is done you can start uploading your images to ImageShack. On the main screen, press the button Upload Your First Images. Upload the image to the box using Drag & Drop or upload from the PC using the button Browse&Upload. Once the image is uploaded, you can find the link to copy and paste for sharing the image. To return to your user profile, just press the button Go to My Images.
As mentioned, the popularity of ImageShack has now meant that the service has transformed from free to paid. In any case, among the image hosting sites it remains one of the best in its paid version. One of the main advantages of the subscription version is the availability of unlimited storage space. You can read more about the pricing and features of the paid version of ImageShack on the official website.
Imgur

If you are looking for a hosting service for host an image on the Internet that does not have the constraints given by subscribing to a subscription, I suggest you take a look at the Imgur website, which is also perfect for uploading multiple photos at the same time.
Imgur has become popular as a site to upload meme images but, since you can use it completely participation without even having to register, I recommend that you rely on it to host an image.
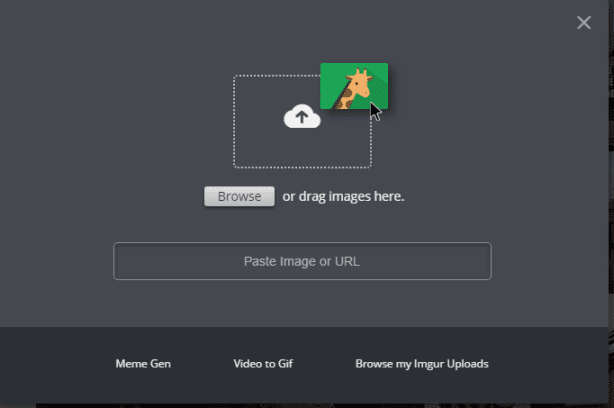
To upload an image to Imgur, first connect to the home page of the service and click on the button New Post and then KATEGORIEN to select photos for upload. You can optionally upload more than one at a time.
At the end of the operation, a page with previews of the uploaded photos will be displayed and, on the right, a box with the link that will allow you to share them. Then click the button Copy to copy the link through which you can show the uploaded images to others.
Alternatively, you can create an account free to the site, thus being able to always have access to your virtual archive of uploaded images. To do this, click on the button Sign Up located at the top right and then register via one of the buttons relating to social networks (Facebook, Twitter, Google, Yahoo) or register by filling in all the text fields: you will be asked to indicate Username, Email e Password.
TinyPic
One of the simplest and most immediate image sharing services to use is the TinyPic website. This is a website with an intuitive interface that will allow you to upload images to the Internet in the blink of an eye.
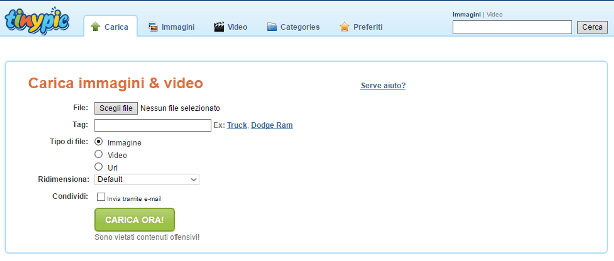
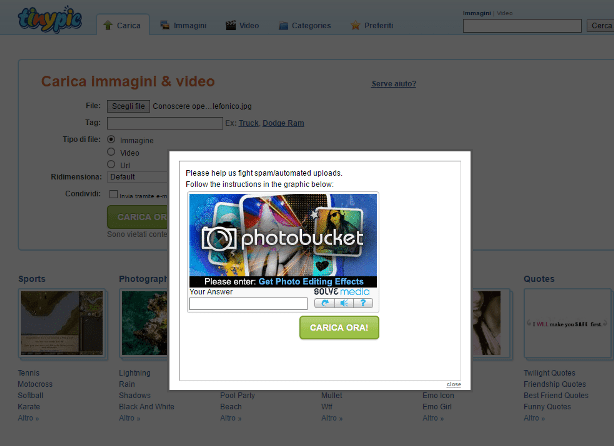
The first thing to do to host an image on TinyPic is to connect to the main website. To upload an image now click on the button Choose File and select from your PC the image you want to upload to the web.
Before actually uploading the image, if you wish, insert tags that represent the image. Also, via the drop-down menu Resize, choose if you want to upload the image in a certain format (Avatar 100X75, Message Board 640 × 480 for example).
Once you have selected the desired settings, click on the button Upload now to upload the desired image to TinyPic. At this point, if you have followed all the steps indicated correctly, a small dialog box will open that will ask you to fill in the text field dedicated to the captcha code. When you have entered the captcha code on the screen, press the button Upload Now.
In the screen dedicated to the uploaded image you will find all the links to share the image. Just copy and paste the direct link or HTML code if you want to embed the image via a website.
If you want to use TinyPic to upload multiple images, you will need to register for the service for free. To do this, simply click on the red button Join Now.
On the next screen, proceed with the registration indicating your email and the password you want to use to access the service. Then enter your date of birth and the captcha code in the relevant text field. Then accept the conditions of use by placing the check mark on the appropriate item and choose whether to stay connected by placing the check mark on the item You wish to store yourself on this Computer. To confirm the registration to the service, press the button Join now.
dropbox
One of the most popular Internet sites for hosting an image is Dropbox. To be honest, this is an Internet site designed for file hosting with multiple functions and it is precisely for this reason that, even if it is not a site strictly dedicated to hosting images, I have chosen to tell you about it in detail.
Using Dropbox to the full means not limiting yourself to just uploading an image and sharing it via links, as Dropbox integrates some features suitable for teamwork. Dropbox can in fact be used simply to host files and / or images but it is undoubtedly the possibility of sharing the file to other members of a work group registered on the site, its strong point.
Also noteworthy is the integration of Dropbox with the Paper service that allows you to create an online text document to share via direct link or by invitation to view and / or modify to others.
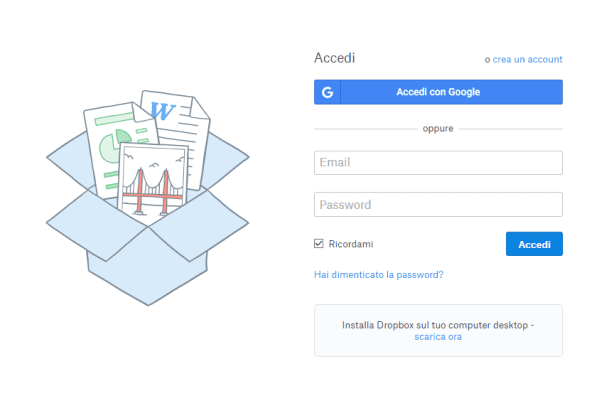
That said, to start using Dropbox as a website to host an image, first connect to the website and register on the website by entering your name, surname and email and password you wish to use to access the website. Then put the check mark next to the item I accept the Dropbox terms e premium pulsating Register for free. Alternatively, click on the button Sign up for free with Google to register for the service through your Google / Gmail account.
Once logged in, you can use the service to host an image. From the sidebar, click on the button Upload File. From the dialog box that appears then press the button Choose File. You will then be able to choose the images to upload from your computer to Dropbox. Once the image is loaded, to add other files, click on the button Add Other Files. Alternatively, if you do not wish to upload additional images, click on the button Done.
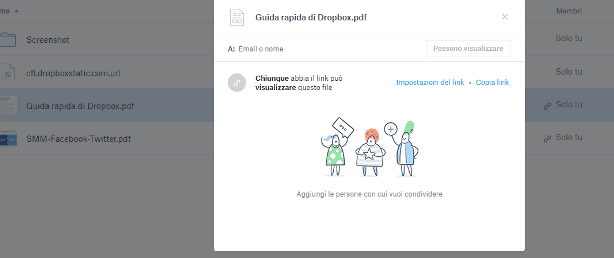
To share an image click on the button Share. At this point you can choose whether to share the image via email or through the name of a person on Dropbox or if, alternatively, create a link for sharing the image for viewing even outside of Drobox. To perform this last operation, press the button Create a link and then on the button Copy Link.


