


Would you like to add an extra touch to your shots by applying a beautiful frame with white Polaroid-style borders? I would say then that you have landed on the right guide, at the right time. Think about it ... with this tutorial of mine today, I really wanted to explain to you how to put white borders on photos using dedicated computer programs, online services and apps for smartphones and tablets.
How do you say? This seems to be very interesting but are you absolutely denied in terms of photo editing? Well, what's the problem? Apart from the fact that I'm here with you, ready and willing to offer you all the support you need, but then I really don't see what you are worried about considering the fact that the resources I'm about to talk to you about are within reach of anyone, even the less tight in terms of new technologies.
Come on then, let's not waste any more time chatting and immediately begin to get busy. I wish you, as usual, good reading and I wish you a great, indeed a great good luck for everything. Are you ready to go to work? Yup? Great. Then let's proceed!
Put white borders on computer photos
You are interested in understanding how to put white borders on photos acting from computer? Then use one of the solutions right away software o online that I have reported to you below, I'm sure they will be able to satisfy you.
XnView NP (Windows / macOS)
The first program I invite you to try is XnView NP: it is a photo viewer that, in addition to fulfilling the purpose of this tutorial, allows you to view, edit and organize images effectively. Among its functions it also boasts the use of EXIF data, the creation of web galleries and screen capture. It's free and works on both Windows and macOS.
To download it to your computer, visit the program's website and press the button Zip Win 64bit (if you are using 64-bit Windows), on that Zip Win 32bit (if you are using 32-bit Windows) or on the one with written on it OSX DMG 64bit (if you are using MacOS).
When the download is complete, if you are using Windows, extract theZIP archive just got it, open the file xnviewmp.exe present inside and presses the button Run in the window you see appear on the screen. If, in doing so, you see an error message, right-click on the program icon and select the item Run as administrator from the menu that opens, in order to start XnView NP with administrative privileges.
Se, invece, stai using MacOS, april il package .dmg obtained and move theXnView NP icon in the folder Applications, then right click on it and select the item apri twice in a row, in order to open the program, however, going around the limitations that Apple imposes on applications from non-certified developers (an operation that must be performed only at the first start).
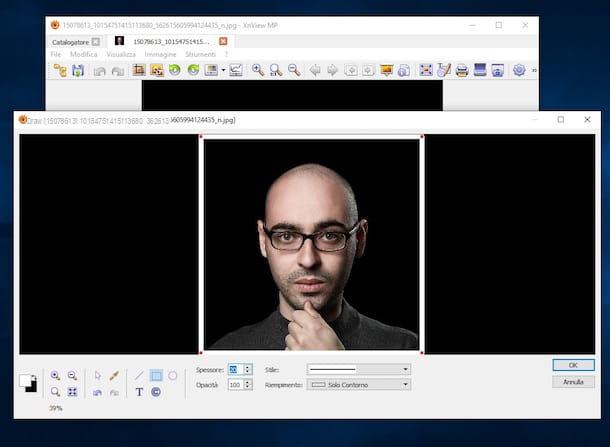
In the window that opens, click on the button OK and you will find yourself in front of the main screen of the program. Therefore, use theFile Explorer on the left to open the image to which you want to add the white borders, press the button with the pencil, the geometric shapes and the "T" located on the toolbar and, in the additional window that appears, click on the symbol rectangle located at the bottom.
At this point, select from the drop-down menu Filling (right) option Outline only, double-click on the first one colored square on the left and choose the White from the color selection window. Then trace the outline on your photo visible at the top, by clicking in one of the corners of the same and, continuing to hold down the left button, dragging the mouse pointer. If you want, you can also increase the thickness of the borders via the field Thickness (bottom center).
When the changes are complete, click the button OK located on the right, presses the button with the floppy disk located in the upper part of the program window and indicates, through the additional window that opens, the format, position and name you wish to assign to the final file. Finally, click the button Save And that's it.
canva

Do you prefer to put white borders on your photos without downloading anything to your PC? Then try canva. In case you have never heard of it, this is a popular web service that allows you to create various types of graphic projects, including photos with a white border in the style of Polaroid. It has a nice user interface, it's free (for personal use), super easy to use, and works from any web browser or operating system. The only thing that needs to be taken into account is that you have to create a special account to be able to use it.
To use it for your purpose, connect to the home page of the service and select one of the options available in the box First time on Canva? Subscribe! to indicate the reason why you intend to use the service. Then register with your email, with your Facebook account or with your Google account, by clicking on the appropriate buttons displayed on the screen.
Once the registration procedure is complete, indicate (if you want) the profession you carry out in the screen that is proposed to you, click on the link Skip invitation to team members and click on the button Other types of projects. Therefore, he presses on his voice Home located on the left, then on the button Custom sizes which is located at the top right; type, in the appropriate fields, the dimensions you want your project to have and click on the button Create a new project.
At this point, select the item Uploads located on the left sidebar, drag the photo you want to add borders to to the section or drag one here from the desktop (always located on the left) and, once the upload is complete, move the image onto the white sheet in the center of the screen.
Now, select the item Elements always located in the left sidebar and, in the menu that opened, click on the link Tutto che trovi in corrispondenza della dicitura Frames, then presses on the frame with white borders that you prefer in the list displayed. If you want, you can also choose between frames in photo format, by clicking on the item Gallery found at the top of the menu.
Once the frame has been added to the work area, click on it, select the item Location present at the top right and choose the option Backwards to take it to the background of the photo. Subsequently, resize it as you see fit using the appropriate sliders placed at the edges and do the same with the photo, so as to center it within the frame.
When the changes are complete, press the button with the down arrow located at the top right, indicates the format in which you intend to download your edited photo to your computer using the drop-down menu File type and presses the button Download to start the download.
PhotoFancy
As an alternative to the resources already mentioned, I suggest you put it to the test PhotoFancy: this is another free and very easy to use Web service that makes tools available to all Internet users to modify images. Of course, it also allows you to add white border frames to your photos.
To use it, connect to its home page and click on the button Edit images now located at the bottom right. In the editor that is shown to you at this point, click on the item Upload your own image (in alto a sinistra), pigia sul pulsating Insert new photos in the window that has opened, select the photo on your computer in relation to which you are interested in going to act and press the button Upload starts. When loading is complete, press the button Select placed under the photo.
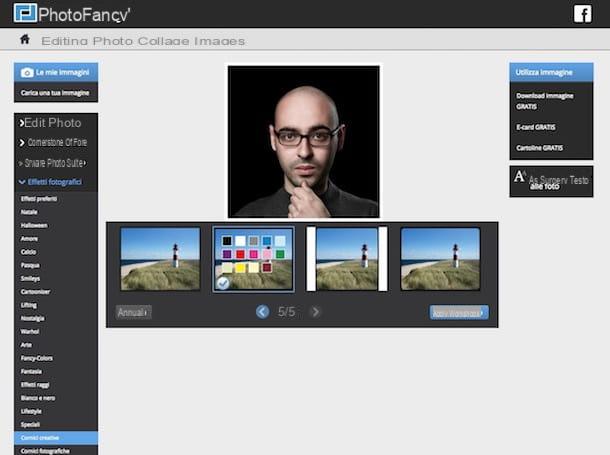
At this point, expand the menu Photo effects on the left, click on the item Creative frames and select the border frame you prefer from the list shown below. Then choose the White as the color to use for the frame and wait a few moments for it to be applied to the photo.
Per conclusdere, pigia sul pulsating Free Image Download placed on the right, on the one with written on it Download photos (present in the new page displayed) and on the buttons Yes, I accept the contractual conditions e Save the image now. The photo with borders will then be saved on your computer in JPG format.
App to put white borders on photos
Let's now move on to the mobile side and let's go, therefore, to find out which are the uses which can be used to apply the white border effect to photos. Find what in my humble opinion constitute the best solutions in the category right below, both for Android that for iOS.
Pixlr (Android / iOS)
Pixlr is without a doubt one of the best photo editing apps out there. It boasts a very rich set of tools thanks to which it is possible to intervene on 360 ° images and, of course, also offers the possibility of applying white borders to photos and various other types of frames. It's free and works on both Android and iOS.
To use it, download it and install it on your device using the links I have provided you just now, then start it and, on the main screen of the app, press on the item photo and select an image from the gallery of your smartphone or tablet.
At this point, select the symbol of picture (bottom right) and, in the menu that opens, choose one of the frames with white borders available. Then use the slider that appears at the bottom of the screen to increase or decrease the thickness of the frame. If necessary, press the buttons with the arrows to flip the frame or to rotate it.
Once you have obtained the desired result, confirm the changes made to the image by tapping on checkmark located at the bottom right, then press on the wording done which, instead, is located at the top right and saves the image on your device, or share it using the available save and share functions. It was easy, wasn't it?
Snapseed (Android / iOS)
As an alternative to the above application, I invite you to evaluate the use of Snapseed: it is a renowned free app developed by Google, very simple to use and which provides its users with numerous tools and functions useful for photo editing, including, of course, the opportunity to apply various borders and frames to photos . It works on both Android and iOS.
To use it, first download and install the app on your device, using the links I just provided. Then start the application and, on its main screen, tap anywhere on the screen and select the image on your device on which you intend to go to act.
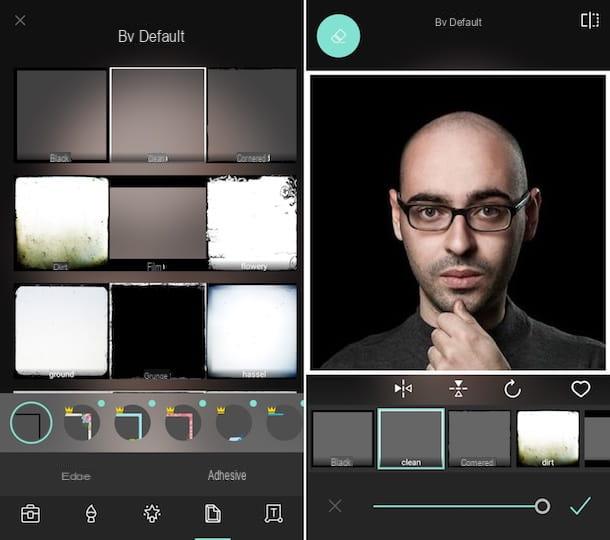
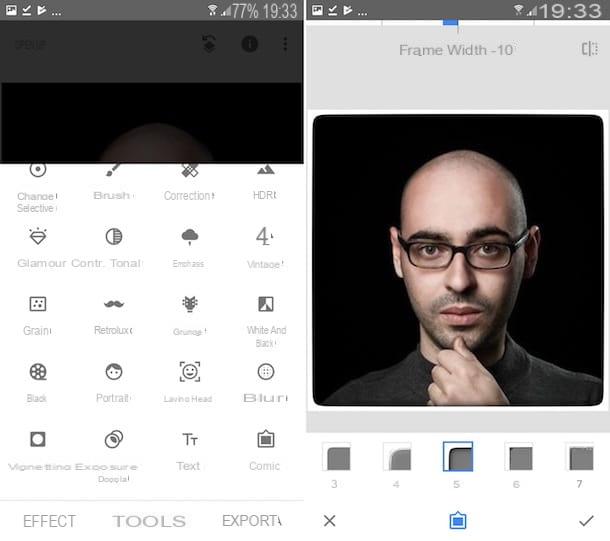
Next, press on the voice Instruments and, from the menu that opens, tap on the wording Frames. Then select the frame with white borders you prefer from the various available and that's it. If you see fit, you can also increase or decrease the thickness of the borders by swiping your finger left and right.
When the changes are complete, tap on the checkmark placed at the bottom right and presses on the voice Export (always placed at the bottom right) to save the edited photo on the device, to share it on social networks or, again, to export it to other apps.
Instagram (Android / iOS)
Well yes, even with Instagram, the famous photographic social network I told you about in depth in my dedicated guide, you can put white borders on the photos (to be published later on your profile): just take advantage of the special option offered by almost all of the integrated filters and it's done. Let's see immediately how to do it on Android and iOS.
First of all, if you haven't already done so, download and install the Instagram app on your device, then start it and create an account following the instructions on what to do that I gave you in the tutorial linked above. Once this is done, start the procedure for creating a new post by pressing the button [+] bottom center.
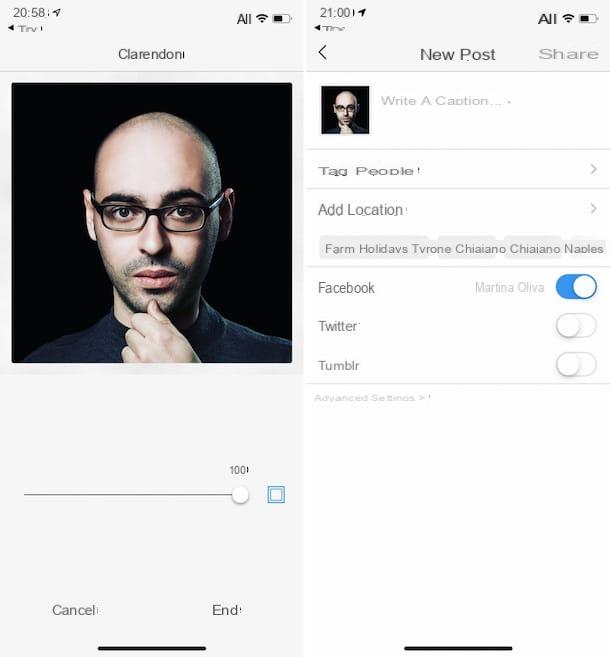
Then select the photo saved on your device in relation to which you want to go to act, presses on the item NEXT at the top right and, in the new screen displayed, choose the filter you want to apply to the photo from those below, press it and tap on the picture placed on the right to enable the display of the edges. Then, if you want, adjust the intensity of the filter using the bar at the bottom and press on the item end (always located at the bottom).
Now make any changes to the color, saturation, highlights, etc. by tapping on the item Modification present at the bottom of the screen and then using the available tools and presses on the voice NEXT at the top right. Finally, add a caption to the photo by filling in the appropriate field at the top, tag the people possibly portrayed, indicate the place where the image was taken and choose whether to publish the post also on your profile Facebook, Twitter e/ Tumblr.
Finally, press on the voice Share located at the top and your photo with white borders will immediately be published on Instagram, as well as being saved in the camera roll of your device. Mission accomplished!
How to put white borders on photos


