As we have already seen on other occasions, the differenze from Hard Disk e SSD they are truly remarkable. The solid state memory supports in fact, allow you to save on size and significantly increase the speed of writing and reading data.
If you have already installed a drive of this type on your PC, you need to know that Windows 10 is full of features that allow you to make the most of SSDs. Furthermore, compared to the past, many of the rules for the correct functioning of these units are no longer valid, thanks to the progress made by the production processes.
Precisely for this reason, it is good to follow some advice when using an SSD with Windows 10. Today we will take care of just this aspect, updating you a little on the methods to get the most from Solid-State Drives.
Preliminary information
We always recommend doing an installation through one 100% genuine and original license, this is to avoid data loss or hacker attacks. We are aware that purchasing a license on the Microsoft store has a high cost. For this we have selected for you Mr Key Shop, a reliable site with free assistance specialized in in your language, secure payments and shipping in seconds via email. You can check the reliability of this site by reading the many positive verified reviews. Windows 10 licenses are available on this store at very advantageous prices. Furthermore, if you want to upgrade to the latest versions of Windows operating systems, you can also purchase the upgrade to Windows 11. We remind you that if you have a genuine version of Windows 10, the upgrade to the new Windows 11 operating system will be free. Also on the store you can buy the various versions of Windows operating systems, Office packages and the best antivirus on the market.
Update the SSD firmware
Beyond what we usually think, an SSD, like all other hardware devices, needs firmware to work. To optimize the performance of the storage drive you need to use the latest firmware version available for the model in your possession.
Unfortunately, compared to other peripherals, an SSD is not automatically updated by the operating system but needs manual intervention. However, each manufacturer uses a tool proprietario. To make your search easier, we will now provide you with links to the update pages for the most popular SSDs on the market.
- Kingston SSD Toolbox
- SanDisk SSD Dashboard Support
- Samsung Magician Software
- Crucial SSD Firmware Support
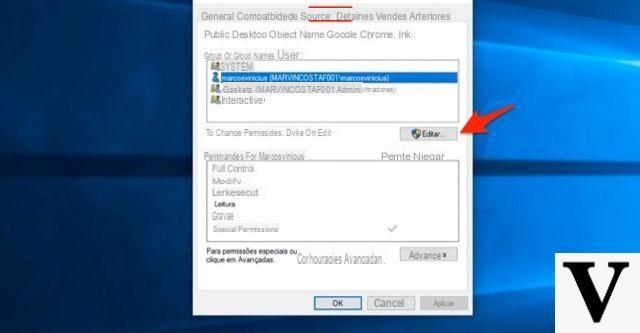
Enable AHCI mode
The AHCI mode. acronym for Advanced Host Controller Interface, it allows Windows to fully support all the advantages that derive from the use of an SSD drive inside a PC. This is especially useful for the TRIM functionality, which allows Windows to help the SSD to locate junk files that remain in the system even when they are no longer used.
However, AHCI mode can be activated only from the BIOS of your PC. This means that aside from helping you enter the BIOS while the computer is starting up, it is difficult to write a detailed guide for this operation. This is because each motherboard of a particular manufacturer, integrates a settings panel structured in a different way.
Fortunately for you, see motherboard model it's not that difficult and you just need to reach the manufacturer's website for more information. However, there is a good chance that on newer models this option is already active by default.
Enable TRIM mode
Using the TRIM mode with the use of an SSD is vital, since it does not prolongs life and keeps the level of cleanup from junk files higher than normal. This option should be enabled by default on Windows 10 but to be sure it is best to check it.
- Open the command prompt using the combination key Windows + R, type cmd and press enter.
- Now, in the window that will open, copy and paste this line, excluding the quotes "fsutil behavior set disabledeletenotify 0”And press enter again.
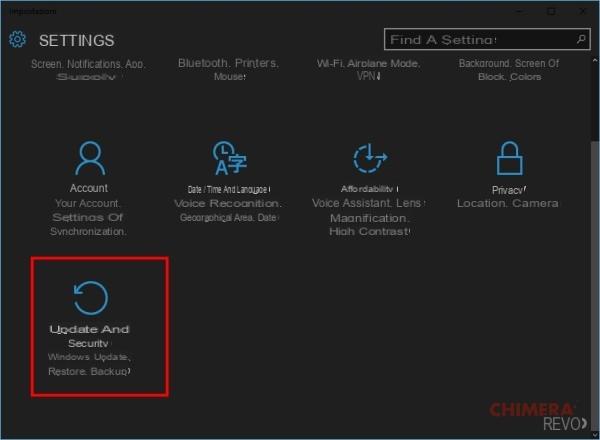
Check if system restore is enabled
Shortly after SSDs landed on the market, many users recommended, to increase their life and health, to disable system restore to overcome these problems.
After years of continuous improvement, this advice has become decidedly anachronistic and can be easily bypassed. The system restore it is extremely useful, especially in case of problems and you need not to lose all the data present inside the PC. To activate it follow these simple steps.
- In the search bar, type "System Restore" and click on the first item that appears at the top.
- In the window that will open, select the third item, that is “Configure System Restore”.
- Another menu will open, through which you can easily and directly check the recovery settings of the SSD and other disks mounted on the PC.
Disable indexing
Most of the speed of your SSD is lost in theWindows 10 file indexing. This can be especially useful if you store most of your files on the SSD, but it can be frustrating if you have another storage medium mounted alongside it. To disable this option you have to follow these steps.
- Open "File Explorer" and bring up the icon that represents your PC.
- Here you do right click on your SSD and choose the properties item.
- In the window that opens, at the bottom, uncheck the item "Allow indexing of content" and click on apply.
Keep defragmentation on
Another piece of advice that was given to those who used an SSD for the first time was that defragmentation, in addition to being useless, could even damage the storage disk. Windows 10, a much more advanced operating system than its predecessors, already knows how to do this.
By leaving the defragmentation active, which you can find by simply typing the term in the search bar, Windows will locate your SSD and treat it with due respect. Contrary to what is believed, in fact, although it must be carried out much more rarely, SSDs also need to be defragmented.
Disable Prefetch and Superfetch
Although these two names are almost unknown to most users, they are two modes that can negatively affect the performance of SSDs. In fact, Windows 10 sometimes uses the virtual memory of SSDs to place files that belong to programs that you only rarely use. Let's see how to disable Prefetch and Superfetch.
- Open the system log using the Run window (Windows key + R) and typing the word regedit, then hit enter.
- Don't be impressed by the amount of items displayed. To find what you are looking for, just follow this path: "HKEY_LOCAL_MACHINESystemControlSetControlSession ManagerMemory ManagementPrefetchParameters".
- For both the Prefetch and Superfetch items, just set the default value to "0" and reboot the system.
Disable system services for Windows Search and Superfetch
After following the previous advice, your computer may continue to lower the performance of the SSD. To prevent this from happening it is necessary disable system services related to Windows Search and Superfetch.
- Open the Run window once again and type in the space provided services.msc.
- Search for both the services listed above and disable them by right clicking on them and selecting the item “Stop”.
Disable ClearPageFileAtShutdows and LargeSystemCache
The technology that regulates SSDs, allows you to easily overwrite files precisely because it is one memoria flash. This means that there is no need to delete the paging files while the PC is being shut down. This will make the computer shutdown much faster. Likewise, being LargeSystemCache designed specifically for server versions of Windows, disabling it will only bring benefits.
Both of these options are available through the registry and can be found at this path: "ComputerHKEY_LOCAL_MACHINECurrentControlSetControlSession ManagerMemory Management".
To deactivate, simply set the values to “0”.
Change the power and sleep settings
Strange as it may seem, even on desktop PCs, power and sleep settings impact PC performance. These regulate the modalities that the PC will maintain during its use according to some paragraphs.
The advice we give you is to always leave them set to "maximum performance". Likewise it is possible to change these settings also in a laptop computer. You can do this easily by clicking the battery icon in the system tray. However, remember that, in this case, higher performance always corresponds to higher consumption.
Conclusions and other interesting articles
Well, if you have followed our advice to the letter, you have certainly succeeded increase SSD performance with Windows 10. To do this, it takes only a few minutes and the operations we have recommended are very simple and within everyone's reach.
In the meantime, if you want to further optimize Windows performance, we recommend reading some articles.
Doubts or problems? We help you
Remember to subscribe to our Youtube channel for videos and other reviews. If you want to stay up to date, subscribe to our Telegram channel and follow us on Instagram. If you want to receive support for any questions or problems, join our Facebook community or contact us on Instagram. Don't forget that we have also created a search engine full of exclusive coupons and the best promotions from the web!