


Printing large Excel tables can very quickly become a tedious operation. Indeed during the printing you recover several pages in the tray of your printer. Excel makes it possible to quickly overcome this problem by modifying the printing scale on a single and unique page.
Print an Excel spreadsheet correctly
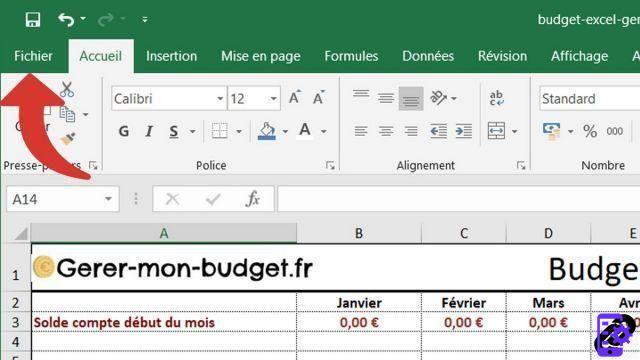
- Click on the tab File ribbon in the upper left.
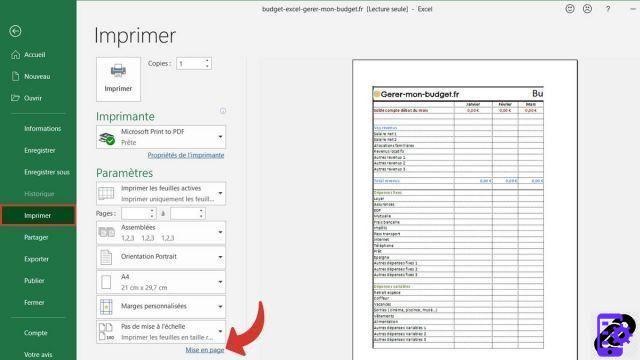
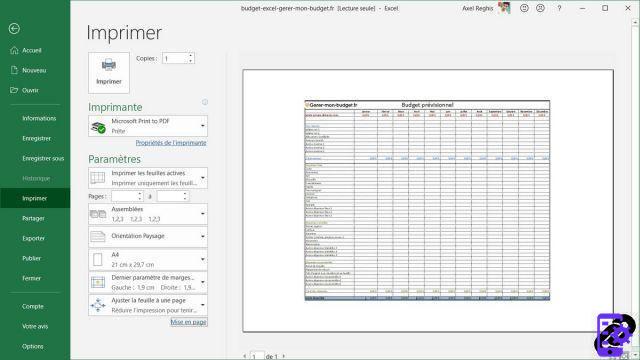
- On the green sidebar, click the button Print, then the button Layout in blue at the bottom of the Excel window.
- On the dialog of Layout in the section SCALE, check the option Adjust making sure that it is correctly set to 1 page(s) wide by 1 high.
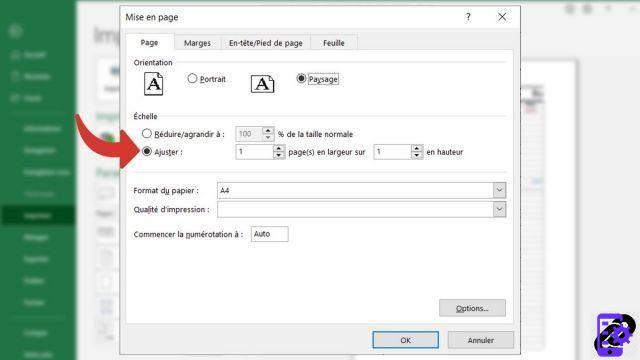 Note: we advise you to check the option Landscape in the section Orientation to optimize the use of space on your sheet when printing.
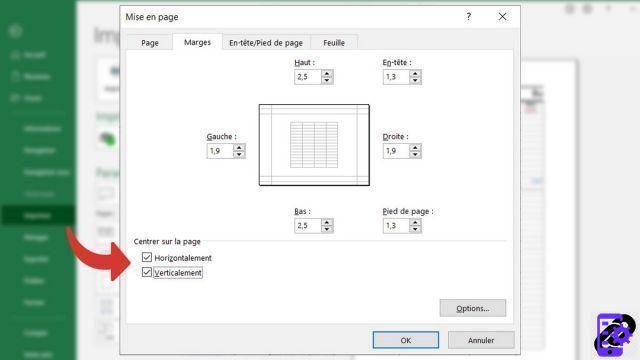
 - Always on dialog Layout, click on the tab Margins, and in the section Center on page, check the options Horizontally et Vertically.
- Click on the button OK to validate your layout. You can now see a preview of what your print will look like.
If you want to push the layout options even further, you can go to the tab Layout ribbon. This one is full of options in order to print your spreadsheet correctly. It is possible to print the headers, the grid, to modify the margins or to change the printing orientation (portrait/landscape).
Note that printing can be accessed using the CTRL+P shortcut.
40 ">This tutorial is brought to you by the trainer Jean-Philippe Parein
Find his course Learn and Master PowerPoint Complete Guide
in full on Udemy.


![[Review] Samsung Powerbot VR7000: the robot vacuum cleaner from Star Wars](/images/posts/6bc44de38605b5c0fa12661febb1f8af-0.jpg)


