


Did you take a photo on a particularly significant day for you and would you like to have the date and time of the shot stamped on it? Would you like to post a photo with the date superimposed on Instagram, to make your shot more original? No problem: if you want, I'm here to give you my advice and to help you succeed.
If you wonder how to take photos with date, you will be happy to know that this is an extremely simple operation. In the next chapters of this guide, in fact, I will talk to you about how to do it through the use of free apps for Android and iOS, including Instagram, and computer programs.
How do you say? Are you eager to learn more and eager to get started? In that case, sit down comfortably and pick up your smartphone. Carefully follow the instructions I am about to give you and put them into practice, in order to succeed in the intent you have proposed. At this point, all I have to do is wish you a good read and a good time!
Index
App to take photos with date
If you wonder how to take photos with date with your mobile phone, you will be happy to know that to do this, all you have to do is use some free apps for Android e iOS, such as those I will talk about in the next lines, which allow you to take pictures by automatically applying the date and time of the shot overlay.
How to take date photos with Android
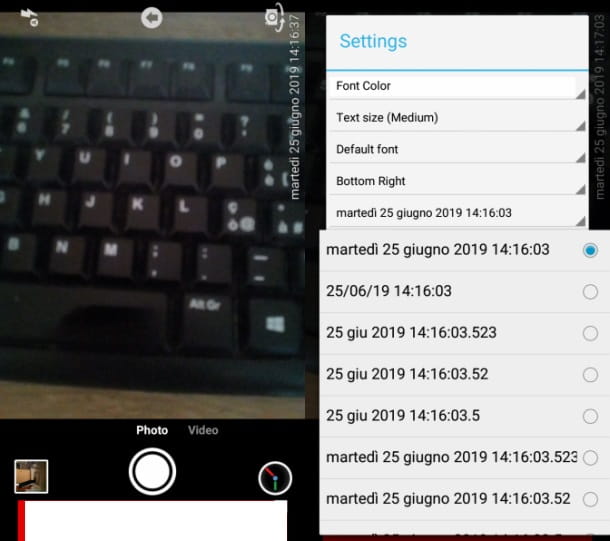
To take photos with date on Android, you can use the Timestamp camera Free app (also available for iOS), which allows you to take photos and videos by automatically applying the date and time superimposed on them. It's free, but it's also available in a paid version (Timestamp camera Pro) which, at a cost of € 5,49, offers the possibility to unlock various additional functions dedicated to customizing the font to stamp the date and time on the shots.
That said, to download the free version of the app on your device, open the dedicated page of the Play Store e premi sui pulsnti Install e apri.
When the app starts, choose whether to use the front or rear camera by pressing theicona della macchina photography located in the upper right corner. To activate the flash, however, presses onlightning bolt icon situata nell'angolo in alto a sinistra.
When you are ready, take the photo, pressing on pulsating dell'otturatore placed at the bottom: the date andNow they will be automatically imprinted on the resulting image. Later, if you want to change the date format, tap the icon with the dell'orology symbol located at the bottom right, then, in the menu Settings that is shown to you, presses on default format date, to change it.
Photos taken via Timestamp camera Free are automatically saved in the Android Gallery app (Gallery o Gallery).
How to take date photos with iPhone
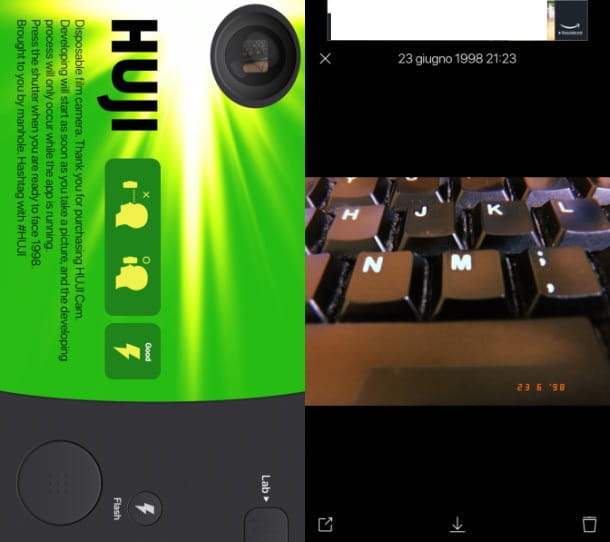
If you own a iPhone, the free app I recommend you use for take photos with date è HUJI Cam, which automatically stamps the date and time and adds a vintage filter to the shots. It is characterized, in fact, by its retro-style interface.
To download the application to your iPhone, connected to the App Store and press the button Get. Once this is done, unlock the download and installation of the same through the Face ID, the Touch ID or the password of your Apple ID. At the end of the automatic download, start the app by pressing the button apri.
Now, to take a photo, press on thetarget icon located at the top left, to start the camera mode. Then, choose whether to take the photo using the front or rear camera, by pressing thearrows icon. To activate the flash, on the other hand, tap onlightning bolt icon. When you are ready to take the photo, press on pulsating dell'otturatore.
To see the photos taken, press the button Lab and locate, in the next menu that is shown to you, the photo you have just taken. Now, to save it in the app Gallery iPhone, press the button with theicona della freccia verse il basso and consent to requests for access to the default multimedia gallery of your device, in order to complete the operation.
Also, if you want to change the format of the date and time imprinted on the photo, press the button ☰, then tap on the menu item Data and presses on the voice Current, if you want the date and time stamped on the photo to match the one you took it.
Finally, I point out that HUJI Cam is also available on Android, with a similar operation to that of the iOS version.
How to take vintage photos with date

make vintage photo with date, you can take advantage of the apps I told you about in the previous chapters. In fact, if you are using the app Timestamp camera Free on Android or iOS, you can take advantage of its filter database.
Su Android, after downloading and starting the app following the instructions I gave you in the previous chapter of the tutorial, tap onicon dell'orologio located at the bottom right, then press on the item Advanced and then Show options menu. Then set the vintage filter you like best, using the menu Color effect And that's it.
Su iOS, on the other hand, you can access the filter menu by pressing directly on theicon dei tre pallini located at the top, in order to select the one that best reflects the vintage style you want to apply to the shot.
If, on the other hand, you are using the app Huji Cam on Android and iOS, you will be happy to know that, as mentioned in the chapter dedicated to its use, this app automatically applies a vintage filter to the photos taken.
So, follow the directions I gave you in the previous chapter, if you want to know how to use this app, and you will get a photo with date and vintage look.
How to take photos with date and time

Also for take pictures with date and time, you can take advantage of the apps I've told you about so far. In fact, both the app Timestamp camera Free that the app Huji Cam allow you to take photos in which the date but also theNow of the shot.
In this case, therefore, all you have to do is follow the instructions I gave you in the previous chapters of this guide.
How to take date photos on Instagram
If you wonder how to take date photos on instagram, you must first know that when you post a photo or video in the post of the social network, the content in question is automatically dated. In fact, by tapping on a photo you published in this section, you will find it publication date right below the description.
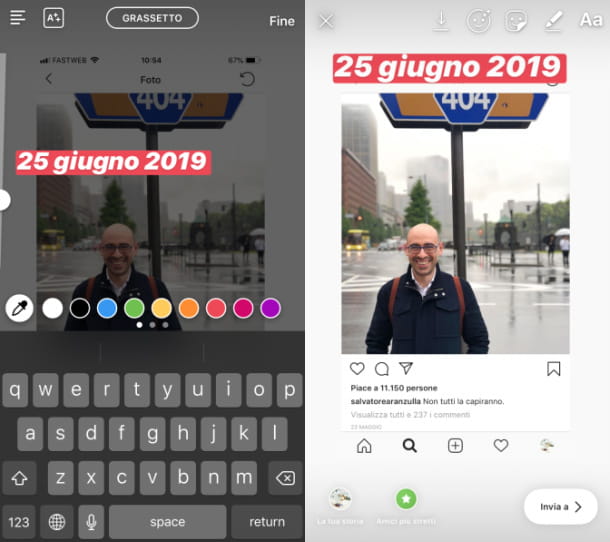
On the other hand, as far as stories are concerned, there is no native feature that allows you to insert the superimposed date on the photos you post in the stories. So, to do this, you have to enter it manually, writing on the photo.
To proceed, start the app Instagram on your device, log in to your account and tap oncamera icon, located in the upper left, to launch the story creation tool.
Now, use the tools from the stories of Instagram, to take a photo or to import it from your device's memory, as well as to edit it using filters and effects.
Fatto ciò, first prize Aa, in order to open the keyboard of your device and type the date to be imprinted on the shot. At the end of the changes, publish the story created by clicking on the button The tua storia.
Alternatively, if you have activated the Stories Archive, access it: by sharing a previously taken photo in the stories, the publication date will be shown as an overlay.
Once this is done, locate, in this section of Instagram, the photo you are interested in sharing and press the button Share, then publish the story by clicking on the button The tua storia.
Program to take photos with the date
Be vuoi avvalerti di programs to change the date of the photos on PC or to stamp the date directly on the photo, refer to the solutions that I will show you in the next paragraphs.
Photo (Windows)

To date the photos on Windows, puoi avvalerti dell'app Gallery di Windows 10, which allows you to change the date of the shots imported from Android, iPhone or any digital camera.
Having said that, to proceed, identify the photo of your interest, among those imported into the program, then press the button (...) located in the upper right corner and click on the item File info, on the menu you are shown.
Now, to change the date of the photo, you just have to refer to the menu Acquisition date: therefore sets the date andNow you want to assign to the photo and confirm the operation by pressing the button √.
Photo (macOS)
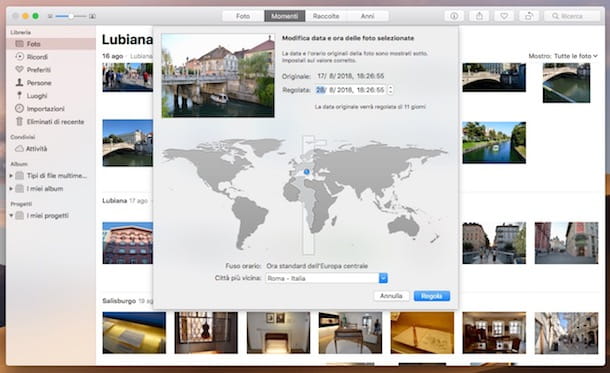
If you own a Mac, you can use the "standard" application Gallery, which allows you to add or change the shooting date of photos imported from iPhone, Android and digital cameras quickly and easily.
That said, launch the application Gallery, by clicking on his flower icon located in the bar Dock, and click on the photo you want to go to act on. Now, click on the menu Image, located at the top, and select the option Adjust date and time da quest'ultimo.
At this point, in the new screen that is shown to you, customize the date and time of the shot, referring to the drop-down menu located next to the item Regulated. Finally, to confirm the changes made, click on the button Rule located at the bottom. Easy, right?
FastStone Photo Resizer (Windows)
To stamp the date on PC photos Windows, you can make use of the FastStone Photo Resizer program which can be used for free for the purpose of this tutorial. For uses other than personal use, however, a license must be purchased for $ 19,95.
That said, to download it, connect to its website and click on one of the first two buttons download for free, to download the .exe file on your PC.
When the download is complete, start the file you just downloaded (FSResizerSetupxx.exe) by double clicking on it. To install the software, click first Yes and then Next, I Agree, install. Finally, click Finish, to finish installing FastStone Photo Resizer.
Then start the program, using its shortcut located on the desktop or in the menu Start of Windows and, choose the image of your interest, exploring the folders of your computer that you can see in the left panel of the software. Then import the image into the right section by clicking on it and then pressing the button Add.
Once this is done, put the check mark next to the item Use Advanced Options and by clicking on the button Advanced Options, to access the advanced program settings.
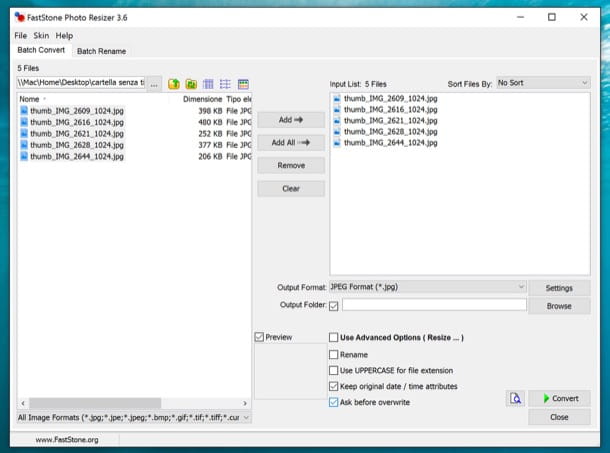
Now, click on the tab Text, tick the entry Add text, then reach the path Insert a Variable > File Date name > Date and time, to add an overlay showing the current date and time. After adjusting all the settings related to the customization of the writing, such as the Font, confirm the addition by pressing the button OK.
To save the image, indicate the export path (Output Folder) using the button KATEGORIEN and press pulsating Convert, to complete the operation.
BatchPhoto (macOS)
Su MacOS, I recommend that you take advantage of the free software BatchPhoto, to stamp the date and time on your photos. BatchPhoto It is also available in a paid version (the price starts at $ 29,95) which removes the watermark applied to the exported photos with the free version of the software.
That said, to download the program for free, connect to its official website and press the button Try Free.
Now, wait, then, for the automatic download of the dmg file, then, to install it, double-click on it and drag its icon into the folder Applications say macOS.
After that, to get started, start BatchPhoto, by pressing on its icon in the macOS dock bar and clicking on apri (this is only necessary on first boot), to bypass macOS restrictions that prevent you from opening files not downloaded from the Mac App Store. Dopodiché, premium pulsating Continue Trial, to continue with the free version.
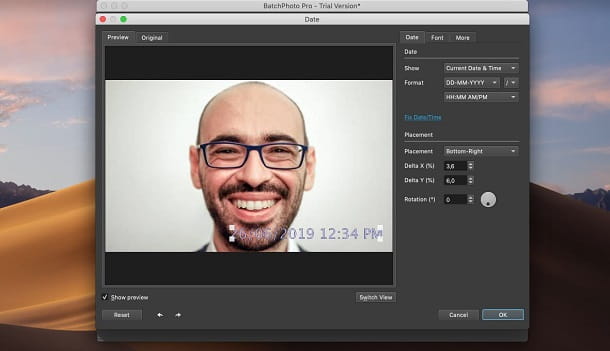
Now, drag the photo into the main window of the software, using drag and drop or press the button Add photo located in the upper right corner, to import it. With that done, click on the tab Edit Photo which you can see at the top, then click on the item Add Filter on the left and select the tool Date.
Then use the menu Size to customize the format of the date and time added as an overlay, as well as the section Placement to place the inscription. Don't forget to resize it, using the appropriate ones selection handles. At the end of the changes, confirm the addition by pressing the button OK.
To continue, go to the tab Setup and indicates the format and destination folder (Output format e Folder). After that, select the tab Process I awarded her OK, to begin the process of exporting the photo with the date imprinted. Easy, right?


