


Like most image editors, GIMP allows you to do all kinds of selection of elements within a creation. There are many features: rectangular selection, elliptical selection, smart scissors, etc. To choose an area by playing on the similarity of colors, nothing like the Magic Wand tool, also called “Contiguous selection”.
Need to select an area of a certain color within your image? Available in the toolbox of the GIMP software, the magic wand allows you to select all the areas of tint similar or approaching a chosen color. The following tutorial teaches you how to use this handy tool.
Using the Magic Wand in GIMP
Here are two techniques for making a contiguous selection:
1 method
1. Below the top menu of GIMP, find the Toolbox.
2. Click on the magic wand icon, and in the image you are working on, click on the color to isolate.
 © GIMP
3. Abracadabra! The entire area consisting of the same color is selected. All you have to do is make the changes you think are necessary.
 © GIMP
2 method
It is also possible to select the magic wand by doing the following:
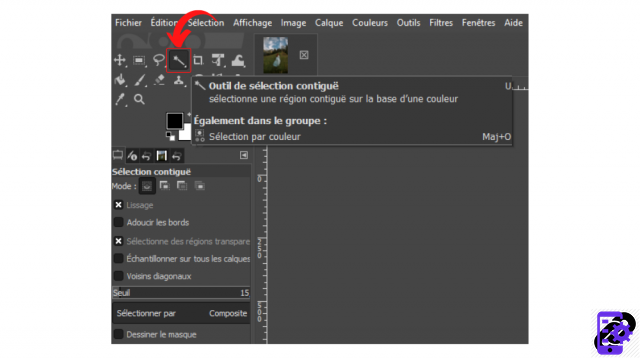
1. In the main menu, click on "Tools".
2. Hover over the “Selection Tools” option and click on “Contiguous Selection”.
 © GIMP
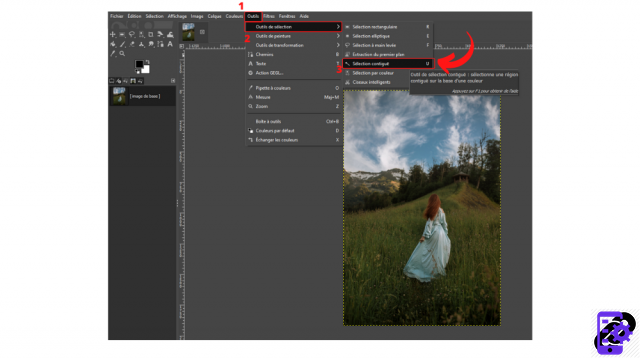
3. Touch the area to be worked on and…. Alakazam! Here it is selected!
Setting up the magic wand in GIMP
You can also take your selection further by doing the following:
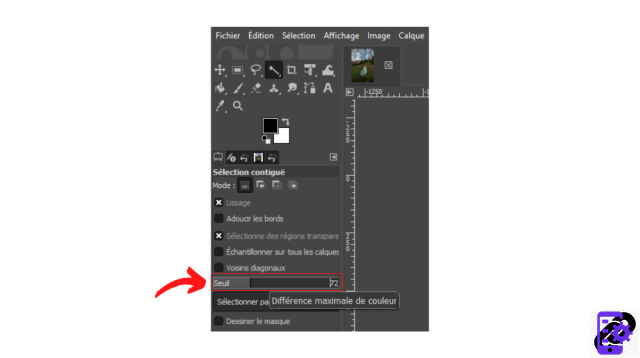
1. It is possible to modify the “Threshold” value, available in the left column, so that the selection is more or less precise.
 © GIMP
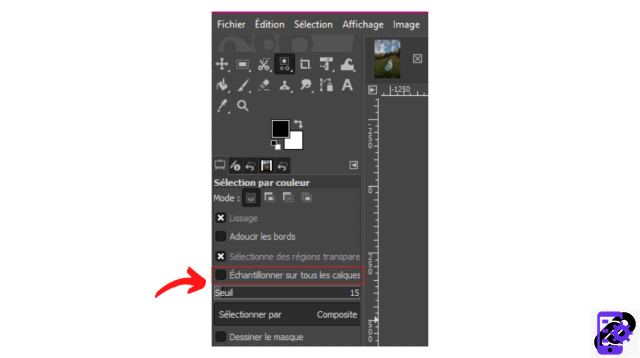
2. If you have used several layers, do not hesitate to check the line “Sample on all layers” so that the selection is made on each of them.
 © GIMP
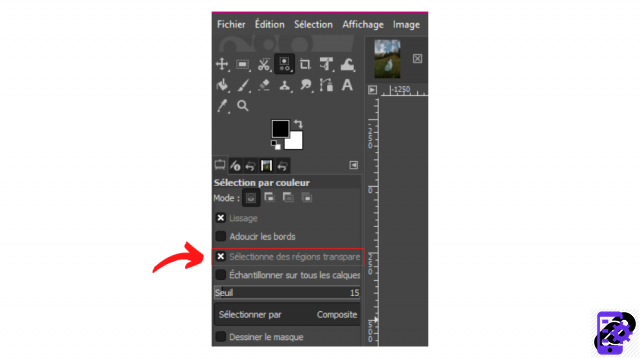
3. If you want the selection to take transparent spaces into account, check the “Select transparent regions” line.
 © GIMP
Make an Extended Color Selection in GIMP
The Magic Wand tool allows you to make contiguous selections. This means that if you click on a pixel, the tool will only select the closest pixels. The work done is therefore partial. And it can be quite suitable, depending on the needs.
Do you want to make a selection extended to your entire document? To select all the areas of the image having the same color as the chosen pixel, it is possible to go through the “Selection by color” tool. To do this :
1. Go to the main menu and click on "Tools".
2. Hover over the "Selection Tools" option and click "Select by Color".
 © GIMP
3. Click on a pixel in your image.
4. Lo and behold, all the areas of the same shade are surrounded by dotted lines!
Convenient, isn't it?
Image source: Pexels
Find all the tutorials to act on elements in GIMP:
How to select or deselect an element in GIMP?
How do I move an element in GIMP?
How do I delete an element in GIMP?
How to Use Smart Scissors in GIMP?
How to use the Dropper tool in GIMP?
How to Use Paint Tools in GIMP?
How to use transformation tools in GIMP?


![[Review] Samsung Powerbot VR7000: the robot vacuum cleaner from Star Wars](/images/posts/6bc44de38605b5c0fa12661febb1f8af-0.jpg)


