


All the steps to install and configure Kodi on Freebox. The media center is one of the most popular and there is good reason given the many possibilities it offers. Apart from managing your multimedia catalog, if you are fans of streaming movies, series, documentaries, here is how to configure Kodi on the Feebox Mini 4K, the only Freebox compatible with the application. This of course remains valid for all other boxes under Android TV.
The popularity rating of Kodi continues to climb. Basically, the open source media center was developed for the Xbox platform. Hence its original name: Xbox Media Center (XBMC). The application was subsequently extended to other systems: GNU / Linux, Windows, MacOS X, Android, but also iOS. If you have a Freebox Mini 4K or any other box running Android TV, here's how to configure Kodi and take advantage of all its power.
Configure Kodi on a FreeBox
For a long time, the Freebox Delta designated by its code name V7 was advertised on Android. But Free ultimately preferred a homemade OS, like the Freebox Revolution. It is therefore still not possible to take advantage of Kodi on these boxes since the application is not available on the FreeStore, unlike the Plex alternative that a developer recently brought to the platform (P2F).
In case you have a TV running Android TV, this tutorial is also for you. If you've never used Kodi, here's how to set it up, especially since the process isn't the easiest. But before we start, let's do a little recap of the possibilities that Kodi offers for those who don't know.
What can be done with the Kodi media center?
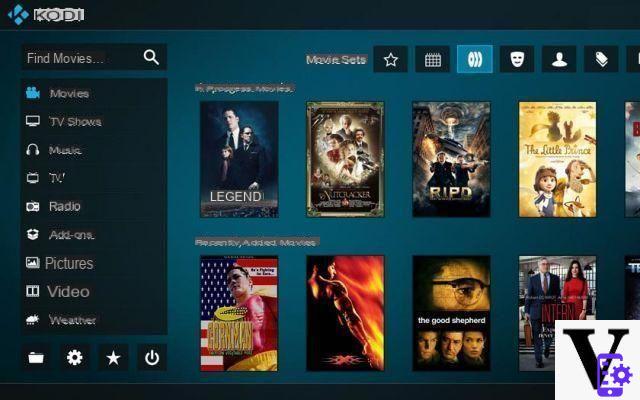
Like any good media center, Kodi lets you play the vast majority of video, audio, and image formats. The application allows you to manage your local catalog as well as access various content on the web. Thanks to the possibility of adding extensions, you can also watch videos (films, series, documentaries), watch free TV channels via the Internet, etc. Power 10 streaming on your TV thanks to Kodi!
Configure Kodi on your Android box
Start by installing it from the Play Store or the Kodi site. Open the app. It is by default in English. If you are not familiar with the language of Shakespeare, the first thing to do is to put the interface in of the country.
Change Kodi language
Press the gear-shaped “Parameter” icon, then “Interface Setting”. In the “Regional” tab, click on Language and select of the country.
Return to the “Region” tab once the interface is in of the country, and do the same for the keyboard layout. It defaults to "English Qwerty". Put it on "Français AZERTY".
Configure your sources
To read your multimedia files, the application must go and find them. Specify a source for this. It can be the local hard drive of your Freebox or a remote server (NAS, FTP) and it is also one of Kodi's strengths because your multimedia files may not be stored on the device. , but on another.
However, by accessing your content in this way, it is important to have good bandwidth, both on the source device (Upload) and on your Box (Download). But in our case, we are going to configure Kodi to search and organize multimedia content on the Box.
First of all, it is important to organize your files well in order to make things easier since the organization in Kodi will also depend on how your directories are ranked. For videos, keep movies, series, documentaries, and other shows in separate folders. The same goes for music, photos / images, etc.
To configure your sources, go to the home page of the Kodi interface. In the Menu on the right, select the desired content category. Here, we choose Films. Since no source had been configured before, the system prompts you to select select "File section".
Browse your local drive and select the source of your movies. Click OK and the following screen will appear.
You can choose the source category (Film) and the information provider (Scrapper). This is the database that will allow you to retrieve the basic information of your content displayed in the video library, more precisely the meta data which are essential for the best possible user experience: cover of films, title, genre, synopsis , release date, etc.
By default, Kodi is positioned on the “The Movie Database” scrapper as you can see in the image. Click on Parameter, at the bottom, and set the preferred language to "of the country". The same goes for the preferred certification country.
Once the configuration is validated, Kodi will automatically upload the information to the Internet in order to display your library in the most ergonomic way possible, with previews and all the necessary information about your movies. Of course, repeat the same operation for the series and for the music.
How to install an extension on Kodi
Here is one of the most interesting parts of Kodi. All the power of the application lies in the extension of its possibilities through add-ons. And it is precisely thanks to these add-ons that we can add sources to stream or watch channels for free from Kodi. There are of course various extensions. As part of this tutorial, we are going to install the VStream extension.
Install a Kodi repository
You can directly install VStream on Kodi thanks to its ZIP file. But it is more interesting to go through a deposit. It is simply an extension which itself functions as an extensions directory. Thus, you will be able to directly search and install the extension you want among thousands. The advantage is to avoid having to download the zip of an addon and to redo the process each time you want to install it. SuperRepo is one of the best Kodi repositories.
To install it, go to Settings> File Management. Tap Add source. Click on the line where it is marked "None." Add the following address http://srp.nu. Name the source SuperRepo and click OK.
Now go back to the Kodi homepage, go to "Extension" on the right Menu level, click on the cardboard icon at the top right.
Select "Install from zip file".
On a first attempt, a message will tell you that installation from unknown sources is disabled. Click on parameter in the dialog box and activate the installation from unknown sources.
Once it's done, do “Install from zip file” again, then select the “SuperRepo” from the sources listed. Go to the Krypton folder (current version of Kodi), then to "All". Select the zip file and the installation takes place.
Stream movies, series and sports from Kodi
Once the repository is in place, we will install VStream. The choice of this extension is not trivial. It is powerful and allows you to access a variety of streaming entertainment content: IPTV, Replay TV, Movies, Series, Anime & Cartoons, Documentaries, Sports, etc. One of the best of the country-speaking sources.
To install VStream, go to 'Extension', click on the box icon, then on 'Install from repository', choose the SuperRepo repository and find the VStream extension by scrolling down the list. Once identified, click on it, then click Install, at the bottom right. Wait until the installation is complete. Then go to Extension> My Extensions> Video Extensions and click on VStream.
You now have access to a vast universe.
Select the category that suits you: Movies, Series, Anime, TV and do your research.


