


By now you should know well, OpenOffice is a free alternative to Microsoft Office that allows you to do almost anything you can do with Microsoft's paid suite. This means that it not only allows you to process text documents like Word and spreadsheets like Excel, but also allows you to create beautiful presentations like in PowerPoint.
If you are looking for a solution to create presentations and slides to show at school or work and you don't want to spend a fortune on commercial solutions, you could hardly find better. Here is the reason why I would say to close it here with the chatter and immediately take action: here how to make a presentation with Open Office step by step.
For the tutorial I will be using OpenOffice version 4.x which, at the time of writing, is the most recent. In any case, the indications in the guide should be valid for all the versions of the famous open source suite, which I remind you to be available not only for Windows, but also for macOS, Linux and, unofficially, also Android. (I'll tell you more about it at the end of the article). Happy reading and good work!
Index
- Preliminary operation
- Create a presentation with Open Office
- Create a presentation with Open Office on smartphones and tablets
Preliminary operation
If you're reading this guide, you most likely already have it installed OpenOffice on your computer. If this is not the case, fix it immediately by connecting to the official website of OpenOffice and first click on the item download for free and then Download the full version (making sure that in the three drop-down menus at the top there are selected, respectively, the operating system installed on your computer, the 2022na language and the most recent version of the software).
When the download is complete, if you are using Windows, april il .exe file obtained and, in the window that opens, first click on Yes and then NEXT e Install to extract the files needed to install OpenOffice. Then click on NEXT three consecutive times and complete the setup by pressing in sequence on Install e end. If you also install the component Visual C ++ Redistributable, don't worry: it is a free component (developed by Microsoft) necessary for the correct functioning of OpenOffice.
If you use a MacInstead, open the package .dmg got it, drag OpenOffice in the folder Applications macOS and start the program by right clicking on its icon and choosing the item apri for two consecutive times (the operation is only necessary at the first start to bypass macOS restrictions on applications from non-certified developers).
Once the installation is complete, you are ready for make a presentation with Open Office. Then start the suite by clicking on its icon on the Windows desktop or in the macOS Launchpad and, in the window that opens, fill out the short welcome questionnaire by entering your name (so that this is included in the metadata of the documents that you will create). Then follow the instructions in the following chapters of the guide to bring your slides to life.
Create a presentation with Open Office
To break the ice, I would say that the best choice is to start from a preset model using the wizard for creating presentations included in OpenOffice.
Then click on the button Introduction present in the main OpenOffice screen (or go to the menu File> Wizards> Presentation located at the top left) and, in the window that opens, put the check mark next to the item As a model to start creating a new presentation from a preset template.
Then choose the presentation template that best suits you from the list that appears (there are only a couple at the beginning, but you can download a lot of them from the Internet for free through the OpenOffice site) and click on NEXT to continue setting up your presentation.
At this point, you need to choose the medium for presentation, that is where you will have to play the presentation you want to create (screen, slide, paper, etc.), putting the check mark next to one of the available items, and select the background for presentation among those proposed in the list.
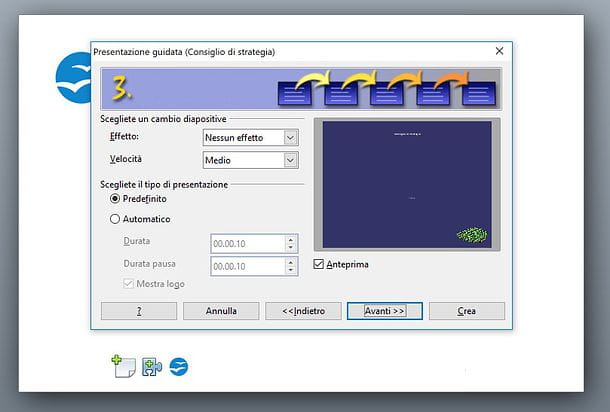
Once you have made your choice, click again on NEXT and choose the animation you want to use to switch between pages of your presentation by selecting it from the drop-down menu Effect. Also sets the Speed playback of the presentation from the drop-down menu and click NEXT to access the form where you will need to enter information about yourself or the company for which you are producing the presentation.
Once the form is filled in, click on the button once again NEXT, leave the check mark next to the pages you want to keep in your presentation (Title, View, Long-term goal, etc.), remove it from the ones you don't want to insert and click on the button Crea to access the main screen of Impress.
Even if at first glance its interface can surprise you, I can assure you that creating a presentation with OpenOffice is really a breeze: just think that, to modify any text, image or shape, just select it with the mouse and proceed with the customization. using the program toolbars.
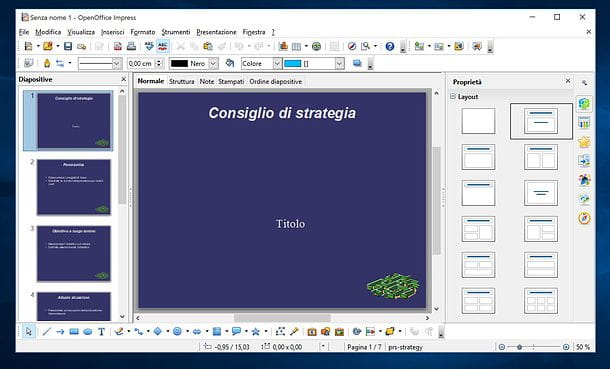
In the main toolbar of Impress, for example, you will find all the tools to format text, copy / paste, insert images, hyperlinks and perform all the most common operations. On the right, however, you will find a quick access bar with various buttons: Property to display the "Properties" pane, which contains the menus with which to adjust the properties of the various selected elements (eg texts or images); Master Pages to view templates of pages used in the presentation, recently used pages, and pages available for use; Custom animation to adjust the properties of the animations applied to the selected elements; Transition effect to choose the transition effect to apply to the selected slide; Styles and formatting to manage predefined styles and formatting in OpenOffice; Gallery to access the OpenOffice gallery with clipart to be included in presentations e navigator, to access the navigation menu through which "jump" from one slide to another by selecting the title.
Finally, on the left are the thumbnails of all slides that make up the presentation, while with the toolbar which is located at the bottom you can insert and modify shapes and texts in a very simple way (just select a tool from the toolbar and then click on the point on the slide where you want to use it).
Once you are familiar with all the commands and have created your first presentation, you can view the final result by pressing the button F5 on the keyboard or by clicking on the button Introduction of the main Impress toolbar (top right).
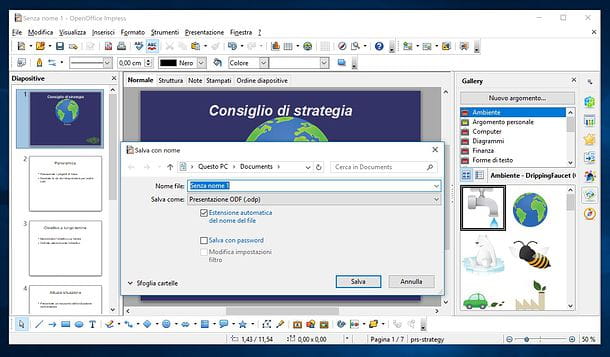
If you are satisfied with the result, you can save your presentation by selecting the item Save with name from the menu Fillet located at the top left. Presentations can be saved in either OpenOffice format (ODP) and in PowerPoint format (PPT), just choose the desired file type from the drop-down menu Save eat (o File type your Mac). Easy, right?
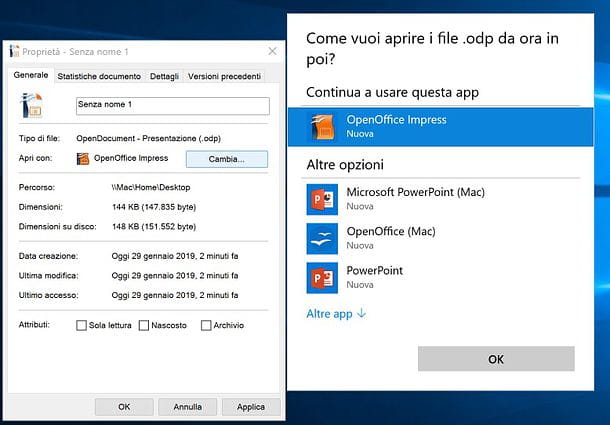
Afterwards, you can edit your presentation whenever you want by simply double-clicking on it: Impress will automatically open, allowing you to apply the desired changes to your file. If not, right click on the file to edit and select the items Open with> OpenOffice Impress (Or Open with> OpenOffice on Mac) from the context menu, or restore the association between ODP or PPT files and OpenOffice.
To perform this operation on Windows, right click on any file in the format you want to associate with OpenOffice and select the item Property from the context menu. In the window that opens, click on the button Change, select Openoffice impress from the list of available applications and give OK.
If you use a Macinstead, right-click on any file in the format you want to associate with OpenOffice and select the item Get information from the context menu. In the window that opens, expand the pane Open with, select OpenOffice from the drop-down menu for choosing applications and click on the button Edit all to apply the changes.
How do you say? Would you like to create a new blank presentation with Impress? Nothing easier: start OpenOffice through its icon on the Windows desktop or in the macOS Launchpad, select the item Introduction from the window that opens, check the box Blank presentation and click on the button Crea.
If, on the other hand, you want to install new templates to use for your presentations, visit the OpenOffice website, find the template of your interest and click first on its preview and then on the button Download templates, on the page that opens. When the download is complete, you can double-click on the downloaded file and work on it directly or, alternatively, you can move it to the OpenOffice templates folder and always have it available among the program's predefined templates.
If you do not know which is the folder in which OpenOffice keeps the templates, open the program, go to the menu Tools Options (Or OpenOffice> Preferences on Mac), select the item Paths from the sidebar of the window that has opened and check the path indicated in the field Patterns: it is there that you will have to go to place the template file downloaded from the Internet (in order to find it in the menu for choosing the program templates).
Create a presentation with Open Office on smartphones and tablets
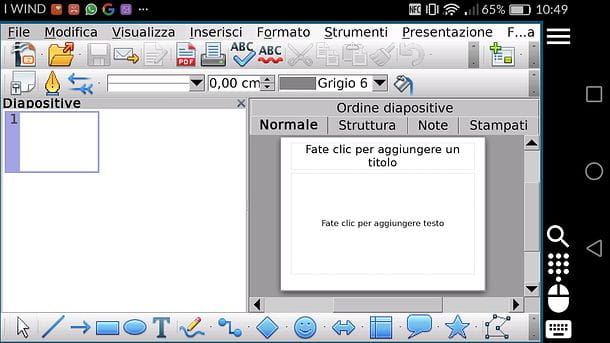
As mentioned at the beginning of the post, OpenOffice is also available on smartphones and tablets. This is not an official solution, but it works very well. The app I am referring to is AndrOpen Office, it is only available for Android and it is an exact port of OpenOffice for computers: this means that its interface is not optimized for use via touch-screen but that it shows all the menus of the desktop version of the program.
AndrOpen Office is free, but to unlock some advanced features, such as support for cloud storage services (eg. dropbox), and to remove the advertisements from the app, it is necessary to purchase its Professional Pack at a cost of 4,49 euros. That said, to download AndrOpen Office on your smartphone or tablet, all you have to do is open the Play Store (the icon with the colored ▶ ︎ symbol located on the home screen or in the drawer, i.e. the screen with the list of all the apps installed on the device), search "AndrOpen Office" in the latter and proceed with the installation of the app by first pressing on its icon in the search results and then on the button Install.
Then start AndrOpen Office, choose to create a new one presentation and follow the instructions I have already given you in the chapter of the guide dedicated to OpenOffice for PC as, as already mentioned, the program interface is the same even on mobile.


