


With Photoshop you can really do everything, from the most basic photo editing to the creation of real digital works of art. But this is known history; what not everyone knows is that Photoshop can also be used to create vector graphics images. Don't tell me you've never heard of it! Vector graphics - to simplify the concept as much as possible - is that particular type of graphics that allows images to be enlarged infinitely without losing quality. It is mainly used for the creation of logos, icons and stylized images, but its application concerns many areas.
Well, using Photoshop you can take any photo in standard format (eg. JPG, BMP, PNG or GIF) and transform it into a vector image giving it an enviable stylized look. The operation is a bit long to complete, but all in all simple; the important thing is to use good starting images. To obtain noteworthy results, good quality photos must be used, not too "confusing" and with well-defined subjects. So, what do you think? Are you ready to try? If your answer is yes, take some time off and find out how to vectorize an image with Photoshop thanks to the information I'm about to give you. I assure you that with a little attention you will be able to obtain truly amazing results.
Final report: only the most recent versions of Photoshop (those released from the end of 2022 onwards) support direct export of images in vector format. If you are using an older version of Adobe software, you need to prepare the image in Photoshop, save it as a PNG file, and then transform it into a vector image using external solutions, which I will tell you about towards the end of the tutorial. Enjoy your reading and have fun!
Index
- Step 1 - crop the image to be vectorized
- Step 2 - simplify the image to be vectorized
- Step 3 - convert the image to a vector shape
- Step 4 - save the image in vector format with Photoshop
- Vectorize the image with Photoshop workarounds
Step 1 - crop the image to be vectorized
If you want to learn how to vectorize an image with Photoshop, the first thing you need to do is start Photoshop via its icon on the desktop or in the Windows Start menu and import the photo you want to convert into a vector image by selecting the item apri from the menu Fillet.
At this point, you need to clear the background of the photo by selecting the tool magnetic loop from the toolbar on the left side of the screen (you have to right click on the lasso tool to make it appear) and creating as accurate a selection as possible of the subject of the photo.
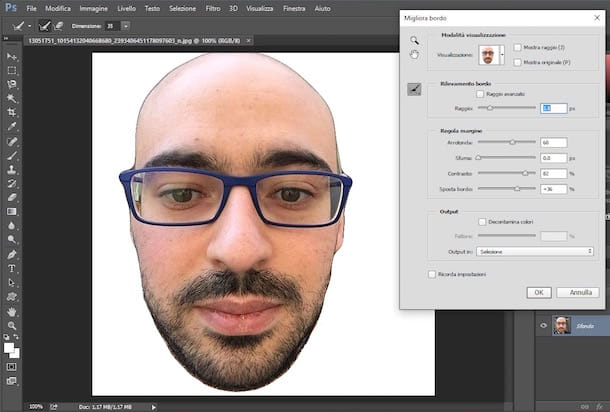
Once the subject of the photo is outlined, click on the button Refine Edge located at the top right and adjust the bars radius, Round up, Fade, etc. to refine the selection as much as possible and make sure that there are no “missing pieces” from the subject or portions of the background in it.
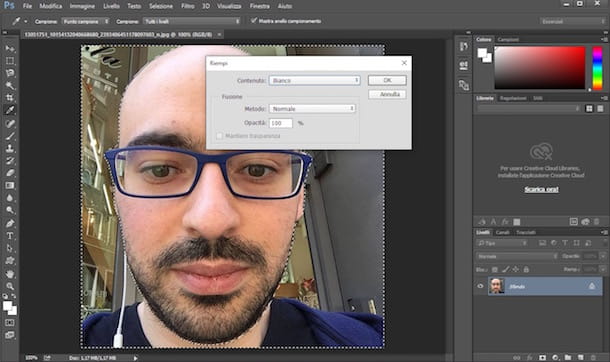
Once this operation has also been completed, all you have to do is select the background of the photo and delete it. To do this, click with the right mouse button anywhere in the selection you have created, select the item Select reverse from the menu that appears and press the button Canc/Backspace of your PC keyboard.
In the window that opens, select the color White give menu to tendin Content and click on the button OK to erase the background of the photo by filling it with white successively.
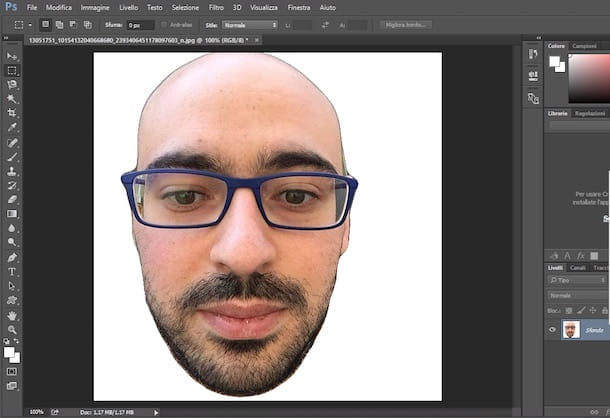
Finally, select the tool rubber or white brush and refine your image by removing any smudges or unwanted elements. Eventually you will need to get a well-defined image that you can vectorize without losing too much detail.
Step 2 - simplify the image to be vectorized
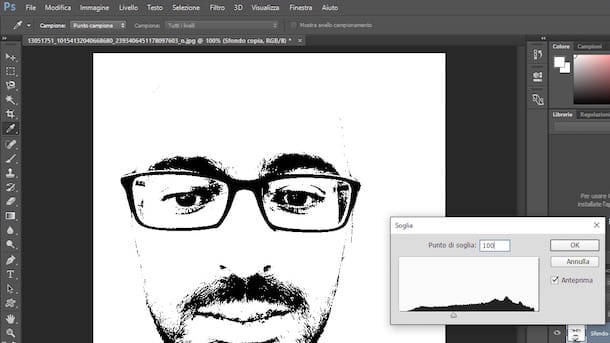
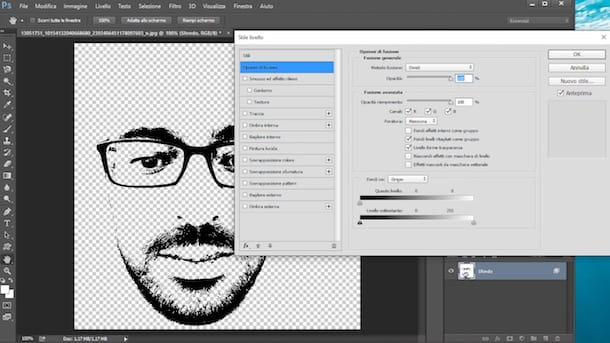
At this point you should have obtained a photo with the subject in the foreground and no background. To turn it into a vector image, though, you need to simplify it even more and make it monochrome. Then go to the menu Image> Adjustments Photoshop and calls the function Threshold.
In the window that opens, use the indicator at the bottom to find the threshold point better (the one that allows you to obtain a "clean" image while maintaining as much detail as possible) and click on the button OK per salvare i Cambiomenti.
If you can't get any appreciable results with the Threshold tool, try going to the menu Filter> Filter Gallery Photoshop and apply one of the filters available in the section to your image Sketch. Then go back to Image> Adjustments> Threshold and this time the image should be more defined.
Step 3 - convert the image to a vector shape
Now you need to convert your image into a vector shape and save it in Photoshop. To do this, erase the background of the photo and make it transparent. This is an extremely simple operation to complete. All you have to do is place the mouse cursor on the layer panel (bottom right), click with the right mouse button on the name of the layer that makes up your image (eg. Background) and will select the voice Blending options give the menu to compare.
In the window that opens, select the item Blending options, move to black colour (then to the left) the first adjustment bar located under the wording Fund if and click on the button OK per salvare i Cambiomenti.
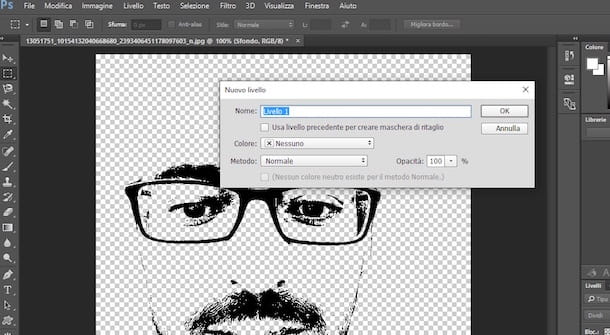
At this point the background of the image appears transparent but it really is not (in the sense that copying the photo, or selecting it, would still be white). To make the background of the image truly transparent, go to the menu Layer> New> Layer Photoshop, set the option Nobody from the drop-down menu Color and click on the button OK to create a new layer with a transparent background.
When done, select the item Merge Visible from the menu Subscription and the two layers (the new one you just created and the background one) will merge. This way you will get your image on a transparent background.
You now have the image to use as the basis for creating your vector shape in Photoshop. To bring the vector shape to life, you need to select the content of your image (without the background) and create a new work path.
Then place the mouse cursor on the layer panel located at the bottom right, click on the name of the layer that makes up your image (eg. Background) and press the combination Ctrl+click (cmd+click on Mac) to select its content.
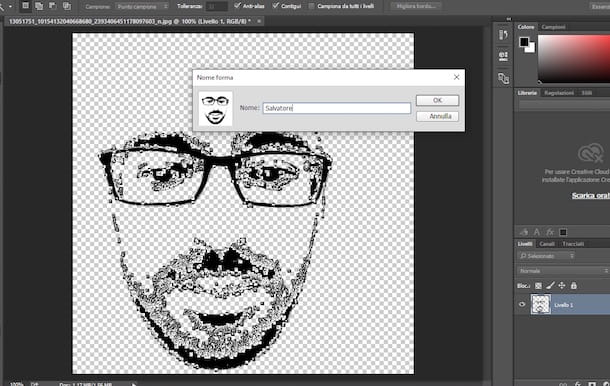
Next, right-click anywhere in the image and click on the item Create work path present in the menu that appears. In the window that appears, set the value related to tolerance su 1.0 and click on the button OK to move forward.
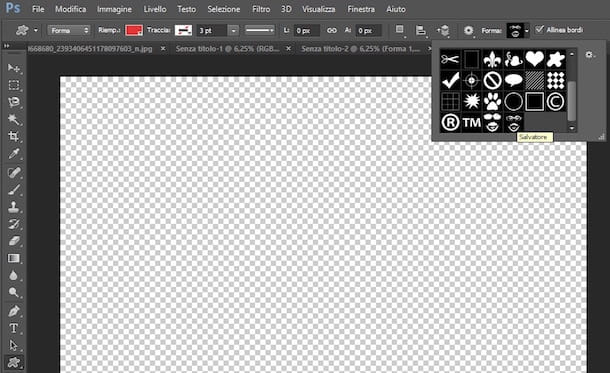
The last step is to create the vector shape in Photoshop. Then click on the menu Modification located at the top left, choose the option Define personal shape from the latter, assign a name to the shape and click on the button OK to save it in Photoshop.
Step 4 - save the image in vector format with Photoshop
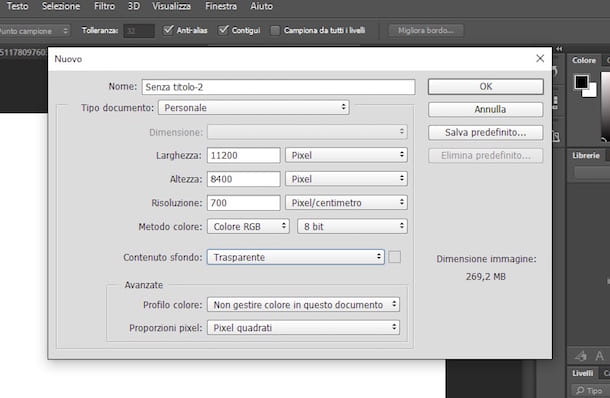
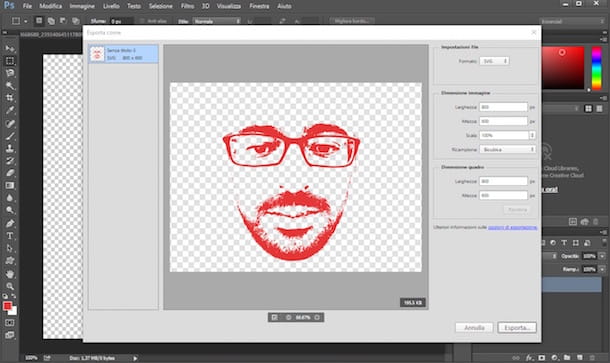
Finally here we are! Now you just have to create a new image, insert the vector shape you created earlier in it (choosing the color you want to apply it in) and export the final result as an SVG file.
To create a new image in Photoshop, go to the menu File> New program, indicate the size you want to assign to the image, set the option Transparent in the drop-down menu Background content and click on the button OK but I will complete the operation.
Next, right click on the rectangle tool located in the Photoshop sidebar, select it personal shape tool from the menu that opens and set the option Shape from the drop-down menu that appears at the top left.
So use the menu Riemp to choose the color in which you want to “print” your vector shape and select the vector shape from the appropriate box located at the top right.
After this step too, use the mouse to “draw” the vector shape in the center of the image and click on rectangular marquee tool to apply the changes.
If you deem it appropriate, also click on move tool and use the mouse to move the vector shape to the point of the image you prefer.

Now the procedure for vectorizing an image with Photoshop it's almost finished. If you are satisfied with the result, then go to the menu File> Export> Export As program, select the option SVG from the drop-down menu Format located at the top right of the window that opens, adjust the rest of the parameters as you see fit and press the button Export to choose the folder in which to save your image in vector format.
If the preview of the SVG file is empty (therefore completely white), duplicate the background layer of the image and repeat the export procedure.
Your Photoshop does not have the features Export as and / or SVG support? You are obviously using a not very recent version of the program (dating back to before 2022). In this case you have to export the image as a common PNG file, then you have to feed it to external solutions and convert it into vector format with the latter.
To export the image in PNG format, go to the menu File> Save with nome Photoshop and sets PNG format give menu to tendin Format. As for the external solutions to transform the image into vector format, read on, you will find everything explained below.
Vectorize the image with Photoshop workarounds
If you are using an outdated version of Photoshop or are not satisfied with the SVG export done by the Adobe software, take the PNG image you created in Photoshop and turn it into a vector image by contacting an external solution.
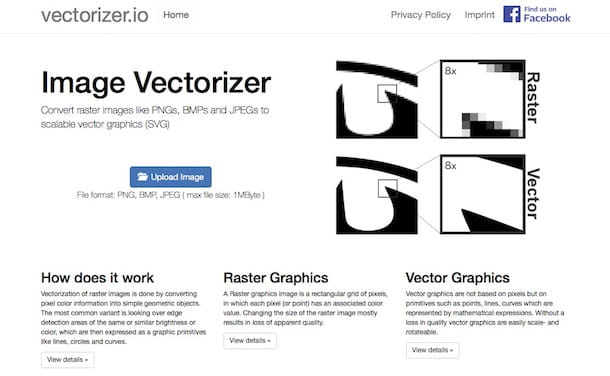
Among the simplest and most immediate vectorization tools to use is Vectorizer.io, a free online service that vectorizes PNG, BMP and JPEG images using predefined styles (e.g. color drawing or black and white drawing) and offering the user can adjust numerous parameters. To use it, connected to its main page, click on the button Upload images and select the image you previously exported from Photoshop. Note that you can only upload files up to 1MB in size!
On the page that opens, expand the drop-down menu Presets and select one of the vectorization styles available in the latter. The preview on the right will help you find the one that best suits your image.
Once you have found the style that best suits your image, expand the drop-down menus Colors, Tollerance e Blur and, if you want, manually set the parameters relating to the colors that must make up the vector image (I recommend 32 or 64), the tolerance threshold and the gradient. These last two values I advise you to keep them as low as possible as they greatly affect the degree of sharpness of the final image. Other parameters you can adjust are those related to colors, details e BORDI vector image (using the buttons capacitor positive (+) lead e negative (-) lead which are on the right).
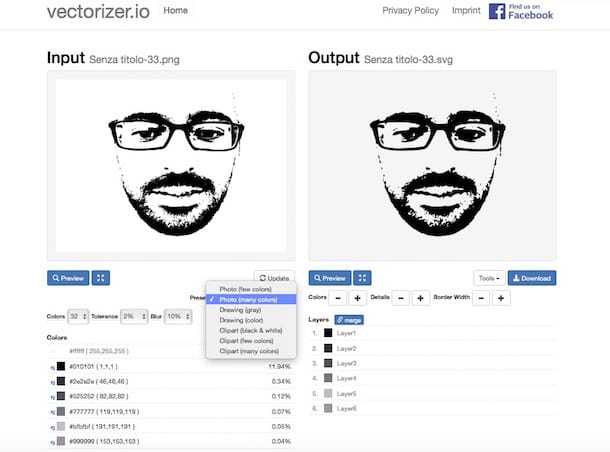
When you are satisfied with the result, press the button Download which is under the vector image preview (on the right) and the output SVG file will be downloaded to your PC automatically. The image in SVG obtained will be compatible with all major web browsers and all vector graphics software.
Other solutions to try
You can also use offline applications to turn your photo into a vector image, such as Flash e Adobe Illustrator. In the first case, you need to import the PNG or GIF file to be vectorized into Flash and use the tool Tracebitmap. Afterward, you need to call the function Ricalca bitmap from the menu Elaborate and set the Color threshold a 100 andMinimum area a 10.
If, on the other hand, you have decided to use Illustration (solution that I suggest, as it is simpler), all you have to do is import the PNG / GIF image to be vectorized in the program and select the item Tracing options from the menu Object> Dynamic Trace. In the window that opens, set Color o Black and White give menu to tendin Method depending on whether you want to get a colored or monochrome vector image and click on the button recharge to save the changes. You can find more details on how to vectorize an image with Illustrator by following the guide on the subject I posted some time ago. There you will find illustrated all the steps to be done even without using Photoshop in advance (an operation that I recommend you do if you want to get a more precise result).


![[Review] Samsung Powerbot VR7000: the robot vacuum cleaner from Star Wars](/images/posts/6bc44de38605b5c0fa12661febb1f8af-0.jpg)


