


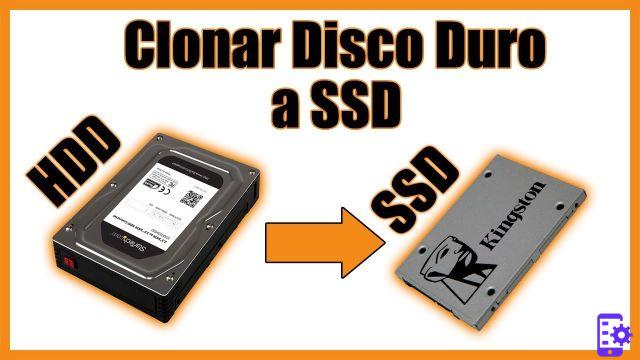
Having made this necessary premise, if you want to keep your system intact without having to resort to annoying data backup / restore procedures and system formatting, it will be necessary Cloning thehard drive on which the operating system is present through an appropriate software, which creates a identical copy of the source disc on a new unit. In the past, cloning hard drives or SSDs was only possible with expensive software, so it wasn't possible for everyone. Over time and with the evolution of software, cloning hard drives and SSDs has become a very simple operation to perform, especially if you have a minimum of familiarity with information technology.
So to clone hard drives and SSDs there are a myriad of software available online, both free and paid. If you have some previous computer knowledge, the most recommended software given the great possibility of operations that can be performed is Clonezilla (Download). If, on the other hand, you do not have much experience with the world of Linux and you want to do the operation in a much simpler way, the most suitable software for cloning hard drives and SSDs are certainly AOMEI Backupper (Download) e Macrium Reflect (Download). An interface will also be required for the cloning operation SATA / USB to connect the disks, which you can find for less than 10 euros on Amazon. The procedure remains very similar even in the migration of data on SSD NVMe.
Come clonare hard disk/SSD con Clonezilla
Clonezilla an opensource software based on linux specially designed (as the name suggests) for disk cloning operations.
The first thing to do is burn to disc the iso image containing Clonezilla on a disco (in case you still have an optical reader) or on one USB pendrive.
Bootable CD / DVD creation
If you are going to create a traditional Bootable CD / DVD, it will be sufficient to burn the disc image via the suite di Windows.
Once downloaded the image will be enough right click on the .iso file and select the "burn disc image". Your optical reader will automatically open and you will need to insert a virgin support. Once the burn operation has been performed, the disc will automatically eject and you are ready for the second part of the procedure
Creation of a bootable USB key
If you want to create a key Bootable USB, it will be necessary to use software capable of burning the images in .iso format to a removable device. Various programs are available online and we recommend you among the many Rufus (Download), given the effectiveness and ease of use.
Once the necessary files have been downloaded, we open Rufus and we choose the device on which to burn the .iso file
In some cases, it will be necessary download some additional libraries necessary for the correct functioning of the procedure. Rufus automatically recognizes missing libraries and then it will be sufficient to download the libraries it suggests.
At this point the program will ask us if we want to write the image in traditional way (suggested), or via DD. Confirm your choice, and after a further security confirmation, the writing procedure will begin, which will last a few minutes.
After this operation, leave the key attached to the USB port and restart the PC.
Clonare hard disk / SSD
From this point on, whether it is a disk or a key the procedure is the same.
We connect our new disk, verifying its correct functioning. Once initialized, we proceed by turning off the PC and turning it back on, taking care of select as boot device (boot device) the key o optical media. Once Clonezilla is started we will find ourselves on the following screen.
We reward ENTER and so we start the operating system. Within a minute it will boot and the live system will be ready. At this point we select the language (Italian is also available), taking care to keep the keyboard layout the same by selecting the "Keep".
Now select "Start Clonezilla”To start the copy procedure. You will find yourself in front of a screen where various functions are proposed, including that of creating a backup clone of your disk. For the cloning procedure of one disk on another it will be necessary to select the item "device-device", that create a clone on any disk connected to our system.
At this point we select the beginner mode, which will automatically set all the parameters necessary to perform the cloning correctly. Later you will find yourself having to choose whether to clone the entire local disk or a single partition of the disk, in this case you will have to choose according to your disk partitioning and based on the systems installed on the device. For a full cloning select the option “disk to local disk”.
After that the complete list of disks connected to our PC will appear, similar to the one in the image. This step is crucial and it is vital to recognize and correctly choose the disk it will act as source and the one who will receive the image. The selection will take place in sequential manner, will be chosen for first the disk to clone and then you will have to select the destination disk. As for the controls, we recommend that you skip various controls by selecting the first option.
Finally, as regards the operations to be carried out at the end of the cloning, the choice is irrelevant, even if it is advisable to wait until the end of the operations to choose whether to shut down or restart the PC.
When the actual cloning starts, you will be asked twice to confirm the destination disk, since the operation will be completely irreversible as all sectors of the disk will be overwritten.
At the end of the operation we can then choose whether shut down or restart your PC. At this point you will have an identical copy of your previous disk on the new one, which will already be ready to use without the need for further interventions.
How to clone hard drive / SSD with AOMEI Backupper
AOMEI Backupper is a software that includes a very advanced disk management suite. The functions available in the free version are very limited, but among these is the one that allows clonare hard disk e SSD. Once downloaded and installed, the newly opened program will return this screen to us.
Select the option "Clone", Then click on the item"disco screen".
We select source disk first e then the destination disk, taking care to carry out this step very carefully.
Once the disks have been selected, proceeding, the program will show a warning that will warn us of the loss of data on the destination disk. If you are sure you have chosen the disks in the right order, click on "OK".
At this point you will be presented with a summary screen where the program shows you the hard disk or SSD that you are about to clone. Below there are 2 options: the first, that is "SSD alignment”Is useful in case you are migrating data from a traditional Hard Disk to a new SSD, while the second option "clone sector by sector" it is specific for mechanical hard disks, as they are internally divided into sectors. Select the option according to your needs and start the procedure.
Once the software has finished cloning hard disk or SSD, a screen will inform you of the completion of the operation. At this point, all you have to do is insert your new storage drive into the PC and start using it.
Come clonare hard disk/SSD con Macrium Reflect
Macrium Reflect is also a software that allows you to clone hard drives and SSDs, even using the free version. Once downloaded and installed, the program will be very simple to use despite being only available in English. To clone hard drive or SSD, we must first open Macrium Reflect.
This is the main screen, where the partitions of all disks detected by the system are present. We select the disk we want to clone by right clicking and at the bottom the option "Clone this disk“, Which is what we will need to carry out the operation.
Once clicked, a new screen will pop up where you will need it choose the destination disk, which we remember must have dimensions equal to or greater than the source disk.
Once you have selected the desired disk, we drag the source partition on the disk so as to be able to clone all the desired partitions, in the case of a source disk with multiple partitions.
Clicking on Next, the program will give the possibility (if deemed necessary) to plan any cloning operations. If you are interested in cloning the hard disk right away, leave the tabs you want and click on Next.
At this point you will find yourself in front of a summary screen, useful for giving a final general check. We advise you to double check which disk serves as the source and which disk will receive the data, to avoid errors and a consequent loss of data. Once the checks have been completed, click on Finish, the software will start cloning hard drive or SSD to the new drive.
The program will obviously give you one last warning before overwriting all data and giving you the option to create a log file, useful in case of problems. Let's create the file and once we move on check the box and click Continue, to start the operation.
At the end of the operation, the software will inform you of the successful cloning. As in the other cases, once again all you have to do is insert the newly cloned drive into the system to start using it.
Find all Crucial branded SSDs on offer on Amazon, among the best given the high value for money!
How to clone hard drives and SSDs


![[Review] Samsung Powerbot VR7000: the robot vacuum cleaner from Star Wars](/images/posts/6bc44de38605b5c0fa12661febb1f8af-0.jpg)


