


An acquaintance asked you to make a Word document containing several tables; to align them all, it would be convenient for you to have a virtual ruler for reference, however you are operating from the computer and do not know how to achieve such a result. For this reason, you opened Google in search of a solution that could tackle the problem, ending up straight on this guide of mine.
Well, let me give you some great news: Word has a built-in feature that's right for you, which can be activated in seconds. If you will give me a few minutes of your time, I will explain to you in detail how to insert ruler in word, regardless of the "version" of the program you are using. Don't worry if you don't consider yourself an ace in terms of technology, you have no reason: the ruler is naturally integrated into the program and can be viewed by activating the relative option, without using third-party software or making complex changes to the operating system.
So, without hesitating further, take a few minutes of free time for yourself, make yourself comfortable and read very carefully everything I have to explain on the subject: I'm sure that, at the end of this reading, you will be perfectly able to visualize the ruler within the program and to use it in the way that best suits your case. Having said that, there is nothing left for me to do but wish you good reading and good work!
Index
- How to insert ruler in Word for PC
- Insert ruler in Word for Windows
- Insert ruler in Word for Mac
- Insert ruler in Word online
- How to insert ruler in Word for smartphones and tablets
How to insert ruler in Word for PC
Do you need to make cards or other bespoke material using the computer, so would you find it extremely useful to activate the ruler on this platform? Then this is the section for you: below, I am going to explain how to do this on Windows, MacOS and in online version of Word.
Insert ruler in Word for Windows
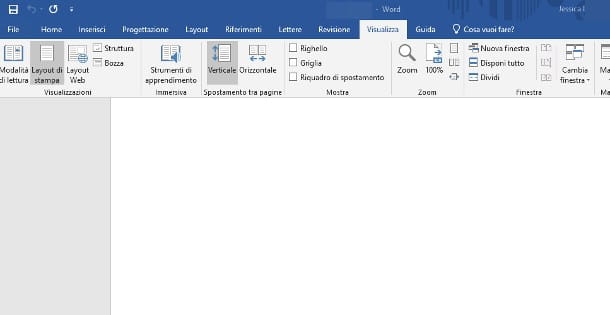
Insert ruler in Word to Windows it's really that simple! After starting the program, click on the icon to create a Blank document, or open a Word file already saved on your computer. Then click on the tab Immagine located at the top, then put the check mark next to the item Ruler and that's it: the horizontal ruler will be immediately shown on the screen!
Note: if you are using Word on a small display or with a minimized window, after going to the tab Immagine, you have to click on the button Show to activate the checkbox for the ruler.
If you need to use the vertical ruler as well, you can do the following: go back to the tab Immagineclick on your bottone Show, if necessary, then put the check mark next to the item Navigation Pane. Immediately thereafter, both the aforementioned pane (useful, for example, to quickly navigate between document chapters) and the vertical ruler will be added to the Word screen.
If, on the other hand, you want to show the vertical ruler together with the horizontal one, without however displaying the navigation pane, you must enable the appropriate option: click on the tab Fillet, located in the upper left corner of the Word window, click on the items options e Advanced Settings, identify the box viewing and apponi il segno di spunta accanto alla voce Show vertical ruler in Print Layout view. Always from the same section, if necessary, you can change the reference unit of measurement (inches, centimeters and so on).
Insert ruler in Word for Mac
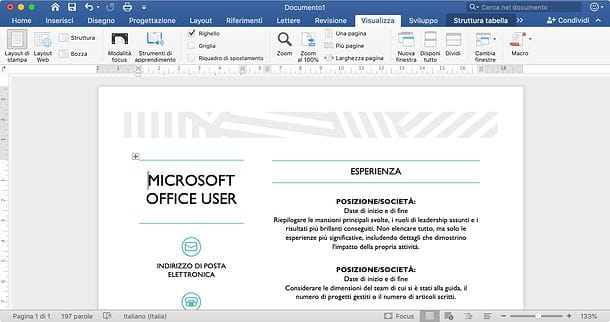
The steps for insert ruler in Word for Mac they are quite similar to those already seen on Windows. To get started, start the program, click on the icon to create a Blank document (or, alternatively, open an existing file), then click on the tab Immagine placed at the top and put the check mark on the item Ruler.
Alternatively, press the menu Immagine of the program (the one that appears on the Mac bar when the Word window is displayed at a reduced size) and click on the item Ruler placed inside, to place the check mark.
Should you need the vertical ruler and this is not displayed, click on the menu Word located at the top left (if you do not see it, place the mouse on the top bar of the Mac), select the item Pref Renze and then click on the icon Immagine. Finally, locate the box Show window elements and apponi il segno di spunta accanto alla voce Vertical ruler. That's all!
Insert ruler in Word Online
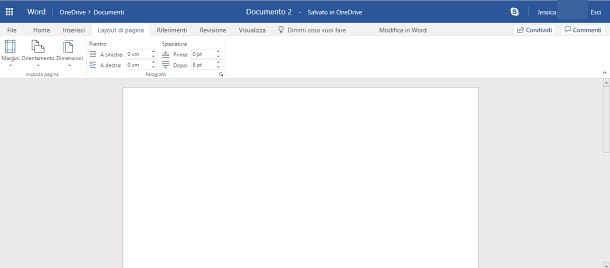
Currently, there is no special function for viewing the ruler in Word Online, the free version of Word that works directly from the browser. However, if you need functionality for editing borders, margins, spacing and so on, you can use the buttons and the appropriate boxes available within the tab Layout on the pagina, designed just for this purpose.
How to insert ruler in Word for smartphones and tablets
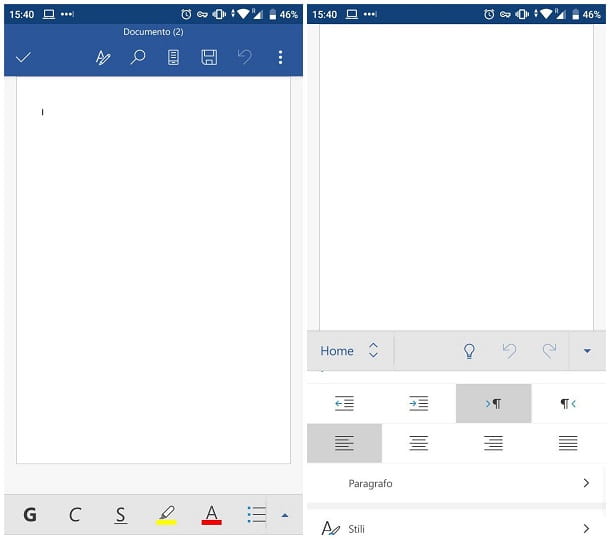
At the time of writing this article, it is not possible to view the ruler in the Word app for Android and iOS smartphones and tablets.
If, however, you need the ruler to change the margins and spaces within the documents, you can use the specific functions present in the program screen: to change the line spacing and paragraph spacing (if available), touch the icon Modification (shaped A with pencil) and then the icon of paragraph / line spacing formatting, located in the section Home, these poisons are smartphone; on tabletsinstead, you have to press the tab Home and touch the icon Paragraph.
The margin editing features, on the other hand, are located in the section Immagine of the app, accessible by pressing the icon of A with pencil (on smartphone) or by touching the homonymous tab (on tablet).


