How to photograph the Moon is one of those questions that are often asked of me and that, normally, pass through the mind of any photographer at least once in their life. Whether you are interested in photographing it or not, the Moon always remains at the center of photographic curiosities; she, so distant and shining, able to be unattainable for everyone but not for the eye of an attentive photographer. So if in your checklist there is a "photograph the Moon", get ready, after this article you will be able to tick that box.
How to photograph the Moon: knowing the satellite
I am of the opinion that it is not enough to think about how to photograph the Moon but it is also necessary to know some of its characteristicsand, like the most important ones for example. Similarly, if you are interested in night photography it is good to know the basics of the sky, stars and so on. This is because in most cases it is not enough to know how to take a picture or be able to master a camera, it is also necessary to know more than enough what is in front of you, whether it is the Moon, the Milky Way, a mountain or a person (and not underestimate this last point).
READ ALSO: From the Moon to the Earth: the five NASA inventions we use every day
Of course, it is not necessary to know how the Moon originated or if the landing was pure reality or fiction, this is not the right article to discuss it, but understanding the brightness, the displacements and above all the phases are three fundamental points to be able to photograph the essence in the best way, and don't forget the eclipse, where everything changes.
The Moon, which is a satellite (but you cannot use it to watch Sky), it is a very important light source in the sky, for this reason you will have to prepare yourself to manage it in the best way. Just imagine the type of contrast you are going to face: dark sky and bright Moon, then counting that the light emanating from the satellite spreads and consequently creates a different illumination. A type of lighting that also changes according to the phases of the moon, but now we get there step by step, don't worry.
The moon is illuminated thanks to the light of the Sun that "falls" on it in the same way it falls on the Earth, this means that the Moon does not shine with its own light and this is a great advantage, from certain points of view, for the management of light at a photographic level; this is because the light intensity is lower than the Sun and it is certainly easier to take an effect photograph with even a little landscape outline than doing the same thing during the day (equipment permitting, of course). Perhaps speaking of brightness, however, you have forgotten that the Moon is in motion, so there are three main factors to consider to prepare the shot: the Moon is very bright, it is far away and it moves. Fortunately for you, the information to know how to photograph the Moon is not that many, you don't need to memorize the Wikipedia text.
How to photograph the moon: The phases of the moon
By now you will have realized that there are three factors to take into account when wondering how to photograph the Luna; What if I give you another one?
Never forget to plan your shot well according to the current moon phase depending on what your shooting goal is. This part can also be particularly useful in night photography to understand, however, when the Moon will not be present to bother your photos. Yes, because if in this case you are actually going to "chase" the presence of the Moon, in the photo to the stars it is the exact opposite.
The phases of the moon describe what the moon actually looks like (seen from the Earth) during its motion, which changes according to the different orientation with respect to the Sun. The "synodic month“, Which is equal to about 29 days, is what defines the type of interval in which the lunar phases repeat themselves, therefore, once you learn them, you will also know that they happen cyclically. This part is useful as it is not always said that you necessarily want to photograph the full moon, you may also be interested in a crescent gibbous or a first quarter.
There are eight phases of the moon in total: New Moon (also called "new moon phase"), waxing moon, first quarter, waxing gibbous, full moon (or "full moon phase"), waning gibbous, last quarter, waning moon. The term "fourth" defines the exact subdivision of the Moon to better understand the various phases of the moon.
In the upper image you can see a wonderful shot that describes the phases of the moon in the exact order in which they were written and always seen from the northern hemisphere. Based on this image, you can surely understand how to photograph the Moon based on what you want to achieve. Set yourself a goal and look for the Moon in the sky at that precise moment of your interest, clouds permitting of course, because without a clear sky it will be difficult even to see the satellite in the sky.
Tall very nice so far, but how can you understand the current moon phase and consequently calculate the one of interest at a photographic level? In ancient times, people used a very special material obtained from trees and called "paper" by mere mortals. This material, together with a "pen" used on a "calendar" made it possible to mark the phases of the moon and understand, by calculating, the one in progress. Fortunately for us, it is now possible to do all this extremely easily thanks to thousands of different applications available on both iOS and Android.
In order not to get too lost in the selection or in the search, I will recommend two: one free and a paid must-have.
Su Android it's available "Daff Luna", An application that also offers a splendid widget that can be used in the homescreen and that is able to show you all the phases of the moon, the guides for experts, the precise position of the Moon and many other things that would actually be more useful to those who study space compared to a photographer, but it could be something you are passionate about.
 Download
QR-Code
Daff Luna
Developer:
Evgeny Fedorischenko
Price:
Free+
Download
QR-Code
Daff Luna
Developer:
Evgeny Fedorischenko
Price:
Free+
Speaking of iOS and always talking about free applications, it can work and be right for you "Moon.", A very simple app that offers 3D models of the Moon, the phases of the moon, the illumination of the Moon, the Azimuth (the position in the sky), the altitude with respect to the horizon, the distance from the Moon and the time line of the moon phase. All things that Daff Luna also does but with different graphics than Moon.

 Download
QR-Code
Moon.
Developer:
CDV Concepts
Price:
Free
Download
QR-Code
Moon.
Developer:
CDV Concepts
Price:
Free
However, I also promised you a paid app, and the reason is very simple: for many this application could be an expensive investment (always compared to a "classic" price standard for apps), however, it must be said that it is the best application in the world not only for "observing" the Moon but also for photographers in general. It's called PhotoPills and it's available on both iOS and Android.
Are you a photographer or videomaker? Do you need to plan a photo, a video, a time lapse, a particular shot different from the usual? Then surely you can't miss this masterpiece of modern technology. With PhotoPills you will have everything in a single application: exposure calculation, PdC, Hyperfocal, count Time Lapse, Spot Stars, augmented reality with vision of the Moon, the Milky Way or the stars of your choice and much more. The "key" function of everything is certainly the Planner, that is a section that allows you to program each part of your shot. This feature is particularly useful if you think (or fear) that you have obstacles in front of you, be they mountains, hills or whatever. PhotoPills has an incredible database and will help you plan everything down to the smallest detail based on obstacles, points where light hits the ground, position of the sun, moon, Milky Way, visibility of the Milky Way in the sky, light pollution and much more. Obviously this is only 5% of PhotoPills' potential, which includes a dedicated tool to "monitor" the Moon in every way.

 Download
QR-Code
PhotoPills
Developer:
PhotoPills S.L.
Price:
9,99 €
Download
QR-Code
PhotoPills
Developer:
PhotoPills S.L.
Price:
9,99 €
 Download
QR-Code
PhotoPills
Developer:
PhotoPills, SL
Price:
10,99 €
Download
QR-Code
PhotoPills
Developer:
PhotoPills, SL
Price:
10,99 €
How to photograph the Moon: the necessary equipment
Now you are ready and you know (almost) everything about the Moon and its photographic management. To know how to photograph the Moon, however, does not end here, because we need to move on to another very fundamental point: the necessary photographic equipment. This, in my opinion, is the most complex point of all, because it is one of the few photographic cases in which the equipment in one's possession can really make a difference. Depending on the type of photo you have in mind, it is clear that if you want to see the Moon "nice big" or zoomed in at the right point, you will need a zoom lens capable of moving away a few hundred thousand KM, but not be afraid, everything is feasible.
Let's start with the camera, that's the base and you need to have one; this is because, although you see in some advertisements that it is possible "thanks to the zoom optics" to take pictures of the Moon even with a smartphone, if you have come to read this far it is because you are a photographer or you want to become one, so maybe let's take the opportunity to take pictures of quality, "works" that leave their mark.
How to photograph the moon: choosing the right lens
Whether you have a Nikon, a Canon, a Sony, a Fujifilm or any other brand, there is always a lens for you. Just pay attention to the type of sensor of your camera: for APS-C there are some types of lenses, for full frame others. It is assumed that if you have a full frame camera it is not necessary for you to know these things (as full frame cameras are meant for professionals or very advanced amateur photographers).
In any case, I thought of selecting for you at least one photographic lens suitable for photographing the Luna for the various cameras on the market (always assuming that you want to take a photo with a good zoom level and that it is not a wide-angle panoramic photo). I also remind you that by clicking on any target in the selection below you can access the Amazon page containing the different types of attack depending on the camera you have (always obviously that it is not of a specific brand and therefore with a single attack):
APS-C and Micro 4/3 selection
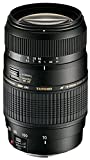 Tamron A17 70-300Mm F / 4-5.6 Di Macro 1: 2 Canon EF
- Focal length [mm]: 70-300
- Minimum focusing distance [m]: 0.95
- Number of aperture blades: 9
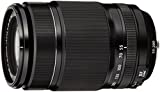 Fujifilm FUJINON Obiettivo Zoom 55-200 mm, f/3.5-4.8, R LM...
- Single focal length lens of 55-200mm
- Right lens design for optimal X-Trans CMOS sensor performance
- Long zoom lens
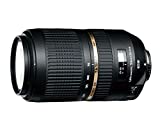 Tamron 70-300Mm F / 4-5.6 Canon Ultrasonic, Filter Size: ...
- Zoom type: Turn
- Diameter: 8,15 cm
- Maximum opening: 32
Full Frame Selection
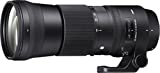 Sigma 5,0-6,3 / 150-600 DG OS HSM Contemporary Nikon, black
- Lens
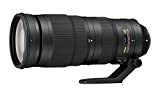 Nikon AF-S Nikkor 200–500 mm f/5.6E ED VR Teleobiettivo...
- Image stabilization: Y
- Maximum focal aperture: 500
- Minimum focal aperture: 200
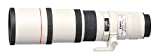 Canon EF 400mm f / 5.6L USM Telephoto lens
- The Canon EF 400mm f / 5.6 L USM is a tele lens for FF and APS-C
- Focusing is done via the Ultrasonic AF Motor
- Minimum focusing distance 3.50 m
Obviously, the longer the focal length, the greater the possibility for you to get closer to the Moon. For example, in the case of a lens able to go up to 500mm, know that ryou will be able to easily capture craters and various shades of the Moon from very close, a feature that will allow you to take photos that are truly unique and not feasible with other "common" devices. Clearly, the purchase of such a lens must not be justified only by your curiosity about how to photograph the Moon but it must certainly be an opportunity to experiment with other types of photography, such as portraits from a distance, sports photography and so on.
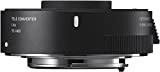
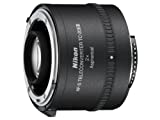
The teleconverter
There is another interesting "trick" that can be useful to further increase the zoom of any lens in order to exploit one that you may already have but which is not able to go that far: the use of a teleconverter.
A teleconverter is a very simple accessory that does only one thing (but it does it very well): as the name implies, it multiplies the focal length by the number defined in the model in such a way as to allow you a greater maximum zoom. For example, there are teleconverters from 1.4x, 1.6x and even 2x. This means that if you have, trivially, an 18-55mm, with a 2x you can get to have a 36x110mm. Of course, personally I think it is useless to use a teleconverter on an 18-55, it wouldn't make any sense. But if you have, for example, a 70-300 on APS-C, an optic that, in general, you can buy at a low price, thanks to a 2x teleconverter. you will reach a maximum of 600mm, more than enough to reach the much coveted "craters" of the Moon.
Discount
 Sigma - Teleconverter TC-1401, teleconverter, ...
- Suitable for professional use due to its robust dust and water proof construction
- Compatible with large diameter lenses
- Compact and lightweight, it allows you to easily increase the focal length of the lens
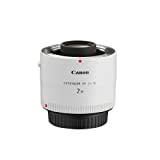 Canon Extender EF 2x III Telephoto Zoom, For Canon ...
- Extends the focal length of the lens by 2x
- Exceptional image quality
- High resistance to dust and water
 Nikon Tc-20E Af-S Iii Teleconverter
- versatile and ideal lens for sports
- aspherical lenses
- eliminates aberrations and luminous defects
How to photograph the Moon: the essential accessories
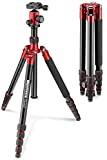
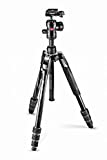
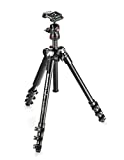
Did you think it ended here? Obviously not, there are at least two other essential accessories that should never be missing in your backpack to understand how to photograph the moon. The first is the tripod, because you will not be able to photograph the Moon freehand, the second is a remote control or intervalometerThis is because you need to touch the camera as little as possible and shoot at a safe distance.
The tripod is an essential accessory for every photographer in any case, not only if you want to photograph the Moon but also for Night photography, HDR, daytime long exposures and so on. A good tripod is necessary and I do not advise you to save on this type of purchase because it is a product that you will always carry with you and that, above all, must better hold your camera even in adverse weather conditions. An inexpensive and not very resistant tripod could cause your camera to fall which, in most cases, is worth more than a tripod, so it is a good idea to make the right investment. Specific "in most cases" because there are special carbon tripods that can cost up to € 2000 and more, so it all depends. Don't worry, this is not the case.
 Manfrotto MKELEB5RD-BH Element Traveler Tripod, Large, ...
- Lightweight and robust in the field
- Padded bag included
- Three leg angles to adapt to all terrains
 Manfrotto Befree Advanced with Twist Lock, Tripod Kit ...
- PORTABLE: Intuitive use and easy setup make it very convenient in travel situations, plus its ...
- COMPACT: M-Lock locking system has a Twist closure that leaves no protruding parts and therefore makes the ...
- COMBINABLE: The supplied plate is compatible with the attachments of the most common standard heads - Manfrotto and ...
 Manfrotto MKBFRA4-BH Befree Kit with Ball Head for ...
- The aluminum construction makes the tripod easy to carry
- Supplied with a padded shoulder bag to protect it
- The aluminum body and ball head provide stability
Speaking instead of the remote control / intervalometer, it is necessary to avoid touching the camera with your finger on the shutter button. This is a fundamental part in the passage dedicated to how to photograph the Moon because the touch of your finger could make the camera move and, consequently, create some blur in the photo, which, unfortunately, you will only notice once at home in front. on the computer, regretting not listening to me. Of course, if it were to happen to shoot at very fast times, this problem would not occur, but, in any case, this accessory can be useful even just to shoot with the camera on the tripod in order to make everything much more comfortable. Also, if in the future you are interested in doing night photography or Time Lapse, you will still need it. Keep in mind that each camera has its own intervalometer model / remote control, but it is not always necessary to buy the original one. In the selection below I will add some of the best "universal" brands that produce this type of accessory, then make sure it is compatible with your camera:
 PHOLSY N10 Timer Remote Control Release Remote Control with ...
- ✔Delay / Self timer (DELAY), Interval timer (INTVL), BULB / Long exposure (Long): Set any ...
- ✔2-step shutter button: can be pressed halfway for autofocus and exposure measurement; full ...
- ✔LCD display with backlight and status LED with alarm. Cable length: 900mm
 Pixel 2.4GHz Remote Control Intervalometer Remote Shooting LCD ...
- Compatibility: Olympus E30, E100, E400, E410, E420, E450, E510, E520, E550, E600, E620, SP-510UZ, SP-550UZ, SP-560UZ, ...
- TW-283 supports single shot mode, continuous shot, BULB shot mode, delayed and timed shot ...
- In delayed shooting mode, you can set the delay from 1 to 59s and the number of shots from 1 to 99.
 QUMOX Time Timer Lasso intervalometer Remote shutter release for ...
- 1. Delay / timer (Delay): When taking the photo for your own with on camera, the remote timer switch allows you to ...
- 2. Interval counter (INTVL): Interval counter can be set in any time period up to ...
- 3. Spot / Long Exposure: This allows you to take time exposures up to 100 hours in length.
How to photograph the Moon: the best settings
After the classic cold cuts and cheeses as an appetizer, it is right to switch to the main course: the Fiorentina. Sorry, I'm getting hungry so I better start telling you about the best settings on how to photograph the Moon right now.
Surprise: there are no better settings. End.
Seriously, as in most specific photographic techniques, there are no safe settings that you copy from this article and use in the shooting session obtaining the precise results you see in this guide. This because every situation and weather condition is always different, as well as the light that surrounds you, any unexpected events, the optics used and so on.
First of all, if your interest is not only the Moon but also a bit of landscape, make sure you go to a sufficiently dark place where you can act undisturbed and better manage the landscape. This does not mean that you will not be able to photograph the Moon in the city, but surely you will have to be more careful to manage the various lights present and any, indeed sure, annoyance they will give you. Also calculate the fact that light pollution could dramatically change the color temperature in the shot, as the lights are warm and the Moon has cool tones, just like the sky. Therefore, to handle this kind of difference you need to get some experience not only with the camera but also with a post-production program, such as Lightroom for example. Don't worry, there is no better way than experimentation to gain experience, even scientists say so.
As I wrote at the beginning of this guide dedicated to how to photograph the Moon, this type of technique is practically the opposite (at the level of rules) compared to night photography. This is because the Moon shines, it is very bright, so a long exposure would not be suitable, just as high ISOs and large apertures would not be suitable (which is why all the zoom lenses I have recommended above are perfect).
Speaking of times, try to keep one between 1/100 and 1/250 depending on the type of brightness of the Moon and / or the phase of the moon; certainly do some tests in these exposure time ranges will make you better understand the type of light present in that particular evening, the light of the Moon and the right shooting conditions.
All this, however, acts as a function of the ISO and the aperture you decide to choose, two factors that, in my opinion, are the easiest to manage in this type of photographic technique. This is because, in the exact opposite of Night photography, the ISO will have to be very low: 50-100 ISO will be fine, because the light is great and you won't have to burn the shot. Following the same logic, a rather closed aperture, basically between f / 8 and f / 11, no more.
By reading these settings, you may have understood why contextualizing the landscape becomes difficult: if the landscape is sufficiently illuminated, the settings could already be fine, otherwise, it will be necessary to do a double exposure, that is, two photos with the same angle and framing but with different parameters to be joined later with Photoshop. This is valid if you are using a wide-angle lens and you are interested in contextualizing the landscape scenario, otherwise, in the case of a telephoto lens with the Moon that fills the whole frame or only a part (albeit generous), you can simply stick to the settings I wrote to you avoiding further concerns for the landscape.
How to photograph the Moon in the event of a Lunar Eclipse? No fear, the settings remain almost the same, the difference is the time you will have available, significantly less than a classic night with a full moon, a crescent moon or any phase you want to photograph. Therefore, I strongly advise against using a lunar eclipse as your first experience. You arrive prepared from every point of view, with the right experience and with the right equipment, all based on other photos taken over time or immediately after reading this guide.
And if you want to add a professional or more creative touch to your photo of the Moon, don't forget the rule of thirds, or rather the "mother" of photographic composition and more. By dividing the frame into three horizontal and three vertical quadrants, be sure to place the Moon in the center or, if you want to use more, in one of the upper intersections of the thirds (so left or right); this serves to give greater dynamism to the shot and more prominence to the scene. Clearly, if you are presented with a 1200mm lens and a 2x teleconverter, you will not have much to discuss about the composition, because in that case you will also be able to photograph the American flag placed by Buzz Aldrin in 1969 (and maybe even his footprints).
How to photograph the Moon: conclusions
It is always very difficult to write a one-size-fits-all tutorial and “how to photograph the Moon” is no exception: there could always be someone who uses a different, easier or more complicated method. What I think and have learned over the years is that each of us, in the end, finds the best and most suitable method for himself; this happens perhaps by mixing more techniques, following different tutorials and so on. What matters, in the end, is being able to make your shot as you imagined, because after all photography and creativity are nothing without an idea, without programming and without a little ingenuity. Therefore, you can use this tutorial as a starting point that you can then modify during construction to adapt it to your needs and / or experiences. If you are scared of facing a major investment to buy a suitable lens, don't worry, no one said that it is not possible to photograph the Moon with a kit lens, the difference will only be in the final result, which cannot claim to be equal to other photos taken with more specific optics.
Tagsphoto moon photography night photography mobile photography photography tutorial How to photograph the Moon: tips and tricks for the best method